f
The display on the transmitter shows the same channel set on the receiver and the
HI
or
LO
icons indicate a good radio signal.
f
After about 10 seconds, the system automatically returns to LOCK mode. At this
point the system is fully set and ready to operate.
Auto Scan Setting
If you want the system automatically suggest interference-free frequencies, then per-
form the auto scan procedure as already shown in paragraph “8.3. Auto Scan Mode” at
f
Press SETUP knob and rotate it clockwise or counterclockwise until SCAN menu is
reached.
f
Rotate the control knob again and select UP or DOWN to automatically scan up or
down for available frequencies.
f
Once the frequency is reached, press for about 2 seconds IR button to transfer the
Group/Channel information corresponding to the scanned frequency to bodypack
or handheld transmitter.
icon will flash for about 15 seconds, indicating that the
receiver unit is sending the information through the IR sensor.
f
Bring the handheld or pocket transmitter as close as possible to the receiver’s IR
sensor.
f
Once the transmitter is synchronized,
icon stops blinking; MUTE icon turns off,
battery
and transmission power
HI
or
LO
icons light up, indicating that the sys-
tem is now working properly.
f
The display on the transmitter shows the same channel set on the receiver and the
HI
or
LO
icons indicate a good radio signal.
f
After about 10 seconds, the system automatically returns to LOCK mode. At this
point the system is fully set and ready to operate.
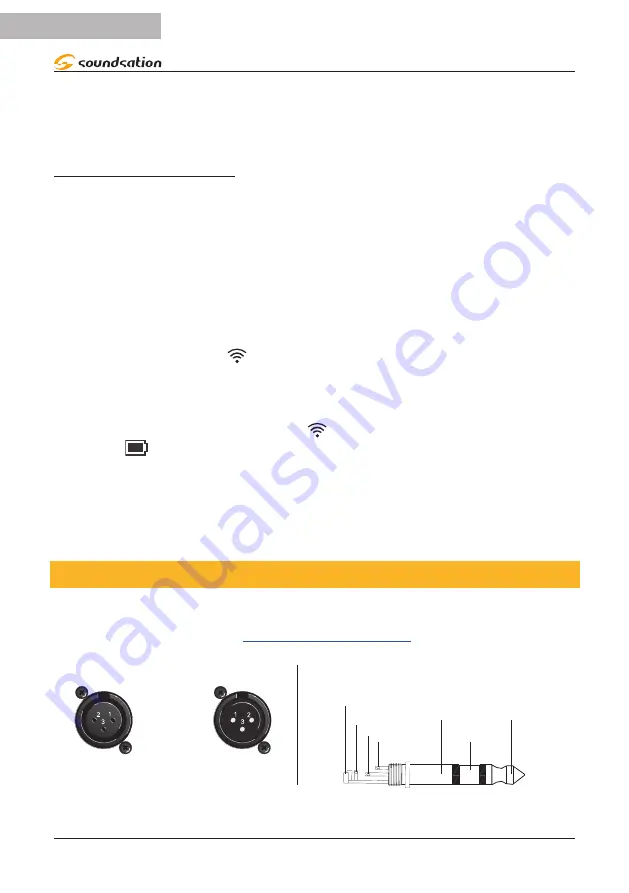
9. AUDIO CABLES
You need XLR balanced cables for connections to your audio equipment. See the
pictures below that show the internal wiring of these cables. Be sure to use only high
quality cables (visit our website
Balanced use of XLR connectors
1= Ground/Shield
2= Hot (+)
3= Cold (-)
INPUT
OUTPUT
In case of unbalanced use Pins 1 and 3 will be jumped
Balanced use of 1/4” jack TRS connector
Strain relief
clamp
Sleeve
Tip
Sleeve
Ground shield
Ring
Ring
Cold (- Ve)
Tip
Hot (+ Ve)
You can, of course, connect even unbalanced equipment to balanced outputs. Use either
18
ENGLISH
WF-D190 MKII User manual


