


Chapt
er
5
S
c
ene
Se
lec
tion
71
5-2 Creating Clip Lists
Load the clip list from the disc into the unit memory
To return to the full-screen display
Press the THUMBNAIL button, turning it on.
3
Use the arrow buttons or the jog dial to select the
desired sub clip.
You can also select sub clips with the following
operations.
Press the PREV or NEXT button:
Moves to the
previous or next sub clip.
Press the PREV or NEXT button with the SHIFT
button held down:
Moves to the first or last sub
clip.
Press the
F
or
f
button with the SHIFT button held
down:
Switches to the previous or next page.
(Does not switch when there is only one page.)
4
With the SHIFT button held down, press the SET
button.
The sub clip operation menu appears.
To return to the thumbnail screen without moving
the sub clip
Do one of the following.
• Press the
F
or
f
button to select EXIT, and then
press the SET button.
• Press the RESET button.
5
Use the
F
or
f
button to select MOVE, and then press
the SET button.
The sub clip movement screen appears. The clip
selected in step
3
appears surrounded by a frame.
To return to the previous screen
Press the RESET button.
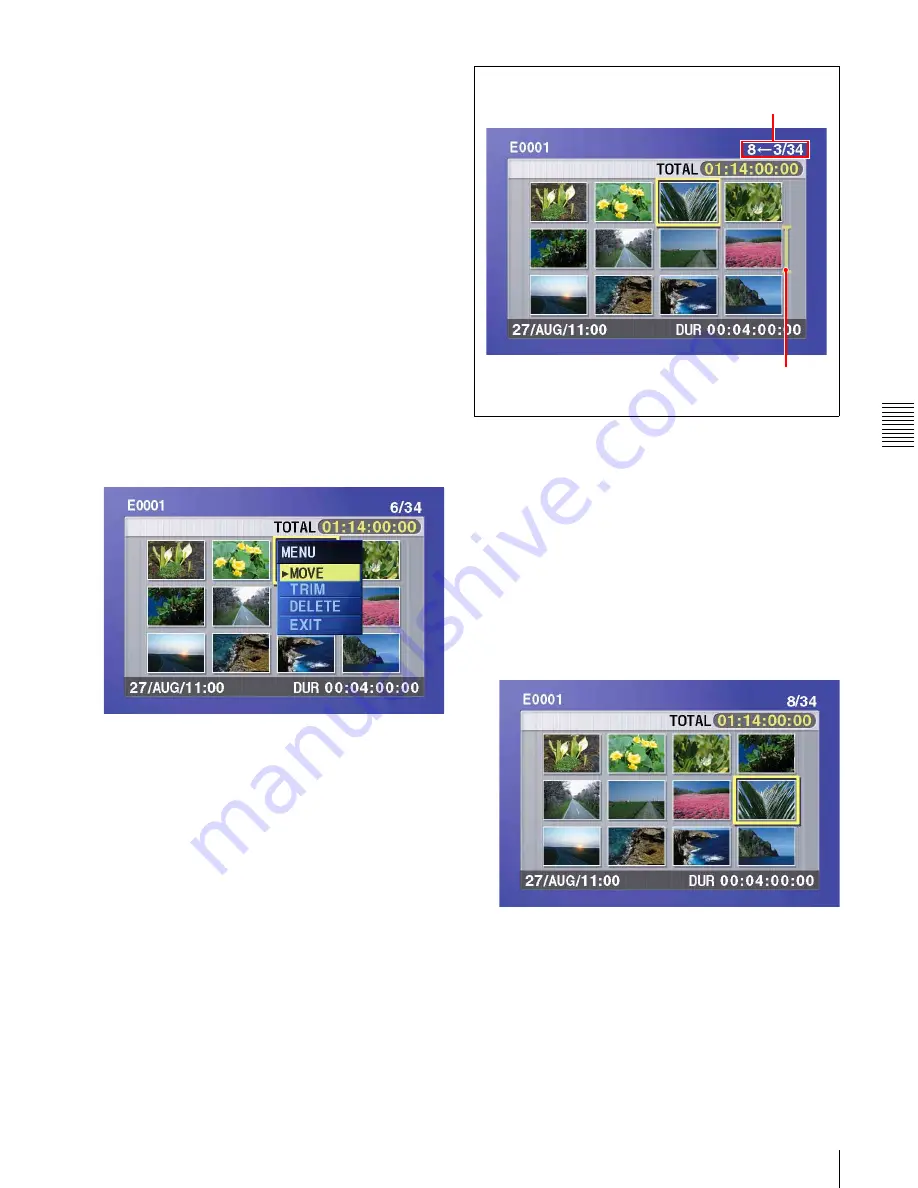
6
Use the arrow buttons or the jog dial to move the
cursor to the position where you want to move the
selected sub clip.
To return to the previous screen
Press the THUMBNAIL button.
7
Press the SET button.
The sub clip thumbnail screen appears, allowing you
to check the results of the sub clip movement.
8
Save the current clip list to disc.
See 5-2-6 “Saving the Current Clip List to Disc” (page
73).
Indicates that the third sub clip will be
moved to the position of the eighth sub clip.
Cursor indicating the move destination
for the selected sub clip
Summary of Contents for XDCAM PDW-1500
Page 10: ...10 ...
Page 18: ...Chapter 1 Overview 18 1 3 MPEG 4 Visual Patent Portfolio License ...
Page 64: ...Chapter 4 Recording Playback 64 4 2 Playback ...
Page 82: ...Chapter 6 Insert Editing 82 6 1 Clip Audio Insert Editing ...
Page 100: ...Chapter 7 File Operations 100 7 4 Recording Continuous Time Code With FAM and FTP Connections ...
Page 132: ...Chapter 8 Menus 132 8 5 System Menu ...
Page 144: ...Chapter 9 Maintenance and Troubleshooting 144 9 3 Alarms ...
Page 152: ...152 Index Index field mark 44 indicator 24 W Write protecting discs 46 ...


