1-37
VPL-PS10/PX10/PX15
24
(GB)
Operations from a Computer
3
Select an image file to display.
Click Browse to open the file select window on a
computer. Double-click the file you want.
The selected file name is displayed in the Browse
text box.
4
Click the SHOW button.
A full-screen image of the selected file is displayed
on the projector.
Note
When projecting a large size image file such as those
in UXGA format, it cannot be opened due to lack of
memory. In this case, reduce the image to obtain a
smaller file size.
To save time taken for transferring data
When clicking the SHOW button, the file is transferred
to the projector. It will take a little time to display an
image on the projector’s screen. To display the image
immediately, transfer all the files you want to use to
the projector before starting your presentation.
1
After step
3
in “Projecting an image stored in a
computer on the projector,” click the SEND
button.
The selected file name appears in the Temporary
File list and the file is transferred to the projector.
Repeat this step until all the files you want are
shown in the Temporary File dialog box.
2
Double-click the file name listed in the Temporary
File dialog box.
A full-screen image of the selected file is displayed
on the projector.
Note
If the memory of the Temporary File list is full, the
data transferred earlier will be erased.
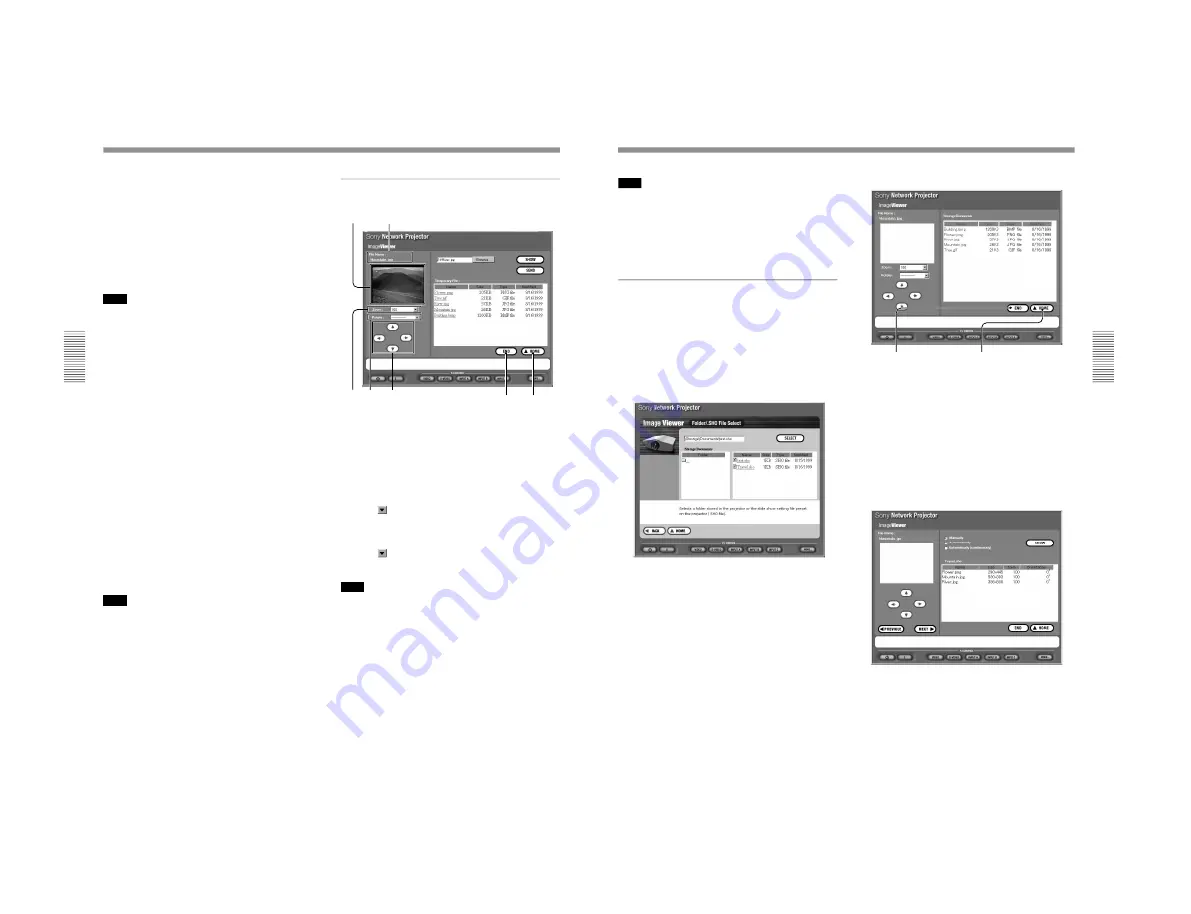
About the window displayed while the
Image Viewer is running
1
6
7
4
2
3
5
1
File name
Shows the file name of the currently displayed image.
2
Slide
Shows the currently displayed image on the projector’s
screen.
3
Zoom text box
Clicking
opens the drop-down list to select the ratio
of enlargement or reduction for the image.
4
Rotate text box
Clicking
opens the drop-down list to select the
angle of rotation for the image.
Note
When projecting a large size image file such as those
in UXGA format, it cannot be rotated due to lack of
momory. In this case, reduce the image to obtain a
smaller file size.
5
Scroll buttons
Clicking the arrows changes the display area of the
image on the screen, if the enlarged image does not fit
the screen.
6
END button
Ends or suspends the full-screen display to return to
the File Select window.
7
HOME button
Returns to the Application Select window.
25
(GB)
Note
When you exit the Image Viewer window by clicking
the END or HOME button, the files listed in the
Temporary File will be automatically erased. To store
the files, add them to the projector using the File
Manager function.
For details, see “Using File Manager” on page 26 (GB).
Running a presentation using an image
file stored in the projector
1
Click the IMAGE VIEWER icon in the
Application Select window.
The Look In window appears.
2
Click PROJECTOR.
The Image Viewer of the projector starts, and the
Folder/.SHO File Select window opens.
3
Click the folder you want or the folder that
contains the slide show setting file (.SHO file) in
the Folder list on the left of the window.
The contents of the selected folder are listed on the
right.
For details on .SHO files, see “Saving the slide show
setting” on page 34 (GB).
4
Select a folder or .SHO file you want to use, then
click the SELECT button.
The Image Viewer window appears.
5
Select an image file you want to project on the
projector.
When you select a folder in step 4
Image files contained in the selected folder are
listed on the right.
Click the file you want.
A full-screen image of the selected file is projected
on the projector.
Resting the mouse pointer over each item on the
left of the window shows its instructions on the
lower part.
When you select an .SHO file in step 4
The selected .SHO file appears on the right.
Select how to advance slides, and click the SHOW
button. The slide show starts.
Resting the mouse pointer over each item on the
window shows its instructions on the lower part.
END button
Ends or suspends the
display to return to the
File Select window.
HOME button
Returns to the Application
Select window.
Summary of Contents for VPLL-CT10
Page 8: ......
Page 32: ...1 24 VPL PS10 PX10 PX15 88 JP ...
Page 52: ...1 44 VPL PS10 PX10 PX15 Sony Corporation Printed in Japan ...
Page 100: ......
Page 104: ......
Page 150: ......
Page 194: ......
Page 196: ...Sony Corporation B P Company 9 870 304 02 English 01GS16 1 Printed in Japan 2001 6 ...


