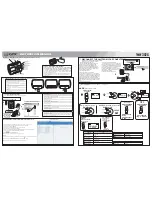
background image

Basic Operations

47

Basic Operations

2

Turn EASY TIMER to set the recording start time.

The time changes in increments of 15 minutes.

Pressing P/– changes the time by one minute.

3

Press EASY TIMER.

“STOP” and the recording stop time appear in the display window.

4

Turn EASY TIMER to set the recording stop time.

5

Press EASY TIMER.

A programme number flashes.

6

Turn EASY TIMER to set the programme position.

To record from a source connected to the LINE-1 IN, LINE-2 IN, or
LINE-3 IN (SAT IN) jacks, press INPUT SELECT to display “LINE
1,” “LINE 2,” or “LINE 3.”

7

Press EASY TIMER to complete the setting.

The TIMER REC indicator on the VCR lights up and the VCR stands
by for recording.

continued

SP

APC

SP

APC

SP

APC

SP

APC

SP

APC

EASY
TIMER

EASY
TIMER

EASY
TIMER

EASY
TIMER

EASY
TIMER

EASY
TIMER

INPUT

SELECT

PROGRAM

Summary of Contents for SLV-ED100ME

Page 1: ...PAL NTSC Video Cassette Recorder 1999 Sony Corporation SLV ED100ME MI ML Operating Instructions G 3 867 110 14 1 ...

Page 2: ...the unit and cassettes away from equipment with strong magnets such as microwave ovens or large loudspeakers Do not place heavy objects on the unit If the unit is brought directly from a cold to a warm location moisture may condense inside the VCR and cause damage to the video head and tape When you first install the unit or when you move it from a cold to a warm location wait for about three hour...

Page 3: ...nal Operations 56 Playing searching at various speeds 59 Setting the recording duration time 60 Synchronised recording 63 Checking changing cancelling timer settings 64 Recording stereo and bilingual programmes 67 Searching using the index function G CODE is a trademark of Gemstar Development Corporation The G CODE system is manufactured under license from Gemstar Development Corporation 68 Enjoyi...

Page 4: ...d Remote commander R6 size AA batteries Aerial cable Getting Started Audio video cable 3 phono to 3 phono Plug adaptor SLV ED100ME ML only Step 1 Unpacking Check that you have received the following items with the VCR ...

Page 5: ...cks into position Using the remote commander You can use this remote commander to operate this VCR and a Sony TV Buttons on the remote commander marked with a dot can be used to operate your Sony TV If the TV does not have the g symbol near the remote sensor this remote commander will not operate the TV Set TV VIDEO to VIDEO and point at the remote sensor on the VCR TV and point at the remote sens...

Page 6: ...tons ten s digit PROG VOL and WIDE with some TV Tip If you set your TV s code number correctly while the TV is turned on the TV turns off automatically Step 2 Setting up the remote commander continued Notes The TV VIDEO button selects the input source of the TV from aerial in or line in The button does not control this VCR With normal use the batteries should last about three to six months If you ...

Page 7: ...te control system from the one programmed to work with the VCR you cannot control your TV with the remote commander You may not be able to use some buttons to control non Sony TVs due to the remote commander s signal limitations If you enter a new code number the code number previously entered will be erased When you replace the batteries of the remote commander the code number automatically reset...

Page 8: ...mains lead to the mains Step 3 AERIAL IN Connecting the VCR Connect the aerial to the VCR and your TV as shown below to watch TV programmes and VCR pictures on your TV In addition if your TV has audio video A V input jacks we recommend you connect the VCR to your TV using an audio video cable to get a better picture and sound AERIAL IN Mains lead to mains AERIAL OUT Aerial cable supplied Signal fl...

Page 9: ... a stereo system You can improve sound quality by connecting a stereo system as shown on the right To a satellite tuner You can record programmes from other equipment such as a satellite tuner To record satellite programmes using the G CODE system connect the audio video cable to the LINE 1 IN jacks not to the LINE 3 IN jacks see To record satellite broadcasts on page 52 LINE 1 OUT LINE IN Audio v...

Page 10: ... Setting the NTSC PB switch to match your TV system You have to set the NTSC PB switch on the rear of the VCR according to your TV system to display the on screen menus when there is no video signal input and play back a tape recorded in the NTSC 3 58 system properly Set NTSC PB following the table below If your TV is compatible with PAL NTSC 4 43 NTSC 3 58 NTSC PB switch Set NTSC PB to ON PAL TV ...

Page 11: ...V and select a programme position for the VCR picture This programme position will now be referred to as the video channel Some TV has the programme position such as 0 that is reserved for a VCR In this case select that programme position for the VCR picture Refer to the instruction manual of your TV for details Step 4 Tuning your TV to the VCR If you have connected the VCR to your TV using the au...

Page 12: ...al for tuning instructions If you select the wrong TV system in step 5 the picture may not appear Select the appropriate TV system and tune the TV again If the picture does not appear clearly see To obtain a clear picture from the VCR below 7 Press RF CH You have now tuned your TV to the VCR Whenever you want to play a tape set the TV to the video channel If your TV colour system and TV system are...

Page 13: ...l a clear picture appears To set another RF channel number on the VCR select a channel number that does not receive a broadcast signal in your area and is clear of interference from other channels If you cannot obtain a clear picture after performing this procedure we recommend you connect the VCR and TV using the audio video cable see To a TV that has audio video input jacks on page 9 If the same...

Page 14: ...en press CURSOR to move the cursor z to LANGUAGE and press OK 4 Press CURSOR to select the desired language then press OK Selecting a language You can change the on screen display language from English to Arabic MENU OK CURSOR Step 5 I u 1 2 3 4 5 6 7 8 9 0 MENU CURSOR OK CURSOR OK END SELECT LANGUAGE OK V v ENGLISH ...

Page 15: ... become black and white etc Presetting all receivable channels using the One Touch Tuning function Step 6 Press ONE TOUCH TUNING on the VCR for more than three seconds The VCR starts channel presetting and NOW TUNING PLEASE WAIT appears in the display window When presetting all of the receivable channels is complete the message disappears To check if the channels are preset correctly Set the TV to...

Page 16: ...o TUNER PRESET and press OK 2 Press CURSOR to move the cursor z to NORMAL CATV then select NORM To preset CATV channels select CATV MENU OK CURSOR Step 6 Presetting channels continued 1 2 3 4 5 6 7 8 9 0 MENU CURSOR OK CURSOR SELECT SET TUNER PRESET B b V v PROG1 NORMAL CATV BG SYSTEM AUTO PRESET CHANNEL SET AFT NORM CATV ON OFF FINE TUNING DK AUTO I 1 M SELECT SET TUNER PRESET B b V v PROG1 NORMA...

Page 17: ...r z to SYSTEM and select BG DK I or M whichever is applicable in your area then preset the channels again The channel numbers besides CHANNEL SET may not be the same as those in your area This is because this VCR s channel search system is based on the fixed TV system that has the widest channel coverage If necessary apply your local channel numbers to the programme positions see Presetting channe...

Page 18: ...TUNER PRESET and press OK 2 Press CURSOR to move the cursor z to NORMAL CATV then select NORM To preset CATV channels select CATV MENU CURSOR OK CURSOR SELECT SET TUNER PRESET B b V v PROG1 NORMAL CATV BG SYSTEM AUTO PRESET CHANNEL SET AFT NORM CATV ON OFF FINE TUNING DK AUTO I 2 M 1 SELECT SET TUNER PRESET B b V v PROG1 NORMAL CATV BG SYSTEM AUTO PRESET CHANNEL SET AFT NORM CATV ON OFF FINE TUNIN...

Page 19: ... FINE TUNING DK AUTO I 7 M 2 SELECT SET TUNER PRESET B b V v PROG4 NORMAL CATV BG SYSTEM AUTO PRESET CHANNEL SET AFT NORM CATV ON OFF FINE TUNING DK AUTO I 2 M 1 SELECT SET TUNER PRESET B b V v PROG4 NORMAL CATV BG SYSTEM AUTO PRESET CHANNEL SET AFT NORM CATV ON OFF FINE TUNING DK AUTO I 2 M 1 Notes The menu disappears automatically if you don t proceed for more than a few minutes The channel numb...

Page 20: ...r areas where various TV systems coexist If the sound is distorted or noisy or the colour TV programme becomes black and white etc that channel may not be matched to the proper TV system In this case try the following steps 1 Press PROG or programme number buttons to select the programme position that has the channel with above described conditions 2 Press MENU then select TUNER PRESET and press O...

Page 21: ...ber buttons to select the programme number for which you cannot obtain a clear picture 2 Press MENU then select TUNER PRESET and press OK 3 Select FINE TUNING The fine tuning meter appears 4 Press CURSOR to get a clearer picture then press OK Note that the AFT Auto Fine Tuning setting switches to OFF continued Selected programme position SET TUNER PRESET B b PROG14 NORMAL CATV SYSTEM AUTO PRESET C...

Page 22: ...0 11 12 13 14 15 16 17 18 19 20 21 22 23 24 25 26 27 28 29 30 Corresponding channels B G AS0 1 2 6 7 8 9 9A 10 11 3 4 28 29 30 1 2 3 4 5 6 7 8 9 10 11 M6 M7 M8 M9 M10 Indonesia Western Europe Australia New Zealand Morocco 1A 2A 3A 4A 5A 6A 7A 8A 9A 10A 11A E2 E3 E4 E5 E6 E7 E8 E9 E10 E11 E12 E21 E22 E23 E24 E25 E26 E27 E28 E29 E30 Step 6 Presetting channels continued ...

Page 23: ... 55 56 57 58 59 60 61 62 63 B G Indonesia Western Europe Australia New Zealand Morocco E31 E32 E33 E34 E35 E36 E37 E38 E39 E40 E41 E42 E43 E44 E45 E46 E47 E48 E49 E50 E51 E52 E53 E54 E55 E56 E57 E58 E59 E60 E61 E62 E63 31 32 33 34 35 36 37 38 39 40 41 42 43 44 45 46 47 48 49 50 51 52 53 54 55 56 57 58 59 60 61 62 63 64 65 66 67 68 continued Corresponding channels ...

Page 24: ...7 C8 C9 C10 C11 C12 C13 C14 C15 C16 C17 C18 C19 C20 C21 C22 C23 C24 C25 Corresponding channels B G Indonesia Western Europe Australia New Zealand Morocco E64 E65 E66 E67 E68 E69 S1 S2 S3 S4 S5 S6 S7 S8 S9 S10 S11 S12 S13 S14 S15 S16 S17 S18 S19 S20 S21 S22 S23 S24 S25 69 5 5A M4 M5 Step 6 Presetting channels continued ...

Page 25: ...CHANNEL SET field C26 C27 C28 C29 C30 C31 C32 C33 C34 C35 C36 C37 C38 C39 C40 C41 C42 C43 C44 C45 C46 Corresponding channels B G Indonesia Western Europe Australia New Zealand Morocco S26 S27 S28 S29 S30 S31 S32 S33 S34 S35 S36 S37 S38 S39 S40 S41 S01 S02 S03 S04 S05 continued ...

Page 26: ...R27 R28 R29 R30 R31 1 2 3 7 8 4 5 9 10 11 12 13 14 15 16 17 18 19 20 21 22 23 China South Africa I M B21 B22 B23 B24 B25 B26 B27 B28 B29 B30 B31 A B C D E J F G H I 4 5 10 6 7 8 9 21 22 23 24 25 26 27 28 29 30 31 2 C2 3 7 8 9 12 13 J K 5 10 11 14 W 29 W 30 15 16 W 31 17 W 32 18 W 33 W 34 19 20 W 35 21 W 36 22 W 37 W 38 23 24 W 39 25 W 40 26 W 41 W 42 27 28 W 43 J 5 J 6 J 7 J 10 J 11 J 12 S1 J 8 J ...

Page 27: ...1 32 33 34 35 36 37 38 39 40 41 42 43 44 45 46 47 48 49 B32 B33 B34 B35 B36 B37 B38 B39 B40 B41 B42 B43 B44 B45 B46 B47 B48 B49 B50 B51 B52 B53 B54 B55 B56 B57 B58 B59 B60 B61 B62 32 33 34 35 36 37 38 39 40 41 42 43 44 45 46 47 48 49 50 51 52 53 54 55 56 57 58 59 60 61 62 29 W 44 30 W 45 W 46 31 32 W 47 33 W 48 34 W 49 W 50 35 36 W 51 37 W 52 38 W 53 W 54 39 40 W 55 41 W 56 42 W 57 W 58 43 44 45 4...

Page 28: ...g channels D K Japan East Europe UK Hong Kong Ireland U S A China South Africa I M 50 51 52 53 54 55 56 57 6 B63 B64 B65 B66 B67 B68 B69 63 64 65 66 67 68 69 11 12 13 70 71 72 73 74 75 76 77 78 79 A 3 A 2 A 1 A B C D E F G H I L M N O P Q R S T U V W W 1 W 2 W 3 W 4 J 3 M1 M2 M3 M4 M5 M6 M7 M8 M9 M10 J 4 S2 S3 S4 S5 S6 S7 S8 S9 S10 S11 S12 S13 S14 S15 S16 S17 Step 6 Presetting channels continued ...

Page 29: ...Africa I M W 5 W 6 W 7 W 8 W 9 W 10 W 11 W 12 W 13 W 14 W 15 W 16 W 17 W 18 W 19 W 20 W 21 W 22 W 23 W 24 W 25 W 26 W 27 W 28 4 4A 6 A 5 A 4 S18 S19 S20 S21 S22 S23 S24 S25 S26 S27 S28 S29 S30 S31 S32 S33 S34 S35 S36 S37 S38 S39 S40 S41 J 1 J 2 Tip The shadow in the table shows the adjustable RF output channel range see page 11 for reference Note There may be a case that the same area channel may ...

Page 30: ...start Turn on the VCR and the TV Set the TV to the video channel 1 Press MENU then press CURSOR to move the cursor z to SET UP CH AND G CODE and press OK The preset channels are displayed on the screen 2 Press CURSOR to move the cursor z to the row on which you want to set the guide channel To display other pages for programme positions 6 to 50 press CURSOR repeatedly MENU OK CURSOR Step 7 MENU CU...

Page 31: ...you want to change the programme positions of the stations proceed to step 2 of Step 8 Changing disabling programme positions on page 34 7 Press OK continued CURSOR CURSOR CURSOR SET UP CH AND G CODE 1 2 3 4 PROG CH GUIDE CH 5 3 9 1 2 5 2 7 6 SELECT GUIDE CH V v CONFIRM B b 6 SET UP CH AND G CODE 1 2 3 4 PROG CH GUIDE CH 5 3 9 1 2 5 2 7 6 6 ERASE PROG SELECT MOVE PROG b V v CLEAR OK SET UP CH AND ...

Page 32: ...G to select a programme position you want to use for watching a satellite channel 4 Select CHANNEL SET then press CURSOR to tune the VCR to the satellite tuner The channel number displayed beside CHANNEL SET is used for receiving all satellite broadcasts from the satellite tuner 5 Press PROG to select another programme position for another satellite channel and press the programme number buttons t...

Page 33: ... you don t proceed for more than a few minutes If you inadvertently entered a guide channel number press CURSOR repeatedly to reset the GUIDE CH column to appears between 1 and 255 The VCR does not allow entering the guide channel number if the same number has been set If you use a satellite tuner connected via the LINE 1 IN jacks you don t have to set up the G CODE system Just record a satellite ...

Page 34: ...video channel 1 Press MENU then press CURSOR to move the cursor z to SET UP CH AND G CODE and press OK 2 Press CURSOR to move the cursor z to the row on which you want to change the programme position then press CURSOR To display other pages for programme positions 6 to 50 press CURSOR repeatedly MENU OK CURSOR Step 8 MENU CURSOR OK CURSOR SET UP CH AND G CODE 1 2 3 4 PROG CH GUIDE CH 1 6 5 3 9 1 ...

Page 35: ...channel are inserted at the new programme position and the intermediate channels are displaced to fill the gap 4 Press CURSOR to confirm the setting 5 To change the programme position of another station repeat steps 2 to 4 6 Press OK CURSOR CURSOR OK SET UP CH AND G CODE 1 2 3 4 PROG CH GUIDE CH 1 2 5 7 3 1 5 9 2 6 6 6 2 CONFIRM b B SELECT SET GUIDE CH V v 2 1 continued ...

Page 36: ...programme position you want to disable correctly If you disable a programme position by mistake you need to reset that channel manually Before you start Turn on the VCR and the TV Set the TV to the video channel MENU OK CURSOR CLEAR MENU CURSOR OK CURSOR OK CLEAR SET UP CH AND G CODE 1 2 3 4 PROG CH GUIDE CH 1 6 5 3 9 1 2 5 2 7 6 2 1 2 6 ERASE PROG SELECT MOVE PROG b V v CLEAR SET UP CH AND G CODE...

Page 37: ...u start Turn on the VCR and the TV Set the TV to the video channel 1 Press MENU then press CURSOR to move the cursor z to CLOCK SET and press OK 2 Press CURSOR to set the date MENU OK CURSOR Step 9 1 2 3 4 5 6 7 8 9 0 CURSOR MENU CURSOR OK END 1 0 FRI 1 SELECT SET CLOCK SET 999 00 1 B b OK V v END 8 0 THU 1 SELECT SET CLOCK SET 999 00 1 B b OK V v 2 continued ...

Page 38: ...t automatically 5 Press OK to start the clock Tip To change the digits during the setting press CURSOR to return to the item to be changed and select the digits by pressing CURSOR Note The menu disappears automatically if you don t proceed for more than a few minutes CURSOR CURSOR OK END 8 0 TUE 1 SELECT SET CLOCK SET 999 00 9 B b OK V v 2 END 8 8 TUE 1 SELECT SET CLOCK SET 999 00 2 9 1 B b OK V v...

Page 39: ...nsert a tape The VCR turns on and starts playing automatically if you insert a tape with its safety tab removed 3 Press PLAY When the tape reaches the end it will rewind automatically 6 EJECT CLEAR P PAUSE PLAY p STOP DISPLAY TRINITRON TV SYNCHRO PLAY COLOR SYSTEM FF 0 REW NTSC PB switch 1 2 3 4 5 6 7 8 9 0 PLAY continued ...

Page 40: ... playback press COLOR SYSTEM on the VCR to conform to the system that the tape was recorded in Normally the colour system is correctly set whenever the tape is inserted If your tape was recorded in PAL MESECAM NTSC Press COLOR SYSTEM until the indicator below appears in the display window PAL PAL NTSC Set NTSC PB to ON PAL TV NTSC 4 43 NTSC 3 58 If your TV is PAL NTSC 4 43 NTSC 3 58 To play an NTS...

Page 41: ...details The counter resets to 0 00 00 whenever a tape is reinserted The counter stops counting when it comes to a portion with no recording If a tape has portions recorded in both PAL and NTSC systems the time counter reading will not be correct This is due to the difference between the counting cycles of the two colour systems Depending on your TV the following may occur while playing an NTSC rec...

Page 42: ...ration Make sure that the TV s power is in standby mode Press TRINITRON TV SYNCHRO PLAY and hold the remote commander in place for about two seconds The VCR and TV turn on and the TV is set to the video channel If there is a tape in the VCR playback starts automatically Notes If the Trinitron TV Synchro Play function does not work properly Wait a few moments and press the button again Replace both...

Page 43: ...t it to the video channel 2 Insert a tape with its safety tab in place 3 Press PROG to select the programme position you want to record Recording TV programmes PROG SP LP SP EP r REC DISPLAY INPUT SELECT p STOP REC indicator 1 2 3 4 5 6 7 8 9 0 continued PROG SP ...

Page 44: ...ng as SP Standard Play EP Extra Play provides recording time three times as long as SP However SP produces better picture and audio quality 5 Press r REC to start recording The REC indicator on the VCR lights up To stop recording Press p STOP To check the remaining tape length Press DISPLAY The white bar indicates the approximate length of tape remaining Remaining tape length Time counter SP LP SP...

Page 45: ...SC systems the time counter reading will not be correct This discrepancy is due to the difference between the counting cycles of the two colour systems The remaining tape indicator bar may differ in length between the PAL and NTSC systems When you insert a non standard commercially available tape the remaining time may not be correct It may take up to one minute for the VCR to calculate and displa...

Page 46: ...ithin the next 24 hours using the EASY TIMER knob Before you start Check that the VCR clock is set to the correct time Insert a tape with its safety tab in place Make sure the tape is longer than the total recording time EASY TIMER knob PROGRAM TIMER REC indicator SP APC 1 Press EASY TIMER START and the recording start time appear in the display window I u INPUT SELECT Programme number buttons PRO...

Page 47: ... stop time 5 Press EASY TIMER A programme number flashes 6 Turn EASY TIMER to set the programme position To record from a source connected to the LINE 1 IN LINE 2 IN or LINE 3 IN SAT IN jacks press INPUT SELECT to display LINE 1 LINE 2 or LINE 3 7 Press EASY TIMER to complete the setting The TIMER REC indicator on the VCR lights up and the VCR stands by for recording continued SP APC SP APC SP APC...

Page 48: ...EASY TIMER repeatedly until the TIMER REC indicator on the VCR lights up You can also change the timer setting using the TIMER SET CHECK menu For details see page 63 If CLOCK appears when you press EASY TIMER Set the clock by referring to Step 9 Setting the clock page 37 Alternatively you can set the clock by following the steps below As this method automatically sets the date to factory setting 1...

Page 49: ...entering the time with the programme number buttons complete the operation entering the four digits then re enter the time Then press EASY TIMER to confirm the setting To cancel the Easy Timer setting press CLEAR on the remote commander or press PROGRAM and on the VCR at the same time during any of the Easy Timer settings Notes You cannot set the recording programme using the Easy Timer function i...

Page 50: ...ly You can preset up to eight programmes at a time Before you start Check that the VCR clock is set to the correct time Insert a tape with its safety tab in place Make sure the tape is longer than the total recording time Turn on your TV and set it to the video channel I u G CODE CLEAR Programme number buttons OK SP LP SP EP CURSOR TIMER REC indicator G CODE G CODE SET 0 9 G CODE NO SP LP SP LP SP...

Page 51: ...enter another setting repeat steps 1 to 4 6 Press I u to turn off the VCR The TIMER REC indicator lights up on the VCR and the VCR stands by for recording To stop recording To stop the VCR while recording press p STOP To record Only once Everyday Monday to Friday Once a week Select ONCE DAILY WEEKLY 1 2 3 4 5 6 7 8 9 0 SP LP SP EP G CODE G CODE NO 9 77 6 82 4 SP LP SP 1 SELECT CANCEL CONFIRM ONCE ...

Page 52: ...dure press G CODE before pressing OK To record NTSC signals set the tape speed to SP or EP To set the EP mode display LP in the tape speed position Notes The G CODE system used in this VCR is for Singapore Malaysia Hong Kong Macao etc and cannot be used in areas such as U S A Canada Japan Korea Taiwan and U K If the VCR beeps repeatedly this means that The G CODE number is incorrect ONCE DAILY or ...

Page 53: ...eck that the VCR clock is set to the correct time Insert a tape with its safety tab in place Make sure the tape is longer than the total recording time Turn on your TV and set it to the video channel 1 Press MENU and select TIMER SET CHECK then press OK MENU OK CURSOR I u INPUT SELECT TIMER REC indicator MENU CURSOR OK TIMER SET CHECK TUE 28 DATE START STOP PROG 9 p STOP 1 2 3 4 5 6 7 8 9 0 contin...

Page 54: ...record from a source connected to the LINE 1 IN LINE 2 IN or LINE 3 IN SAT IN jacks press INPUT SELECT to display L1 L2 or L3 in the PROG position 3 Press CURSOR to confirm the setting The cursor z appears at the beginning of the line To enter another setting move the cursor to the next line and repeat step 2 4 Press OK 5 Press I u to turn off the VCR The TIMER REC indicator lights up on the VCR a...

Page 55: ...PROG or programme number buttons To set the tape speed you can also use the SP LP SP EP button To record NTSC signals set the tape speed to SP or EP To set the EP mode display LP in the tape speed position Note The TIMER REC indicator in the VCR flashes when you press I u with no tape inserted ...

Page 56: ...ast forward or rewind Rewind to the beginning of a tape and start play Operation During fast forward hold down FF During rewind hold down 0 REW During stop press PLAY on the VCR while holding down 0 REW on the VCR To resume normal playback Press PLAY PLAY Click shuttle ring JOG 0 REW FF PLAY Click shuttle ring JOG 1 2 3 4 5 6 7 8 9 0 ...

Page 57: ... click shuttle ring position changes the playback mode and the corresponding mark appears on the TV screen for a few seconds in the following way if the on screen display function is on To use the click shuttle ring in jog mode Use this mode for frame by frame playback Press JOG to enter the jog mode The JOG button lights up If you change to jog mode during any playback mode the playback pauses so...

Page 58: ... the centre position press both buttons at the same time Notes The playback sound is muted during these operations In LP or EP mode noise may appear or there may be no colour If the playback mode mark doesn t appear on the TV screen press DISPLAY The playback mode mark may shake while playing or searching at various speeds The picture may have snow when playing at high speed in reverse Playing sea...

Page 59: ...s of 30 minutes The tape counter decreases minute by minute to 0 00 then the VCR stops recording and turns off automatically To extend the duration Press r REC repeatedly to set to the new duration To cancel the duration Press r REC repeatedly until the TIMER REC indicator lights off and the VCR returns to normal recording mode To stop recording To stop the VCR while recording press p STOP Note Yo...

Page 60: ...s timer The connected equipment must have a timer function for this feature to work When the connected equipment turns on the VCR also automatically turns on and starts recording a programme from the LINE 1 IN jacks How to connect for Synchronised recording Connect the other equipment to the LINE 1 IN jacks of this VCR LINE 1 IN VMC 810HG audio video cable not supplied LINE OUT Signal flow This VC...

Page 61: ...ct the tape speed SP or LP for the PAL colour system and SP or EP for the NTSC colour system 4 Hold down SYNCHRO REC for more than two seconds The SYNCHRO REC button lights up and the VCR stands by for recording The VCR automatically turns on and starts recording when it receives video signals from the connected equipment To cancel the Synchronised recording function Press SYNCHRO REC The SYNCHRO ...

Page 62: ...ting signals even though the power is off In this case the Synchronised recording feature does not work because the VCR will not be able to know when to start recording To record the programme set the timer on the VCR If you use a satellite tuner or a cable TV decoder make sure to turn it on For details see Setting the timer manually If the settings for timer recording and Synchronised recording o...

Page 63: ...RSOR repeatedly until the cursor z appears at the beginning of the line To cancel the setting press CLEAR 4 Press OK If any timer settings remain turn off the VCR to return to recording standby When the timer settings overlap The programme that starts first has priority and the second programme starts recording only after the first programme has finished If the programmes start at the same time th...

Page 64: ...s stereo and bilingual programmes based on the NICAM system the NICAM indicator appears When a stereo or bilingual programme is received the STEREO indicator appears in the display window To record a NICAM programme HIFI AUDIO in the SET UP MENU should be set to NICAM initial setting To check the menu setting see page 71 for details To select the sound while recording Press AUDIO MONITOR to select...

Page 65: ...play window To listen to Main Sub Main and sub Standard sound On screen display MAIN SUB MAIN SUB No indicator To listen to Stereo Left channel Right channel Standard sound Usually the mixed sound of the left and right channels To listen to Main Sub Main and sub Standard sound Usually the main sound monaural Stereo programme Bilingual programme On screen display L ch R ch STEREO No indicator On sc...

Page 66: ...eck that AUDIO MIX in the SET UP MENU is set to OFF see page 71 If HIFI AUDIO is set to STD the standard sound will be recorded on both the hi fi and normal audio tracks Pressing the AUDIO MONITOR button will not change the sound Hi fi audio track main track Stereo sound left right channels Usually mixed left right channels Normal audio track monaural Stereo Bilingual Usually main sound Main left ...

Page 67: ...edly to specify how many indexsignalsaheadorbehindyouwanttosear ch To sear ch ahead pr ess INDEX SEARCH To sear ch backwar ds press INDEX SEARCH The VCR starts sear ching and the index numberontheTVscr eencountsdownto zero Playbackstar tsautomaticallyfr omthat pointaboutfivesecondsaheadofthe specifiedindexmark To stop sear ching Press p STOP Note No index signal will be added when recording starts...

Page 68: ... 1 Press SOUND DIMENSION r epeatedly to select the ef fect you want 2 Press CURSOR to adjust the level of the ef fect selected To cancel the Sound Dimension function Press SOUND DIMENSION r epeatedly until the SOUND DIMENSION knoblightsof f Tip YoucanalsosettheSoundDimensionef fectusingtheMENUoption Notes This function is available only when the sound is r eproduced on a ster eo TV or otherster eo...

Page 69: ...the tracking meter The distor tion shoulddisappearasyoupr essoneofthetwo buttons the indicator lights up T o resume automatictrackingadjustment ejectthetapeand reinser tit Tracking meter About the R2 Reality Regenerator function TheR2 functionautomatically adjuststhepictur etothemost suitablequalityduringplayback Whenplaybackstarts theR 2 functionactivatesandtheR 2 button lightsup Eachpressingofth...

Page 70: ...ivate the APC Set APC to OFF in the SET UP MENU The APC indicator in the display windowgoesof f Tip To set the tracking to the centr e position pr ess the TRACKING and buttons at thesametime Note Thereisadelayofafewsecondsbefor etheVCRactuallystar tsrecordingwhilethe VCR analyses the tape T o avoid the delay first set the VCR to r ecording pause the APC indicator flashes slowly and pr ess rREC to ...

Page 71: ...on will not function OFF tolistentothehi fiandnor malaudiotracksseparately Select the sound using the AUDIO MONITOR button Fordetails seepage77 STD to record standar d sound on the hi fi audio track NICAM to record NICAM br oadcasts on the hi fi audio track Fordetails seepage64 ON to switch on the APC Adaptive Pictur e Control function andimprovepictur equality OFF to switch of f APC Fordetails se...

Page 72: ...window 1 Hold down LCD CONTR on the VCR for more than thr ee seconds Thecontrastlevelappearsinthedisplaywindow 2 Turn LCD CONTR to adjust the contrast 3 Press LCD CONTR Tip If you do not turn the LCD CONTR knob within 10 seconds the LCD contrast mode willbedeactivated LCD CONTR knob SP APC ...

Page 73: ...front of the VCR T o adjust the microphone volume tur n the MIC VOLUME control How to use headphones Youcanlistentothesoundfr oma videotapeoraTVbr oadcast usingheadphones notsupplied Touseheadphones connectthe headphones to the HEAD PHONE jack on the fr ont of the VCR T o adjust the headphone volume turn the HEAD PHONE VOLUME control Note Donotuseheadphonesathighvolume Ifyouexperiencearinginginyou...

Page 74: ...an also use the LINE 1 IN or LINE 3 IN SAT IN jacks instead If the other VCR is a monaural type the sound is recorded only on the channel whose jack is connected to the audio plug To record on both right and left channels connect the audio plugs to the AUDIO R L jacks using the VMC 910HG audio video cable not supplied Notes Make sure you connect the plugs to jacks of the same colour If you connect...

Page 75: ...d press P PAUSE 3 Press r REC on this VCR and set it to recording pause 4 To start editing press the P PAUSE buttons on both VCRs at the same time To stop editing Press the p STOP buttons on both VCRs Tip To cut out unwanted scenes while editing press P PAUSE on this VCR when an unwanted scene begins When it ends press P PAUSE again to resume recording Note If you start editing following the proce...

Page 76: ...for the point to start playback and set it to playback pause 2 Insert a prerecorded tape with its safety tab in place into this recording VCR Search for the end of the section to be replaced and press P PAUSE 3 Press CLEAR to reset the counter to 0 00 00 4 Rewind the prerecorded tape to the beginning of the section to be replaced The VCR enters pause mode 5 Press AUDIO DUB The AUDIO DUB indicator ...

Page 77: ...IX to OFF after playing the tape To listen to the dubbed sound normal audio Press AUDIO MONITOR until the L R and STEREO indicators go off in the display window To add narration on a recorded tape using a microphone Connect a microphone not supplied to the MIC jack on the front of the VCR To adjust the microphone volume turn the MIC VOLUME control Sound from a microphone is recorded over the norma...

Page 78: ...t to video input If you made connections using the aerial cable only make sure the RF channel number is set correctly for your area Set PAL MESECAM in the SET UP MENU according to your local colour system Adjust the tracking with the TRACKING buttons Make sure the colour system is correctly set to the system that the tape was recorded in If you made connections using the aerial cable only make sur...

Page 79: ... monitor set it to video input Select the correct source with the INPUT SELECT or PROG buttons Select a programme position when recording TV programmes select LINE 1 LINE 2 or LINE 3 when recording from other equipment Adjust the TV aerial Make sure SYSTEM BG DK I or M in the TUNER PRESET menu is set to the system of your area Set PAL MESECAM in the SET UP MENU according to your local colour syste...

Page 80: ...continued Symptoms caused by contaminated video heads Normal picture Rough picture No picture blue screen and message appear Unclear picture terminal initial contamination Sapphire tape cleaner The VCR incorporates a sapphire tape cleaner which cleans a video tape when it is loaded This cleaner can prevent the video heads from contamination by removing dust or mold from the tape with the sapphire ...

Page 81: ...tive AUDIO OUT phono jack 2 Standard output 327 mVrms Load impedance 47 kilohms Output impedance less than 10 kilohms LINE 2 OUT AUDIO AUDIO OUT phono jack 2 Standard output 327 mVrms Load impedance 47 kilohms Output impedance less than 10 kilohms PHONES Stereo phono jack 1 Standard output 6 mW Load impedance 32 ohms General Power requirements 110 240 V AC 50 60 Hz Power consumption 22W Operating ...

Page 82: ...sor 5 2 I u ON STANDBY switch indicator 11 3 R2 Reality Regenerator button 69 4 Tape compartment 5 EJECT button 40 6 0 REW rewind button 40 56 7 FF fast forward button 40 56 8 PLAY button 39 9 p STOP button 40 75 º JOG button 56 r REC record button 43 59 75 Click shuttle ring 56 P PAUSE button 40 75 LINE 2 IN VIDEO AUDIO L R jacks 74 ...

Page 83: ... 40 4 AUDIO DUB dubbing button 76 5 REC record indicator 43 6 TIMER REC recording indicator 50 53 59 7 AUDIO DUB dubbing indicator 76 8 SOUND DIMENSION LCD CONTR contrast knob 68 72 9 EASY TIMER knob 46 0 PROGRAM TRACKING buttons 12 58 69 ONE TOUCH TUNING RF CH Radio frequency channel button 11 15 MIC microphone HEAD PHONE jacks 73 continued ...

Page 84: ...indicators 44 4 APC Adaptive Picture Control indicator 70 5 Audio channel sound level indicator 66 6 Time counter clock programme position line RF channel timer setting TV system contrast indicator 11 12 41 44 46 72 7 Tracking indicator 69 8 Colour system indicators 40 9 Tape indicator L SP NICAM STEREO APC PAL NTSC LEP R 6 3 dB 0 3 10 ...

Page 85: ...LINE 1 IN AUDIO R L VIDEO jacks 60 3 LINE 3 IN SAT IN AUDIO R L VIDEO jacks 9 4 LINE 2 OUT AUDIO R L jacks 9 Rear panel 5 AERIAL IN connector 8 6 AERIAL OUT connector 8 7 NTSC PB playback switch 40 8 LINE 1 OUT AUDIO R L VIDEO jacks 9 continued ...

Page 86: ...R button 36 51 63 5 R2 Reality Regenerator button 69 6 SOUND DIMENSION button 68 7 AUDIO MONITOR button 64 8 WIDE button for TV 7 9 TRINITRON TV SYNCHRO PLAY button 42 º AUDIO DUB dubbing button 76 SP Standard Play LP Long Play SP EP Extra Play button 44 INPUT SELECT button 54 r REC record button 43 75 0 REW rewind button 40 56 FF fast forward button 40 56 INDEX SEARCH buttons 67 1 2 3 4 5 6 7 8 9...

Page 87: ...50 ª G CODE button 50 º Programme number ten s digit buttons 6 45 47 51 DISPLAY button 44 EASY TIMER button 46 PROG programme buttons 43 VOL volume buttons for TV 6 P PAUSE button 40 JOG button 56 PLAY button 39 p STOP button 40 44 ª Click shuttle ring 56 1 2 3 4 5 6 7 8 9 0 ...

Page 88: ...g during playback 65 during recording 64 N NICAM broadcasts 64 Normal audio track 66 NTSC recorded tapes 40 O One Touch Tuning function 15 Optional setting 71 P Q Picture adjustment See Adjusting Playback 39 at various speeds 56 frame by frame 57 selecting the sound 65 slow motion 57 Presetting channels 15 Index R R2 Reality Regenerator 69 Recording 43 bilingual programmes 64 duration time 59 savi...

Reviews: