background image

1-22

88

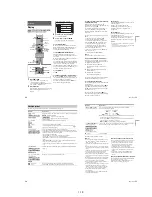
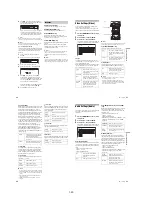
Auto Display

Command Mode

Changes the Command Mode of the recorder if 
other DVD equipment is assigned the same 
Command Mode. Be sure to match the Command 
Mode switch on the remote to the setting made 
here. For details, see “If you have a Sony DVD 
player or more than one Sony DVD recorder” on 
page 21.

Factory Setup

Allows you to select the setup settings by group, 
and return them to their default settings. Note that 
all of your previous settings will be lost.

1

Select “Factory Setup” in “Options,” and 
press 

,

 or ENTER.

The display for selecting a group of settings 
appears.

2

Select the group of settings you want to return 
to default from “Settings,” “Video,” “Audio,” 
“Features,” “Options,” “Parental Control,” 
and “All,” and press 

,

 or ENTER.

3

Select “Start,” and press ENTER.
The selected settings return to their default 
settings.

4

Press ENTER when “Finish” appears.

Easy Setup 
(Resetting the Recorder)

Select this to run the “Easy Setup” programme.

1

Press SYSTEM MENU while the recorder is 
in stop mode.

2

Select “SETUP,” and press ENTER.

3

Select “Easy Setup,” and press ENTER.

4

Press ENTER.

5

Select “Start.”

6

Follow the instructions for “Easy Setup” 
(page 22) from step 2.

On

Automatically displays 
information on the screen when 
the recorder is turned on, etc.

Off

Displays information only when 
DISPLAY is pressed.

DVD1

Select this if the default Command 
Mode conflicts with other DVD 
equipment.

DVD2

Select this if the default Command 
Mode conflicts with other DVD 
equipment.

DVD3

The default Command Mode of 
the recorder.

SETUP

    Easy Setup

Easy Setup

Settings

Options

Features

Audio

Video

89

A

d

d

iti

o

n

a

l In
fo

rm

a

tio

n

Additional Information

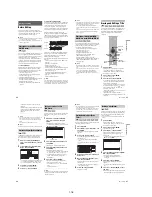
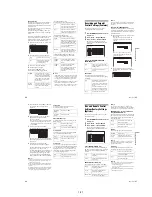
Troubleshooting

If you experience any of the following difficulties 
while using the recorder, use this troubleshooting 
guide to help remedy the problem before 
requesting repairs. Should any problem persist, 
consult your nearest Sony dealer.

The power does not turn on.

,

Check that the mains lead is connected securely.

There is no picture.

,

Re-connect all connecting cords securely.

,

The connecting cords are damaged.

,

Check the connection to your TV (page 13).

,

Switch the input selector on your TV (such as to 
“VCR”) so that the signal from the recorder 
appears on the TV screen.

,

Check that “Scart Setting” in “Video” setup is set 
to the appropriate item that conforms to your 
system (page 82).

,

If you connect the recorder to your TV via only 
the COMPONENT VIDEO OUT jacks, set 
“Component Out” in “Video” setup to “On” 
(page 81).

,

This recorder cannot record NTSC signals.

Picture noise appears.

,

If the picture output signal from your recorder 
passes through your VCR to get to your TV, or if 
you are connected to a combination TV/VIDEO 
player, the copy-protection signal applied to 
some DVD programmes could affect picture 
quality. If you still experience this problem even 
when you connect your recorder directly to your 
TV, try connecting your recorder to your TV’s S 
VIDEO input.

,

You have set the recorder to progressive format 
(the PROGRESSIVE indicator lights up) even 
though your TV cannot accept the progressive 
signal. In this case, press PROGRESSIVE until 
the progressive indicator turns off.

,

Even if your TV is compatible with progressive 
format (525p/625p) signals, the image may be 
affected when you set the recorder to progressive 
format. In this case, press PROGRESSIVE so 
that the PROGRESSIVE indicator turns off and 
the recorder is set to normal (interlace) format.

,

You are playing a DVD recorded in a colour 
system that is different from your TV.

,

Noises may appear in the pictures recorded on 
the HDD, which is due to the characteristics of 
HDD, and is not a malfunction.

TV programme reception does not fill the 
screen.

,

Set the channel manually in “Channel Setting” in 
“Settings” setup (page 76).

,

Select the correct source using the INPUT 
SELECT button, or select a channel of any TV 
programme using the PROG +/– buttons.

TV programme pictures are distorted.

,

Reorient the TV aerial.

,

Adjust the picture (see the TV’s instruction 
manual).

,

Place the recorder and TV farther apart.

,

Place the TV and any bunched aerial cables


farther apart.

,

The RF cable is connected to the AERIAL OUT 
jack on the recorder. Connect the cable to the 
AERIAL IN jack.

TV channels cannot be changed.

,

The channel is disabled (page 78).

,

A timer recording started, which changed the 
channels.

Power

Picture

,

continued

90

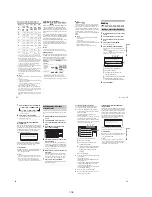
The picture from equipment connected to the 
recorder’s input jack does not appear on the 
screen.

,

If the equipment is connected to the LINE 1 – TV 
jack, select “L1” in the front panel display by 
pressing PROG +/– or INPUT SELECT.
If the equipment is connected to the LINE 2 IN 
jacks, select “L2” in the front panel display by 
pressing PROG +/– or INPUT SELECT.
If the equipment is connected to the LINE 4 IN 
jacks, select “L4” in the front panel display by 
pressing PROG +/– or INPUT SELECT.
If the equipment is connected to the LINE 3/
DECODER jack, select “L3” in the front panel 
display by pressing PROG +/– or INPUT 
SELECT.

,

When an S video cable is connected to the 
recorder’s LINE 4 IN jack, set “Line4 Input” in 
“Video” setup to “S Video” (page 82).

The playback picture or TV programme from 
the equipment connected through the recorder 
is distorted.

,

If the playback picture output from a DVD 
player, VCR, or tuner goes through your recorder 
before reaching your TV, the copy-protection 
signal applied to some programmes could affect 
picture quality. Disconnect the playback 
equipment in question and connect it directly to 
your TV.

The picture does not fill the screen.

,

Set “TV Type” in “Video” setup in accordance 
with the screen size of your TV (page 81).

The picture does not fill the screen, even 
though the picture size is set in “TV Type” in 
“Video” setup.

,

The picture size of the title is fixed.

The picture is black and white.

,

Check that “Line1 Output” of “Scart Setting” in 
“Video” setup is set to the appropriate item that 
conforms to your system (page 82).

,

If you are using a SCART cord, be sure to use 
one that is fully wired (21 pins).

There is no sound.

,

Re-connect all connections securely.

,

The connecting cord is damaged.

,

The input source setting on the amplifier or the 
connection to the amplifier is incorrect.

,

The recorder is in reverse play, fast-forward, 
slow motion, or pause mode.

,

If the audio signal does not come through the 
DIGITAL OUT (OPTICAL or COAXIAL) 
jacks, check the “Audio” setup settings 
(page 83).

Sound distortion occurs.

,

Set “Audio ATT” in “Audio” setup to “On” 
(page 83).

Sound is noisy.

,

When playing a CD with DTS sound tracks, 
noise will come from the LINE 2 OUT R-
AUDIO-L jacks, LINE 1 – TV jack, or LINE 3/
DECODER jack (page 55).

The sound volume is low.

,

The sound volume is low on some DVDs.
The sound volume may improve if you set 
“Audio DRC” in “Audio” setup to “TV Mode” 
(page 83).

,

Set “Audio ATT” in “Audio” setup to “Off” 
(page 83).

,

One of the TVS effects is selected (page 54).

An alternate audio track cannot be recorded.

,

When recording from connected equipment, set 
“Line Audio Input” in TOOLS menu to 
“Bilingual” (page 50).

,

Multilingual tracks (main and sub) cannot be 
recorded on DVD+RWs, DVD-RWs (Video 
mode), DVD+Rs, or DVD-Rs. To record the 
language, select “Main” or “Sub” of “DVD 
Bilingual Rec.” in “Options” setup before 
recording (page 87). To record both the main and 
sub sounds, record on a DVD-RW (VR mode).

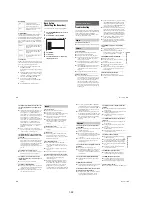
Sound

91

A

d

d

iti

o

n

a

l In
fo

rm

a

tio

n

,

Any discs other than the HDD or DVD-RWs 
(VR mode) cannot be used for recording both 
main and sub sounds. To record on the HDD, set 
“HDD Bilingual Rec.” in “Options” setup to 
“Main+Sub” (page 87).

,

If you have connected an AV amplifier to the 
DIGITAL OUT (OPTICAL or COAXIAL) jacks 
and want to change the audio track for a DVD-
RW (VR mode) during playback, set “Dolby 
Digital” in “Audio” setup to “D-PCM” 
(page 84).

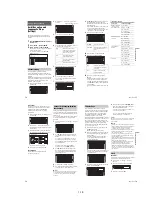
The recorder does not play any type of disc 
(except HDD).

,

The disc is upside down. Insert the disc with the 
labelled side facing up.

,

The disc is not correctly inserted.

,

Moisture has condensed inside the recorder. 
Remove the disc and leave the recorder turned on 
for about half an hour until the moisture 
evaporates.

,

If the disc was recorded on another recorder, the 
recorder cannot play the disc if it was not 
finalized (page 39).

The recorder does not start playback from the 
beginning.

,

Resume play was activated (page 53).

,

You have inserted a DVD whose Title menu or 
DVD menu automatically appears on the TV 
screen when it is first inserted. Use the menu to 
start playback.

The recorder starts playing automatically.

,

The DVD VIDEO features an auto playback 
function.

Playback stops automatically.

,

If the DVD has an auto pause signal, the recorder 
stops playback at the auto pause signal.

Some functions such as Stop, Search, or Slow-
motion Play cannot be performed.

,

Depending on the DVD, you may not be able to 
do some of the operations above. See the 
instruction manual supplied with the disc.

The language for the sound track cannot be 
changed.

,

Multilingual tracks are not recorded on the DVD 
being played.

,

The DVD VIDEO prohibits the changing of the 
language for the sound track.

,

Try changing the language using the DVD 
VIDEO’s menu.

The subtitle language cannot be changed or 
turned off.

,

Multilingual subtitles are not recorded on the 
DVD VIDEO.

,

The DVD VIDEO prohibits changing of the 
subtitles.

,

Try changing the subtitle using the DVD 
VIDEO’s menu.

,

The subtitles cannot be changed for the titles 
recorded on this recorder.

The angles cannot be changed.

,

Multi-angles are not recorded on the DVD 
VIDEO being played.

,

You are trying to change the angles when “

” 

does not appear on the TV screen (page 54).

,

The DVD VIDEO prohibits changing angles.

,

Try changing the angle using the DVD VIDEO’s 
menu.

,

The angles cannot be changed for the titles 
recorded on this recorder.

The MP3 audio tracks do not play.

,

The MP3 audio tracks are not recorded in a 
format that the recorder can play (page 60).

The JPEG image files do not play.

,

The JPEG image files are not recorded in a 
format that the recorder can play (page 60).

,

Progressive JPEG images cannot be played.

TV Pause does not work.

,

You are recording to the HDD or the HDD is full.

Playback

,

continued

Summary of Contents for RDR-HX510

Page 1: ... more than 22 kilohms VIDEO Phono jack 1 0 Vp p S VIDEO 4 pin mini DIN Y 1 0 Vp p C 0 3 Vp p PAL LINE 1 TV 21 pin CVBS IN OUT S Video RGB OUT upstream LINE 3 DECODER 21 pin CVBS IN OUT S Video RGB IN S Video OUT downstream Decoder DIGITAL OUT OPTICAL Optical output jack 18 dBm wave length 660 nm DIGITAL OUT COAXIAL Phono jack 0 5 Vp p 75 ohms COMPONENT VIDEO OUT Y PB CB PR CR Phono jack Y 1 0 Vp p...

Page 2: ...ore releasing the set to the customer CAUTION Use of controls or adjustments or performance of procedures other than those specified herein may result in hazardous radiation exposure WARNING WHEN SERVICING DO NOT APPROACHTHE LASER EXITWITH THE EYE TOO CLOSELY IN CASE IT IS NECESSARY TO CONFIRM LASER BEAM EMISSION BE SURE TO OBSERVE FROM A DISTANCE OF MORETHAN 25 cm FROMTHE SURFACE OF THE OBJECTIVE...

Page 3: ...out This Recorder 1 23 Guide to Parts and Controls 1 24 Glossary 1 25 Language Code List 1 26 Area Code 1 26 2 DISASSEMBLY 2 1 UPPER CASE 2 2 2 2 TRAY COVER ASSEMBLY 2 2 2 3 FRONT PANEL SECTION 2 3 2 4 SLIDE DOOR 2 3 2 5 FR 226 BOARD FL 144 BOARD 2 4 2 6 DVD SECTION 2 4 2 7 DVD DRIVE 2 5 2 8 HDD SECTION 2 5 2 9 HDD 2 6 2 10 RD 053 BOARD 2 6 2 11 D C FAN 2 7 2 12 ER 038 BOARD 2 7 2 13 AV 089 BOARD ...

Page 4: ...5 Device Check Menu 2 2 6 3 6 6 Path Check Menu 6 3 6 7 Hard Disk Check Menu 6 4 6 8 Path Individual Check Pasted Screen Check visual check and data check digital video data auto check Screen Transition 6 4 7 ADJUSTMENT 7 1 Video System Adjustment 7 1 7 2 S Video Output S Y Check 7 1 7 3 S Video Output S C Level Check 7 2 7 4 Component Video Output Y Check 7 2 7 5 Component Video Output B Y Chec 7...

Page 5: ... close the tray with a CD disc inserted in it the CD can be ejected However if you close the tray while it is empty there can be a case that ejection of the tray becomes impossible Note3 Even if you replace the DVD drive unit while the tray remains under the state as described above the situation cannot be improved 2 If the tray cannot be ejected while the disc is not inserted Execute the forced e...

Page 6: ...MEMO 6 ...

Page 7: ... disk needs to be formatted or replaced it will be done at the discretion of Sony All contents of the hard disk drive will be erased including contents that violate copyright laws On power sources The recorder is not disconnected from the AC power source mains as long as it is connected to the wall outlet even if the recorder itself has been turned off If you are not going to use the recorder for ...

Page 8: ... DATADVD DATA CD 11 Maximum recordable number of titles The maximum length for each title is eight hours Note on playback operations of DVD VIDEOs VIDEO CDs Some playback operations of DVD VIDEOs VIDEO CDs may be intentionally set by software producers Since this recorder plays DVD VIDEOs VIDEO CDs according to the disc contents the software producers designed some playback features may not be ava...

Page 9: ...ngs When playing wide screen images Some recorded images may not fit your TV screen To change the picture size see page 81 If you are connecting to a VCR Connect your VCR to the LINE 3 DECODER jack on the recorder page 23 b Notes Do not connect more than one type of video cord between the recorder and your TV at the same time You cannot use the PROGRESSIVE button with the connections B and C When ...

Page 10: ...nected components b Notes Do not connect your TV s audio output jacks to the LINE IN R AUDIO L jacks at the same time This will cause unwanted noise to come from your TV s speakers In the connection A do not connect the LINE IN R AUDIO L and LINE 2 OUT R AUDIO L jacks to your TV s audio output jacks at the same time This will cause unwanted noise to come from your TV s speakers In the connection B...

Page 11: ...ual Rec DVD3 On Off Normal Main Main SETUP Format DVD RW VR Settings Options Features Audio Video Easy Setup Command Mode Factory Setup Auto Display Power Save Dimmer DVD Bilingual Rec HDD Bilingual Rec DVD3 On Off Normal Main Main DVD1 DVD3 DVD2 22 Step 7 Easy Setup Make the basic adjustments by following the on screen instructions in Easy Setup 1 Turn on the recorder and switch the input selecto...

Page 12: ...ners For details see the tuner s operating instructions If you disconnect the recorder s mains lead you will not be able to view the signals from the connected tuner AERIAL IN LINE 4 IN DIGITAL OUT COAXIAL OPTICAL PCM DTS MPEG DOLBY DIGITAL COMPONENT VIDEO OUT VIDEO S VIDEO R AUDIO L PB CB Y PR CR AC IN OUT LINE 2 OUT VIDEO S VIDEO R AUDIO L LINE 3 DECODER LINE 1 TV TV to SCART input SCART cord no...

Page 13: ...es were recorded DVD only 7 Continuous Rem Time Remainder approximate The remaining recording time in each of the recording modes Disc space bar Remaining disc space total disc space 8 Disc setting buttons Disc Name page 38 Protect Disc page 38 Finalize Unfinalize page 39 Erase All page 68 Format Available settings differ depending on the disc type 4 Select Format and press ENTER 5 Select OK and p...

Page 14: ...ently is listed at the top By Title in alphabetical order By Number in order of recorded title number GB 4 3 4 7 World Sports Mystery Travel Tennis Wed Tue Wed Fri AAB 12 11 10 9 0H30M LSP GB 0 9 DEF AAB GHI 0H30M SEP 1H00M SLP 1H00M SEP GB 0 3 GB 0 8 GB 0 6 TITLE LIST ORIGINAL Close A B Erase Delete Chapter Title Name Dubbing Visual Search Protect Erase Play Beginning Play 28 10 2005 13 00 26 10 ...

Page 15: ...elect Disc Info and press ENTER Example When the inserted disc is a DVD RW VR mode 3 Select Disc Name and press ENTER Enter the disc name in the Input Disc Name display page 36 b Note You can enter up to 64 characters for a DVD s disc name The disc name may not appear when the disc is played on other DVD equipment 1 Insert a disc See Inserting a Disc on page 29 2 Press TOOLS to select Disc Info an...

Page 16: ... or sub at a time Select the sound track using the Setup Display before recording starts Set DVD Bilingual Rec to Main default or Sub in Options setup page 87 ZWEITON German stereo system When a stereo based programme is received Stereo appears When a bilingual ZWEITON based programme is received Main Sub or Main Sub appears NICAM system When a stereo or bilingual NICAM based programme is received...

Page 17: ... duration time while recording See page 44 To confirm change or cancel timer recording See Checking Changing Cancelling Timer Settings Timer List on page 47 z Hint The Rec Mode Adjust function also works with this timer method page 44 Recording TV programmes using the VIDEO Plus system 1 2 3 4 6 7 8 9 0 5 M m ENTER TIMER Number buttons SET x REC STOP CLEAR z REC Timer VIDEO Plus Set the timer by e...

Page 18: ... SYNCHRO REC INPUT SELECT 1 2 3 4 6 7 8 9 0 5 DVD HDD X REC PAUSE TOOLS continued 50 3 Press INPUT SELECT repeatedly to select L3 4 Select the line input audio when recording a bilingual programme on the HDD or DVD RWs VR mode Press TOOLS to select Line Audio Input and press ENTER Then select Bilingual and press ENTER For details about bilingual recording see page 42 5 Press REC MODE repeatedly to...

Page 19: ...llustration on page 52 Playback options Buttons Operations audio Selects one of the audio tracks recorded on the disc when pressed repeatedly Selects the language Selects the main or sub sound Selects stereo or monaural audio tracks subtitle Selects a subtitle language when pressed repeatedly angle Selects an angle when pressed repeatedly If various angles multi angles for a scene are recorded on ...

Page 20: ... part of a programme while the recording is being made You do not need to wait until the recording finishes Press TOOLS while recording to select Chasing Playback and press ENTER Playback starts from the beginning of the programme you are recording When you fast forward to the point that you are recording Chasing Playback returns to normal playback b Notes For DVD RWs VR mode this function does no...

Page 21: ...quarium 1 Flowers Summer Summer Winter Winter Summer 6 Zoo 8 Party 7 Consert Summer 3 Festival 5 Tennis match 4 Hiking TITLE LIST 6 Zoo DSC00029 25 11 2005 15 50 1 5 9 2 6 10 3 7 11 4 8 12 continued 62 MP3 is audio compression technology that satisfies certain ISO MPEG regulations JPEG is image compression technology You can play MP3 MPEG1 Audio Layer 3 format audio tracks and JPEG image files on ...

Page 22: ...n the Protection display appears appears next to the protected title To cancel the protection select Off Title Name Allows you to enter or re enter a title name page 36 Set Thumbnail Changes the title s thumbnail picture that appears in the Title List page 34 Edit options for DVD RWs DVD RWs Video mode DVD Rs DVD Rs RWVideo RW R R RWVR RWVideo RW R R HDD 1 2 3 4 6 7 8 9 0 5 M m ENTER TOOLS TITLE L...

Page 23: ...ed scene is played You can change the Playlist title order within the Title List Playlist 1 Press TITLE LIST to turn on the Title List Playlist menu If the Title List Original menu appears press TOOLS and select Playlist 2 Select the title you want to move and press ENTER The sub menu appears 3 Select Change Order and press ENTER 4 Select a new location for the title by pressing M m and press ENTE...

Page 24: ...ng M m Appears when High speed Dubbing is available for the title page 71 8 Select Start and press ENTER The dubbing indication appears in the front panel display page 35 To automatically adjust the dubbing mode Auto Dub Mode If there is not enough available space on the target disc the recorder automatically selects a dubbing mode with lower picture quality according to the available space If the...

Page 25: ...etails see page 27 Changes or disables the programme positions after setting the channels If any programme positions are unused or contain unwanted channels you can disable them You can also change station names If the station names are not displayed you can enter them manually 1 Select Channel List in Settings and press ENTER 2 Press M m to select the row containing the programme position you wan...

Page 26: ... 3 Letter Box 4 3 Pan Scan continued 82 Progressive Mode DVD software can be divided into two types film based software and video based software Video based software is derived from TV such as dramas and sit coms and displays images at 30 frames 60 fields 25 frames 50 fields per second Film based software is derived from film and displays images at 24 frames per second Some DVD software contains b...

Page 27: ...ur password Features Parental Control Level Off Password Standard USA continued 86 3 Select Standard and press or ENTER The selection items for Standard are displayed 4 Select a geographic area as the playback limitation level and press ENTER The area is selected When you select Others press the number buttons to select and enter an area code in the table page 104 Then select OK and press ENTER 5 ...

Page 28: ...isplay by pressing PROG or INPUT SELECT When an S video cable is connected to the recorder s LINE 4 IN jack set Line4 Input in Video setup to S Video page 82 The playback picture or TV programme from the equipment connected through the recorder is distorted If the playback picture output from a DVD player VCR or tuner goes through your recorder before reaching your TV the copy protection signal ap...

Page 29: ...ge 21 The recorder does not operate properly Restart the recorder Press down 1 on the recorder for more than ten seconds until WELCOME appears in the front panel display When static electricity etc causes the recorder to operate abnormally turn off the recorder and wait until the clock appears in the front panel display Then unplug the recorder and after leaving it off for a while plug it in again...

Page 30: ...ini DIN Y 1 0 Vp p C 0 3 Vp p PAL LINE 2 IN LINE 4 IN AUDIO Phono jack 2 Vrms more than 22 kilohms VIDEO Phono jack 1 0 Vp p S VIDEO 4 pin mini DIN Y 1 0 Vp p C 0 3 Vp p PAL LINE 1 TV 21 pin CVBS IN OUT S Video RGB OUT upstream LINE 3 DECODER 21 pin CVBS IN OUT S Video RGB IN S Video OUT downstream Decoder DIGITAL OUT OPTICAL Optical output jack 18 dBm wave length 660 nm 98 Guide to Parts and Cont...

Page 31: ...O Contents can be recorded only once to a DVD R and will have the same format as a DVD VIDEO DVD RW page 8 A DVD RW read plus RW is a recordable and rewritable disc DVD RWs use a recording format that is comparable to the DVD VIDEO format DVD R page 8 A DVD R is a recordable disc that is the same size as a DVD VIDEO Contents can be recorded only once to a DVD R and will have the same format as a D...

Page 32: ... Hausa 1217 Hindi 1226 Croatian 1229 Hungarian 1233 Armenian 1235 Interlingua 1239 Interlingue 1245 Inupiak 1248 Indonesian 1253 Icelandic 1254 Italian 1257 Hebrew 1261 Japanese 1269 Yiddish 1283 Javanese 1287 Georgian 1297 Kazakh 1298 Greenlandic 1299 Cambodian 1300 Kannada 1301 Korean 1305 Kashmiri 1307 Kurdish 1311 Kirghiz 1313 Latin 1326 Lingala 1327 Laothian 1332 Lithuanian 1334 Latvian Letti...

Page 33: ...re Upper case Page 2 2 Tray cover assembly Page 2 2 Front panel section Page 2 3 Slide door Page 2 3 FR 226 board FL 144 board Page 2 4 DVD section Page 2 4 HDD section Page 2 5 HDD Page 2 6 RD 053 board Page 2 6 ER 038 board Page 2 7 D C Fan Page 2 7 AV 089 board Page 2 8 DVD drive Page 2 5 Set ...

Page 34: ...VER ASSEMBLY NOTE Follow the disassembly procedure in the numerical order given 3 Three tapping screws BV 3 10 2 Tapping screw 4 Upper case 1 Tapping screw The hole 3 Two dowels 4 Tray cover assembly 2 Open the tray 1 The stiff wire ...

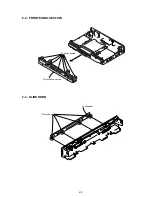
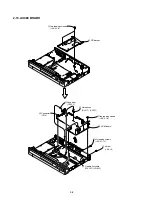
Page 35: ...2 3 2 3 FRONT PANEL SECTION 2 4 SLIDE DOOR 2 Front panel section 1 Seven dowels 1 Four dowels 2 Slide door ...

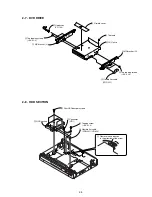
Page 36: ...ble flat cable FFL 002 4 Flexible flat cable FAF 001 CN101 9 FL 144 board 5 FR 226 board 8 FL cover 1 Flexible flat cable FRH 001 CN603 2 Flexible flat cable FRD 001 CN602 7 Remove the DVD section in the direction of the arrow 4 Connector CN2 5 Four tapping screws BV 3 8 6 Harnesses HE 001 3 Remove the harnesses in the direction of the arrow ...

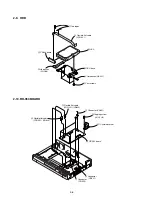
Page 37: ... BV 3 3 6 Two tapping screws BV 3 3 3 MD bracket R 7 MD bracket L 9 DVD drive 8 Two foots 4 Flexible cover 4 Connector CN1 1 Four HDD damper screws 2 Flexible flat cable FRH 001 CN603 6 HDD section 5 Tapping screw BV 3 3 3 Remove the harnesses in the direction of the arrow 2 8 HDD SECTION ...

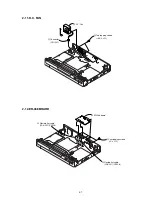
Page 38: ...RH 001 1 Two tapes 5 Four screws 8 HDD 7HDD base 6 Harnesses HE 001 2 10 RD 053 BOARD 1 Flexible flat cable FRD 001 CN602 2 Flexible flat cable FRH 001 CN603 5 TU shield bracket 3 Connector CN901 4 Tapping screw BV 3 8 8 RD 053 board 6 Connector CN501 7 Connector CN502 ...

Page 39: ... 2 11 D C FAN 2 Two tapping screws BV 3 10 1 Connector CN1201 3 D C Fan 2 12 ER 038 BOARD 4 ER 038 board 1 Four tapping screws P 3 10 3 Flexible flat cable FAE 007 CN105 2 Flexible flat cable FAE 007 CN106 ...

Page 40: ...D 5 Harnesses AL 071 CN701 3 Connector CN120 4 Connector CN3 7Tree tapping screws BV 3 8 0 AV 89 board 8 Screw B 3 3 9 Six tapping screws BV 3 10 1 Two tapping screws BV 3 8 2 RD bracket 6 Flexible flat cable FAF 001 CN602 ...

Page 41: ...2 9 2 14 CIRCUIT BOARDS LOCATION CN 243 board FL 144 board FR 226 board RD 053 board AV 089 board ER 036 board Power block ...

Page 42: ...2 10E MEMO ...

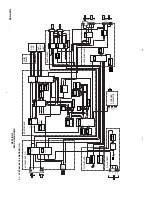
Page 43: ...CHING REGULATOR FAN ON AC IN SCIF2 SDO SCIF2 SCK SCIF2 SDO SCIF2 SCK VY AD L3B L3G L3RC SPDIF SIF AM TUDV V R G B IN CN104 V Y OUT A L R IN A L R OUT A L R IN A L R OUT L3 L R IN L1 L R IN V IN G OUT V Y OUT R C OUT BO CI ERV ERY ERC ERR ERG ERB TU SDA TUSCL EUAUIN L R 3 EUAUIN L R 1 TU LI TU RI SPDIF AV Y CB CR L AOUTL AOUTR AUDIO AMP R VIDEO Y C PO Y PO PB PO PR VO YC VO Y VO C PO Y PO PB PO PR ...

Page 44: ...FFER RDR HX70 CR R CB B Y G VIDEO AMP IC802 XVMUTE 3 8 6 12 15 17 7 16 VIDEO OUT Q812 Y OUT Y OUT CB OUT CR OUT C OUT 24 22 20 33 16 29 31 48 95 XFLMRST5 XP MUTE CNVSS ITSDO5 ITSCK5 ITSDI5 53 108 74 75 DSEL WIDE XNENTMUTE 8 73 M2 SHAWAKE DONE STATUS0 STATUS1 96 97 98 99 2 52 21 6 51 4 50 45 48 49 47 24 26 18 39 40 38 XAWAKE5 XFLMRST5 XITRST5 ITSDI5 ITSCK5 ITSDO5 ITREQ5 CN102 Q1201 1 UNSW 12V IC120...

Page 45: ... CONT 79 11 34 112 15 69 VCC VDD2 VDD3 D605 C651 IC604 IT CPU TU PCONT FAN DET FAN HI FAN ON 96 KEY1 IC605 EEPROM UNSW 8V UN5V SW 10V UNSW12V L302 Q301 RIPPLE FILTER SWA5V UNSW6V IC302 5V REG Q302 303 AU12V SWA5V D302 4 5 IC301 AUDIO OUT AMP IC201 AUDIO INPUT SELECT A D CONV IC401 DC DC CONV TU401 12 4 L406 5V L404 14 30V UHF VHF TUNER TU P CONT UNSW5V Q402 404 L403 L401 IC801UNSW 8V 2 5 L804 SW5V...

Page 46: ... IC401 MULTIPLEXER IC107 BUFFER SH SW3 3V SH SW5V FL103 SH SW3 3V SW3 3V SH 3 3V SH SW1 5VA SW2 5V FL602 SW2 5V FL804 FL802 FL1001 SW3 3V FL603 SW1 8V SW3 3V SW3 3V D4 8 5 IC801 3 3V REG 4 1 5 IC1102 1 2V REG 4 5 2 REG 1 VID5V L1201 IC1402 AUDIO D A CONV SW1 8V SW3 3V SW2 5V L1101 P CONT SW5V VID5V CN1701 CN1702 SW5VAV SWA5V A5V RD 5V SH SW5V SH SW1 5V SH SW3 3V TU 5V 23 9 25 42 27 23 15 14 9 11 2...

Page 47: ...AF15 AD17 AF9 AT1 WE AT1 RD AT1 DACK AT1 RST IDE WE IDE RD IDE DACK IDE RST IDE WE IDE RD IDE DACK IDE RST AC15 AE16 AD16 AT1 DREQ AT1 RDY AT1 INT IDE DREQ IDE RDY IDE INT IDE DREQ IDE RDY IDE INT AC18 AD18 AB18 AC17 AB17 AB19 AF21 AB21 AE22 AD23 AF23 AD24 AF24 AC23 AE23 AD22 AC21 AC20 AB20 AD20 AT2 D0 D15 AT2 A0 A4 AE21 AF20 AD19 AE25 AT2 WE AT2 RD AT2 DACK AT2 RST AE20 AC19 AE19 AT2 DREQ AT2 RDY...

Page 48: ...Y XSWDREQ1 26 32 SWDACK0 XCARCS0 1 37 XVIDRST XSWHDGT0 XUNRD1 XUNWE0 2 5 33 XNAZCS SWDACK1 32 33 30 37 38 44 26 29 XUNWE0 2 XUNRD1 2 XUNBS UNRW1 SWRW XSHWE0 2 XSHRD XSHBS SHRW XSHWE0 3 XSHRD XSHBS SH RW 128 133 107 108 106 118 75 79 80 100 77 78 128M NAND FLASH MEMORY IC101 EEPROM 17 18 XCARRD XNZCRD 2 3 7 22 1 Y10 5 6 7 F17 F18 CPUCK66 5 6 7 9 2 IC306 2 2 IC105 5 XNFLRE XNFLCE NFLCE NFACE XNFLWE ...

Page 49: ...FSL1 ASW4 ASW3 ASW2 ASW1 ASW1 ASW2 ASW3 ASW4 FS L1IN FS AUX IN TU R IN TU L IN DA R IN DA L IN L R IN OUT 25 1 27 22 12 20 10 16 18 27 25 6 4 2 24 26 3 11 9 5 7 28 V IN V Y OUT R C OUT G OUT BO CI BLAKING OUT FUNCTION SW OUT AVLINK X301 18 432MHz BUFFER A L IN A R IN A L OUT A R OUT 27 50 28 29 30 32 24 36 31 51 34 44 42 40 38 5 15 17 21 23 3 7 52 12 47 45 46 41 14 10 8 6 4 2 48 22 20 18 22 20 21 ...

Page 50: ...RDR HX510 MEMO 3 15 3 16E ...

Page 51: ...ST DGND SPDIF_AV DGND AADXRST AI_LRCK DGND STATUS0 EPGVIDEO P_CONT RECVY DGND RECG FSW EPGGND DGND DGND SW5V XAWAKE RECR DGND IT_SCLK RECCCR 256FS DGND IT_CON_TEMP Csync RECBCB Vsync AI_SDT DGND BS_SPDIF SW2 5V C UNSW6V SW3 3V Lch DGND XVMUTE Y Lch SW5VAV DGND RCH CR R Y G RESERVE DGND DGND AUGND DGND DGND SW3 3V DGND SW1 8V SH_SW5V STATUS1 CB B SW2 5V V RCH RMUTE DGND AWAKE_DONE SH SW3 3V SW1 8V ...

Page 52: ...ges are dc between measurement point Readings are taken with a color bar signals on DVD reference disc Readings are taken with a digital multimeter DC 10MW Voltage variations may be noted due to normal production toler ances THIS NOTE IS COMMON FOR SCHEMATIC DIAGRAMS In addition to this the necessary note is printed in each block When indicating parts by reference number please include the board n...

Page 53: ...186 S 8520E25MC BJKT2G IC111 1 CTL 2 GND 3 VOUT 4 EXT 5 VIN 25V 47u C140 0 R102 0 5 3300 R188 13P CN102 1 2 3 4 5 6 7 8 9 10 11 12 13 JL103 10k R1205 JL1202 FAN_ON JL1201 0 5 2 7k R1204 0 5 91k R1202 0 1u B C1201 0 5 6 8k R1203 JL1203 JL1205 FAN_HI 25V 0 01u B C1202 FAN_DET CN1201 3P 1 GND 2 SENS 3 FAN12V MUN2213T1 Q1201 JL1204 25V 47u C1203 2W 0 R1201 BD7800FP E2 IC1201 CTL 1 IN 2 GND 3 OUT 4 ADJ...

Page 54: ...DVDD 20 SDTO 21 BICK 22 LRCK 23 MCLK 24 PDN 25 TVDD 26 SMUTE 27 SEL0 28 SEL1 29 SEL2 30 CDTI SDA 31 CCLK SCL 32 CSN CAD1 33 I2C 34 M S 35 RIN1 36 TEST5 37 RIN2 38 TEST6 39 RIN3 40 TEST7 41 RIN4 42 TEST8 43 RIN5 44 L3RC JL928 AVLINK JL926 FSW JL933 L3B JL942 DGND VY_AD JL931 28P CN902 1 2 3 4 5 6 7 8 9 10 11 12 13 14 15 16 17 18 19 20 21 22 23 24 25 26 27 28 JL940 JL938 JL936 JL925 JL929 JL927 JL93...

Page 55: ...7 220u 470 R327 UNSW12V 8200 R307 0 5 25V 47u C334 AOUTL AOUTL AOUTR AOUTR XLMUTE XRMUTE SWA5V C304 50V 150p C314 50V 150p C307 50V 150p C335 50V 100p C310 50V 560p C336 50V 100p C309 50V 560p C312 50V 150p TK11150CSCL G IC302 1 2 3 4 5 0 1u B C327 UNSW6V 16V C318 220u BC857CE6327 Q315 10k R341 10k R363 MUN2213T1 Q316 XFLMRST5 JL316 JL317 0 2W R365 0 2W R367 16V 47u C323 25V B 0 01u C325 25V B 0 0...

Page 56: ...u B C406 10k R406 2SB1197K T 146 R Q404 UN2211 TX Q402 JL405 JL407 470 R413 JL408 JL409 L405 10uH 100 R422 0 R423 AM SIF JL401 TU5V 2W R475 0 2W 0 R477 50V 100p C446 50V 100p C447 10p C449 C452 0 001u 0 R479 0 001u C453 0 001u C454 22p CH C455 0 001u C456 0 001u C457 JL433 0 001u C459 0 001u C458 2SB1197K T 146 R Q412 TU_BST_C JL432 10k R439 JL430 1k R441 Q410 UN2211 TX 1 A 0 1u B C422 TU_SDA TU_S...

Page 57: ...P75 STATUS0t 24 P74 RESET5VT 25 P73 STATUS1t 26 TA1OUT AV_LINK_OUTT 27 SCL2 TU_SCL 28 SDA2 TU_SDA 29 VSS2 30 LP2 31 LP3 32 LP4 33 VDD2 34 TEST1 35 M1 36 SLICEON 37 TXD IT_SOUTT 38 RXD IT_SINt 39 CLK IT_CLKt 40 P64 TXT_ENT 41 SDA0 TXT_SDA TXD0 STB_TXD 42 SCL0 TXT_SCL RXD0 STB_RXD 43 P61 STB_CNTT 44 P60 XAWAKE5T 45 P57 CLKOUT 46 P56 AWAKE_DONEt 47 P55 XFLMRSTT 48 P54 IT_XRSTT 49 P53 FLD_XRESETT 50 P...

Page 58: ...30k R711 330k R712 DGND 10uH L701 INSEL_PCONT 0 01u B C705 0 01u B C706 0 01u B C707 0 01u B C732 0 01u B C734 0 01u B C735 TU_SDA TU_SCL 2W 0 R733 2W 0 R738 SLICE_V RECVY RECCCR RECBCB SYNCRO_DET HDET 0 01u B C703 TU_VIDEO VSYNC CSYNC 100k R706 25V C738 47u 2W 0 R703 B C711 0 01u 0 01u B C719 B C725 0 01u B C729 0 01u VY_AD 0 R744 47u C720 25V RECR L3RC 47u C721 25V L3G RECG L3B 2W R726 0 AUGND J...

Page 59: ...905 TU_SCL XVMUTE JL923 JL907 EUROPOWER 28P CN901 1 2 3 4 5 6 7 8 9 10 11 12 13 14 15 16 17 18 19 20 21 22 23 24 25 26 27 28 JL916 JL920 Y C G G J801 DGND UNSW 8V 1 A CR R CB B Y G Y C V EURO_MUTE TU_SCL EUROPOWER EUAUOUTR V EUAUOUTL TU_SDA C Y G CR R EURO_MUTE EUROPOWER TU_SCL TU_SDA EUAUOUTR EUAUOUTL CB B Y VIDEO_IN DCCNT1 GND C_IN MUTE1 Y_IN NC DCCNT2 NC GND Y_IN NC DCCNT2 GND Cb_IN MUTE2 Cr_IN...

Page 60: ...I ITSDI5 VSYNC XAWAKE5 ITSCK5 XLMUTE AOUTR V AOUTR SHAWAKE_DONE XAMUTE Y SHSTATUS1 AOUTL AOUTL CR R CB B Y G IT_CON_TEMP REC_MCK_1 C V C Y Y G CB B CR R IT_CON_TEMP XFLMRST5 XITRST5 ITSCK5 ITREQ5 ITSDI5 ITSDO5 SHAWAKE_DONE XAWAKE5 SHSTATUS0 SHSTATUS1 VSYNC RECVY RECCCR CSYNC ADDATI ADBCKI ADLRCKI REC_MCK_1 XSWGBRST ADMUTE XLMUTE XAMUTE AOUTL AOUTR AOUTL AOUTR XRMUTE XRMUTE RECR RECG RECBCB RECBCB ...

Page 61: ... JL123 JL124 JL128 JL121 JL117 JL119 JL111 JL113 JL115 JL114 JL146 JL131 JL143 JL138 JL130 JL148 JL140 JL132 JL134 JL150 JL139 JL147 JL133 JL136 JL135 JL154 JL137 JL142 JL144 JL129 JL145 JL152 JL141 JL156 JL101 JL193 JL172 0 R113 EC10DA40 TE12 D101 JL159 JL160 JL161 JL162 16V 47u C164 0 R221 0 R222 0 R225 0 R114 PS101 2A 0 R116 R126 22 R137 2200 Q107 MSD601 RT1 R139 2200 Q109 MSD601 RT1 R138 2200 ...

Page 62: ...29 30 31 32 33 34 35 36 37 38 39 40 41 42 43 44 45 46 47 48 49 50 51 52 53 54 55 56 57 58 59 60 61 62 63 64 10P CN1302 1 2 3 4 5 6 7 8 9 10 9P CN1301 1 2 3 4 5 6 7 8 9 0 R1327 1 A AD2 AD1 COM1 COM2 COM3 COM4 COM5 COM6 COM7 COM8 COM9 COM10 COM11 COM12 COM13 FLD1_CS FLD_SCLK FLD_SOUT SEG1 SEG2 SEG3 SEG4 SEG5 SEG6 SEG7 SEG8 SEG9 SEG10 SEG11 SEG12 SEG13 SEG14 SEG15 SEG16 SEG17 SEG18 SEG19 SEG20 SEG21 ...

Page 63: ...0 17P CN101 1 2 3 4 5 6 7 8 9 10 11 12 13 14 15 16 17 ET101 150 R118 EB3804X TP J555K D103 JL134 JL135 JL136 JL138 JL139 9P CN102 1 2 3 4 5 6 7 8 9 S102 3300 R130 S103 SLI 343YCT32WST D104 560 R119 0 R117 1 A LESTB LEDIM LERST FLCS LEDT LEDT LECK LESTB HDD DVD LEDIM LEDT FLCS LERST LECK LERST LECK HDD DVD IT_GND SW 8V FR_6V KEY1 LED_RST FLD_CS LED_DT LED_CK IT_GND IT_GND FLD_CS LED_DIM SIRCS KEY2 ...

Page 64: ...D12 IDE_D3 IDE_D1 IDE_D14 IDE_D0 IDE_D15 GND GND GND GND GND N C IDE_DREQ IDE_W IDE_R IDE_IORDY N C IDE_DACK IDE_INT IDE_HD16 IDE_A1 N C IDE_A0 IDE_A2 IDE_A4 CS0 IDE_A4 CS1 DASP GND IDE_D7 IDE_A4 CS1 IDE_D11 GND IDE_D1 GND DASP GND IDE_R IDE_D14 IDE_HD16 IDE_A1 IDE_D8 IDE_D4 GND IDE_D3 GND N C N C IDE_D10 IDE_A0 IDE_DREQ IDE_D12 IDE_A2 IDE_RST IDE_D5 GND IDE_D13 IDE_D15 IDE_D6 IDE_A4 CS0 IDE_INT I...

Page 65: ... MD1 A16 A16 SCIF0_TXD PG5 B16 B16 SCIF0_RXD PG6 C16 C16 MD2 D16 D16 MD0 A15 A15 SCIF0_CLK PG7 B15 B15 SCIF1_RTS PG2 C15 C15 TCK D15 D15 VSSQ A14 A14 SCIF2_RTS PH5 B14 B14 SCIF1_CTS PG3 C14 C14 VDD D14 D14 VSS A13 A13 SCIF2_CTS PH6 B13 B13 SCIF1_RXD PG1 C13 C13 VDDQ D13 D13 VSSQ A12 A12 SCIF2_RXD PH4 B12 B12 SCIF1_TXD PG0 C12 C12 TDO D12 D12 TDI A11 A11 SCIF2_TXD PH3 B11 B11 SCIF1_CLK PG4 C11 C11 ...

Page 66: ...1 SHHD29 SHHD9 SHHD20 SHHD12 SHHD0 SHHD14 SHHA8 SHHA9 SHHA14 SHHA2 SHHD22 SHHD23 SHHA10 SHHD18 SHHD2 SHHD17 SHHA11 SHHD2 SHHD30 SHHD10 SHHD13 SHHD12 SHHA3 SHHD6 SHHA14 SHHD9 SHHD18 SHHD26 SHHA9 SHHD31 SHHD19 SHHA4 SHHA11 SHHA15 SHHA12 SHHA4 SHHA10 SHHD27 SHHD27 SHHD10 SHHD5 SHHD25 SHHD25 SHHA2 SHHD21 SHHD3 SHHA16 SHHA9 SHHA13 SHHD26 SHHA6 SHHD4 SHHD20 SHHA6 SHHA8 SHHA3 SHHD4 SHHA7 SHHA13 SHHD14 SH...

Page 67: ...E 26 2A8 27 2A7 28 GND 29 2A6 30 2A5 31 VCC 32 2A4 33 2A3 34 GND 35 2A2 36 2A1 37 1A8 38 1A7 39 GND 40 1A6 41 1A5 42 VCC 43 1A4 44 1A3 45 GND 46 1A2 47 1A1 48 1OE 0 1u B C330 0 1u B C336 0 1u B C335 22 R369 RB341 10kX4 1 2 3 4 5 6 7 8 JL312 JL301 1W 0 R302 CPUCK66 SH_SW3 3V 100 R313 100 R315 82 R317 82 R319 JL309 JL307 JL306 JL305 JL304 47 R353 68 R370 47 R371 47 R372 FL301 FL302 JL314 JL315 JL316...

Page 68: ...CLK512FS_2_1 16 VSS1 17 VDD1 18 CLK512FS_1_2 19 CLK512FS_1_1 20 CLK256FS_1 680 R1011 0 1u B C1006 CARSYSCK27M PLL1FSEL NAZSYSCK27M VIDSYSCK27M PLL2FSEL PB_MCK_1 REC_MCK_2 REC_MCK_1 NFLDATA1 NFLDATA2 NFLDATA3 NFLDATA4 NFLDATA5 NFLDATA6 NFLDATA7 NFLDATA0 NFLDATA6 NFLDATA5 NFLDATA4 NFLDATA3 NFLDATA2 NFLDATA1 NFLDATA0 NFLDATA7 DAC_LRCK SCIF2_SCK SCIF2_SDO XSWGBRST DAC_DATA DAC_BCK SCIF2_SCK SCIF2_SDO ...

Page 69: ...T VSYNC3 VDCTRST SWDACK1 XSWDREQ1 NAZRDY XNAZCS XNAZRST2 SWDACK0 XSWDREQ0 CARRDY XCARCS1 XCARCS0 XCARRST2 UNHA25 XSHCS0 XSHCS5 XSHCS6 XSHCS4 XSHCS2 XSHCS1 XUNWE0 UNHD5 UNHD6 UNHD7 UNHD14 UNHD9 UNHD10 UNHD8 UNHD13 UNHD15 UNHD11 UNHD0 UNHD2 UNHD1 UNHD3 UNHD12 UNHD4 SHRDY XSHDREQ0 XSHDREQ1 XUNWE0 XFLMCS0 CPUCK66G P_CONT ICE_MD SHDACK0 SHDACK1 XSHDREQ0 XSHDREQ1 SHRDY XGPSINT XGPSINT2 XSHCS0 XSHCS1 XSH...

Page 70: ... D21 SDC_DM0 D21 C21 SDC_DM1 C21 B21 SDC_DQS0 B21 B20 SDC_DQS1 B20 U22 NC U22 C20 SDC_DQ0 C20 D20 SDC_DQ1 D20 B19 SDC_DQ2 B19 D19 SDC_DQ3 D19 U3 VDD33O U3 E19 SDC_DQ4 E19 D18 SDC_DQ5 D18 D17 SDC_DQ6 D17 C18 SDC_DQ7 C18 B18 SDC_DQ8 B18 V23 VDD25I V23 C17 SDC_DQ9 C17 A17 SDC_DQ10 A17 A18 SDC_DQ11 A18 C16 SDC_DQ12 C16 V4 VDD33I V4 D16 SDC_DQ13 D16 D15 SDC_DQ14 D15 C15 SDC_DQ15 C15 AE2 IC1_TDO AE2 AB6...

Page 71: ... 54 DQ8 55 VDDQ 56 DQ9 57 DQ10 58 VSSQ 59 DQ11 60 DQ12 61 VDDQ 62 DQ13 63 DQ14 64 VSSQ 65 DQ15 66 VSS SDR_A5 0 1u B C724 SDR_CS SDR_DQ11 0 5 10k R709 0 5 10k R708 DDR_VREF SDR_DM1 SDR_DM0 SDR_DQS0 SDR_DQS1 SDR_CKN 0 1u B C704 0 1u B C705 0 1u B C706 0 1u B C707 0 1u B C708 0 1u B C709 0 1u B C710 0 1u B C711 0 1u B C713 0 1u B C712 0 1u B C716 0 1u B C714 0 1u B C715 0 1u B C717 CL702 CL703 CL704 ...

Page 72: ...S THERMAL M12 VSS THERMAL M13 VSS THERMAL M14 VSS THERMAL M15 VSS THERMAL M16 VSS THERMAL M17 VSS THERMAL N10 VSS THERMAL N11 VSS THERMAL N12 VSS THERMAL N13 VSS THERMAL N14 VSS THERMAL N15 VSS THERMAL N16 VSS THERMAL N17 VSS THERMAL P10 VSS THERMAL P11 VSS THERMAL P12 VSS THERMAL P13 VSS THERMAL P14 VSS THERMAL P15 VSS THERMAL P16 VSS THERMAL P17 VSS THERMAL R10 VSS THERMAL R11 VSS THERMAL R12 VS...

Page 73: ... B C910 DDRA_DQ10 CL918 DDRA_DQ21 DDRA_CKN DDRA_DM2 CL920 DDRA_DQS0 0 1u B C903 CL926 DDRA_DQ6 DDRA_DQ17 CL901 CL922 DDRA_DQ28 CL916 DDRA_A5 DDRA_DQ2 CL905 DDRA_BA1 RB903 22X4 1 2 3 4 5 6 7 8 0 1u B C912 CL925 DDRA_DQ13 DDRA_DQ24 DDRA_DQS3 DDRA_A1 DDRA_DQS1 SW2 5VA_DDR DDRA_WE 0 1u B C906 1 A DDRA_DQ9 CL927 DDRA_DQ20 DDRA_A8 DDRA_DQ31 DDRA_CK RB905 22X4 1 2 3 4 5 6 7 8 0 1u B C907 JL901 DDRA_DQ5 D...

Page 74: ...WE 116 XCAS 117 AVD10 118 AVS18 119 SDCK 120 AVS19 121 XRAS 122 CKE 123 XCS 124 AVD11 125 BA0 126 ADDR11 127 BA1 128 ADDR9 129 ADDR10 130 ADDR8 131 ADDR0 132 AVS20 133 ADDR7 134 ADDR1 135 ADDR6 136 ADDR2 137 ADDR5 138 ADDR3 139 ADDR4 140 AVS21 141 AVD12 142 VD5 143 VS5 144 AVSPL2 145 VCO 146 VCI 147 AVDPL2 148 VRT1 149 GIN 150 AVSAD1 151 VRM1 152 AVSAD2 153 RIN 154 AVDAD1 155 CIN 156 AVSAD3 157 VR...

Page 75: ...4 0 R1443 0 FSW P_CONT SHSTATUS0 ITSDO5 SRC_LRCK XVMUTE XLMUTE RECBCB VO_YC XITRST5 ITREQ5 SHSTATUS1 VO_Y XRMUTE XFLMRST5 SPDIF_AV PO_Y SRC_DATA XAWAKE5 AOUTR AOUTR AOUTL ITREQ5 RECBCB XAWAKE5 XITRST5 P_CONT XFLMRST5 XLMUTE RECCCR PO_Y VSYNC AOUTL VO_C VO_YC REC_MCK_1 VO_C RECVY PO_PB RECR SHSTATUS1 AOUTR RECCCR XAMUTE XVMUTE SHAWAKE_DONE PO_PR ITSCK5 XAMUTE AOUTR AOUTL VO_Y SPDIF_AV ADMUTE AOUTL ...

Page 76: ...SHUNT REG 5V REG SHUNT REG FCQ08A04 D501 FCQ08A04 D601 21DQ10 D402 1SS119 L501 3 7uH R501 2 2k IC501 TL431CLP R502 22 R505 56k R503 1k C501 0 1u R501 22k R504 68k L401 10uH P401 2 5A P601 0 8A P502 2A P501 2A IC301 M523ML R306 C305 22k R305 12k R506 1k R507 22k R304 82k R303 22k C304 47u 35v R307 10k 1 CN3 2 3 4 5 6 7 8 9 10 11 12 13 UNSW 12V UNSW 4V UNSW 4V GND GND UNSW 6VB UNSW 6VB UNSW 6VA UNSW...

Page 77: ... M5 N5 H5 B5 C5 D5 E5 F5 G5 J6 K6 L6 M6 N6 H6 B6 C6 D6 E6 F6 G6 J7 K7 L7 M7 N7 H7 J2 K2 L2 M2 N2 H2 B2 C2 D2 E2 F2 G2 J3 K3 L3 M3 N3 H3 B3 C3 D3 E3 F3 G3 J4 K4 L4 M4 N4 H4 D13 E13 F13 G13 C1501 C1502 C1503 R3803 CN1703 R3034 C1504 R3035 ZU001 R405 Q1501 Q1502 R3036 R406 ZU002 ZU003 C1507 Q1503 R213 R407 ZU004 C1508 R408 R214 C1509 R409 R215 RB654 R218 RB655 R219 RB656 RB657 RB658 C1510 R410 R3810 ...

Page 78: ...74 JL234 JL428 CL718 C639 JL235 JL429 R675 JL236 R676 JL812 JL237 JL813 R678 JL620 JL238 JL814 C830 JL621 R679 JL239 C831 JL815 JL622 JL816 C832 JL623 C833 C640 JL624 JL430 C834 C641 JL625 JL431 CL721 C835 C642 JL626 JL432 C836 JL433 C643 C837 C644 JL434 JL240 R680 C838 JL628 025 R681 C645 JL435 KB001 JL241 C839 JL629 C646 JL242 R682 KB002 KB003 JL243 R683 R877 JL244 R684 R878 JL245 R685 R879 JL82...

Page 79: ... Connected to VCC when the FLASH is overwritten Clock signal input 32 768KHz Clock signal output 32 768KHz System reset signal input Clock signal output 10MHz GND Clock signal input 10MHz Power supply input Analog 6V Fixed at H Analog 6V Detection of Vsync signal Input of communication request signal with host IC Input of slicer operation detection Output of Euro power control Output of LED power ...

Page 80: ... signal Not used EEPROM writing protect signal input Output of IIC clock signal with EEPROM Input output of IIC data signal with EEPROM Fixed at L Fixed at L Not used Not used Not used Not used Not used Power supply input Analog 6V Not used Digital GND Tuner power supply control signal Muting of S terminal component signal output D terminal output progressive interlace switching D terminal output ...

Page 81: ... FSCIN TU_ATF Function Terminal control signal input Fixed at L Analog GND Tuner gain detect signal input Power supply input Analog 5V Power supply input Analog 6V Not used Oscillation selection input Composite video signal input 2 When slice the vertical synchronous signal input slice power Digital GND Power supply input Analog 5V Component video signal input 1 Analog GND Not used Tuner AFT contr...

Page 82: ...MEMO 5 4E ...

Page 83: ...the message of either OK or NG on the monitor screen When an abnormality is detected the diagnostics is stopped at that moment and you can select to proceed the diagnostics or to stop it Use the keys on the front panel of the main unit to operate the diagnostics 6 1 Checking Item When NG is displayed as the result of the DEVICE TEST the IC or its peripheral is defective When NG is displayed on the...

Page 84: ... IF 2 GR TMENU 1 PATH TEST MENU 1 NAZCA 2 CARIB NAZCA PB 1 T t 2 DEVICE TEST menu DEVICE TEST menu PATH TEST menu TEST MODE MENU 1 Version No TEST MODE menu 3 RETURN RETURN HDD MODE 1 Indicate ID HDD MODE menu 9 RETURN RETURN RETURN Note Do not execute 4 NAND Factory Setup in the 3 TEST MODE menu This item is dedicated for Factory use Otherwise the memory data is deleted and the setting cannot be ...

Page 85: ... not used 10 When the key t is pressed down the monitor display moves to the next device check screen 6 5 Device Check Menu 2 2 1 Key 1 is not used 2 Key 2 is not used 3 When the key T is pressed down the monitor display returns to the previous device check menu screen 6 6 Path Check Menu 1 When the key 1 is pressed down the NAZCA path check is executed 2 When the key 2 is pressed down the path ch...

Page 86: ... check and data check digital video data auto check Screen Transition 1 Select the NAZCA item from the menu 2 The device pasted screen top of the color bar is displayed When visual check is required the display does not move to the judgement screen but remains displaying the picture 3 When the ENTER key is pressed the monitor display moves to the judgement screen 4 When the RETURN key is pressed o...

Page 87: ...r terminated in 75 Ω Instrument Oscilloscope Adjusting element RV801 Specification 1 0 Vp p Adjusting method 1 Insert the reference disk and play back the 100 color bars 2 Adjust RV801 for 1 0 Vp p Fig 7 1 7 2 S Video Output S Y Check Purpose This check confirms that the S video output If it adjusted incorrectly color will be to dark or too thin Mode Video level adjustment in test mode Signal Colo...

Page 88: ... 0 0 06 Vp p 300 30mVp p Fig 7 4 7 5 Component Video Output B Y Chec Purpose This check confirms that the B Y signal of the component video output is correct If this signal level is not correct color of the video signal will have different color when the COMPONENT connector output signal is connected to the projector having COMPONENT input Mode Video level adjustment in test mode Signal Color bars...

Page 89: ...anical parts with no reference number in the exploded views are not supplied 8 1 1 OVERALL SECTION 1 X 2055 182 1 COVERASSY TRAY 3 2 515 217 21 DOOR SLIDE G35 4 X 2055 185 1 PANELASSY FRONT AEP 4 X 2055 186 1 PANELASSY FRONT UK 5 3 070 883 41 SCREW TAPPING 6 A 1109 676 A CASE UPPER SERVICE 7 3 077 331 31 BV3 3 CR 8 1 479 289 11 REMOTECOMMANDER RMT D217P 9 3 071 119 91 LID BATTERY FOR RMT D217P 1 7...

Page 90: ...1 COVER FLEXIBLE 57 1 797 247 11 DRIVE DVD DRW V35P 58 1 830 665 11 CABLE FLEXIBLEFLAT FRD 002 59 A 1132 073 A HDD S P E ASSY Ref No Part No Description Remarks Ref No Part No Description Remarks A B A B 51 52 53 not supplied not supplied not supplied not supplied not supplied not supplied not supplied not supplied not supplied not supplied not supplied not supplied 54 59 55 55 56 58 57 2 2 ...

Page 91: ...S CEES COMPLE UK 112 A 1108 585 A AV 089 DS COMPL UK 112 A 1109 455 A AV 089 AS COMPL AEP 113 3 088 023 01 B3 3 CR 114 A 1108 594 A ER 036 S COMPL 115 1 830 443 11 CABLE FLEXIBLEFLAT FAE 007 116 8 597 979 00 TUNER FSSBTF DF421 Ref No Part No Description Remarks Ref No Part No Description Remarks A B B A C C A A not supplied not supplied not supplied not supplied 103 102 102 104 105 101 106 107 109...

Page 92: ...16 1 126 964 11 ELECT 10uF 20 50V C217 1 107 826 11 CERAMICCHIP 0 1uF 10 16V C218 1 126 947 11 ELECT 47uF 20 35V C219 1 126 961 11 ELECT 2 2uF 20 50V C220 1 107 826 11 CERAMICCHIP 0 1uF 10 16V C221 1 126 947 11 ELECT 47uF 20 35V C222 1 126 964 11 ELECT 10uF 20 50V C225 1 107 826 11 CERAMICCHIP 0 1uF 10 16V C226 1 165 883 11 CERAMICCHIP 10000PF 10 630V C301 1 126 947 11 ELECT 47uF 20 35V C302 1 126...

Page 93: ...P 0 01uF 10 25V C711 1 162 970 11 CERAMICCHIP 0 01uF 10 25V C713 1 162 970 11 CERAMICCHIP 0 01uF 10 25V C714 1 162 970 11 CERAMICCHIP 0 01uF 10 25V C715 1 164 677 11 CERAMICCHIP 0 033uF 10 16V C716 1 162 927 11 CERAMICCHIP 100PF 5 50V C717 1 126 964 11 ELECT 10uF 20 50V C718 1 125 837 91 CERAMICCHIP 1uF 10 6 3V C719 1 162 970 11 CERAMICCHIP 0 01uF 10 25V C720 1 126 947 11 ELECT 47uF 20 35V C721 1 ...

Page 94: ...ISTOR BC857CE6327 Q316 8 729 421 19 TRANSISTOR UN2213 Q401 6 550 286 01 TRANSISTOR BC847CE6327 Q402 8 729 421 22 TRANSISTOR UN2211 Q403 8 729 010 25 TRANSISTOR MSD601 RT1 Q404 8 729 904 87 TRANSISTOR 2SB1197K R Q405 6 550 286 01 TRANSISTOR BC847CE6327 Q407 8 729 421 19 TRANSISTOR UN2213 Q410 8 729 421 22 TRANSISTOR UN2211 Q412 8 729 904 87 TRANSISTOR 2SB1197K R Q602 8 729 045 17 TRANSISTOR 2SB1561...

Page 95: ...L CHIP 1 5K 5 1 10W R319 1 216 830 11 METAL CHIP 5 6K 5 1 10W R320 1 216 823 11 METAL CHIP 1 5K 5 1 10W R321 1 216 823 11 METAL CHIP 1 5K 5 1 10W R322 1 216 823 11 METAL CHIP 1 5K 5 1 10W R323 1 218 871 11 METAL CHIP 10K 0 5 1 10W R324 1 218 871 11 METAL CHIP 10K 0 5 1 10W R325 1 216 829 11 METAL CHIP 4 7K 5 1 10W R326 1 216 829 11 METAL CHIP 4 7K 5 1 10W R327 1 216 817 11 METAL CHIP 470 5 1 10W R...

Page 96: ... R694 1 216 809 11 METAL CHIP 100 5 1 10W R696 1 216 817 11 METAL CHIP 470 5 1 10W R699 1 216 809 11 METAL CHIP 100 5 1 10W R703 1 216 864 11 SHORT CHIP 0 R706 1 216 845 11 METAL CHIP 100K 5 1 10W R707 1 216 864 11 SHORT CHIP 0 R711 1 216 851 11 METAL CHIP 330K 5 1 10W R712 1 216 851 11 METAL CHIP 330K 5 1 10W R726 1 216 864 11 SHORT CHIP 0 R733 1 216 864 11 SHORT CHIP 0 R738 1 216 864 11 SHORT CH...

Page 97: ...15 1 107 826 11 CERAMICCHIP 0 1uF 10 16V C116 1 107 826 11 CERAMICCHIP 0 1uF 10 16V C117 1 107 826 11 CERAMICCHIP 0 1uF 10 16V C118 1 107 826 11 CERAMICCHIP 0 1uF 10 16V C119 1 107 826 11 CERAMICCHIP 0 1uF 10 16V C120 1 107 826 11 CERAMICCHIP 0 1uF 10 16V C121 1 117 681 11 ELECTCHIP 100uF 20 16V C122 1 107 826 11 CERAMICCHIP 0 1uF 10 16V C123 1 126 204 11 ELECTCHIP 47uF 20 16V C124 1 107 826 11 CE...

Page 98: ... FERRITE 0uH FB107 1 469 796 21 FERRITE 0uH FB108 1 469 796 21 FERRITE 0uH FB109 1 469 796 21 FERRITE 0uH FB110 1 469 796 21 FERRITE 0uH FB111 1 469 796 21 FERRITE 0uH FB112 1 469 796 21 FERRITE 0uH FB113 1 469 796 21 FERRITE 0uH FB114 1 469 796 21 FERRITE 0uH FB115 1 469 796 21 FERRITE 0uH FB116 1 469 796 21 FERRITE 0uH FB117 1 469 796 21 FERRITE 0uH FB118 1 469 796 21 FERRITE 0uH FB119 1 469 796...

Page 99: ...W R198 1 216 808 11 METAL CHIP 82 5 1 10W R199 1 216 808 11 METAL CHIP 82 5 1 10W R201 1 216 845 11 METAL CHIP 100K 5 1 10W R202 1 216 845 11 METAL CHIP 100K 5 1 10W R203 1 216 845 11 METAL CHIP 100K 5 1 10W R204 1 216 845 11 METAL CHIP 100K 5 1 10W R205 1 216 845 11 METAL CHIP 100K 5 1 10W R206 1 216 845 11 METAL CHIP 100K 5 1 10W R207 1 216 845 11 METAL CHIP 100K 5 1 10W R208 1 216 845 11 METAL ...

Page 100: ...1 216 295 91 SHORT CHIP 0 JR103 1 216 296 11 SHORT CHIP 0 JR104 1 216 296 11 SHORT CHIP 0 JR105 1 216 295 91 SHORT CHIP 0 JR106 1 216 296 11 SHORT CHIP 0 JR107 1 216 296 11 SHORT CHIP 0 JR108 1 216 296 11 SHORT CHIP 0 JR109 1 216 296 11 SHORT CHIP 0 JR110 1 216 296 11 SHORT CHIP 0 JR111 1 216 296 11 SHORT CHIP 0 JR112 1 216 296 11 SHORT CHIP 0 JR113 1 216 296 11 SHORT CHIP 0 JR114 1 216 296 11 SHO...

Page 101: ...1 125 777 11 CERAMICCHIP 0 1uF 10 10V C123 1 124 779 00 ELECTCHIP 10uF 20 16V C124 1 125 777 11 CERAMICCHIP 0 1uF 10 10V C126 1 125 777 11 CERAMICCHIP 0 1uF 10 10V C127 1 125 777 11 CERAMICCHIP 0 1uF 10 10V C128 1 125 777 11 CERAMICCHIP 0 1uF 10 10V C129 1 125 777 11 CERAMICCHIP 0 1uF 10 10V C131 1 125 777 11 CERAMICCHIP 0 1uF 10 10V C132 1 125 777 11 CERAMICCHIP 0 1uF 10 10V C133 1 125 777 11 CER...

Page 102: ...V C638 1 125 777 11 CERAMICCHIP 0 1uF 10 10V C641 1 125 777 11 CERAMICCHIP 0 1uF 10 10V C642 1 125 777 11 CERAMICCHIP 0 1uF 10 10V C643 1 125 777 11 CERAMICCHIP 0 1uF 10 10V C644 1 125 777 11 CERAMICCHIP 0 1uF 10 10V C645 1 125 777 11 CERAMICCHIP 0 1uF 10 10V C646 1 125 777 11 CERAMICCHIP 0 1uF 10 10V C655 1 125 777 11 CERAMICCHIP 0 1uF 10 10V C656 1 125 777 11 CERAMICCHIP 0 1uF 10 10V C657 1 125 ...

Page 103: ...RAMICCHIP 0 01uF 10 16V C1210 1 164 943 11 CERAMICCHIP 0 01uF 10 16V C1211 1 164 943 11 CERAMICCHIP 0 01uF 10 16V C1212 1 164 943 11 CERAMICCHIP 0 01uF 10 16V C1213 1 164 943 11 CERAMICCHIP 0 01uF 10 16V C1214 1 164 943 11 CERAMICCHIP 0 01uF 10 16V C1215 1 164 943 11 CERAMICCHIP 0 01uF 10 16V C1217 1 164 943 11 CERAMICCHIP 0 01uF 10 16V C1218 1 164 943 11 CERAMICCHIP 0 01uF 10 16V C1219 1 164 943 ...

Page 104: ...6W R158 1 218 990 11 SHORT CHIP 0 R159 1 218 961 11 RES CHIP 4 7K 5 1 16W R161 1 218 965 11 RES CHIP 10K 5 1 16W R162 1 218 957 11 RES CHIP 2 2K 5 1 16W R163 1 218 938 11 RES CHIP 56 5 1 16W R164 1 218 929 11 RES CHIP 10 5 1 16W R165 1 218 929 11 RES CHIP 10 5 1 16W R166 1 218 957 11 RES CHIP 2 2K 5 1 16W R167 1 218 938 11 RES CHIP 56 5 1 16W R168 1 218 938 11 RES CHIP 56 5 1 16W R170 1 218 965 11...

Page 105: ...669 1 218 957 11 RES CHIP 2 2K 5 1 16W R671 1 218 990 11 SHORT CHIP 0 R672 1 218 990 11 SHORT CHIP 0 R674 1 218 990 11 SHORT CHIP 0 R675 1 218 933 11 RES CHIP 22 5 1 16W R676 1 218 933 11 RES CHIP 22 5 1 16W R677 1 218 933 11 RES CHIP 22 5 1 16W R678 1 218 933 11 RES CHIP 22 5 1 16W R679 1 218 933 11 RES CHIP 22 5 1 16W R680 1 218 933 11 RES CHIP 22 5 1 16W R681 1 218 933 11 RES CHIP 22 5 1 16W R6...

Page 106: ...00 5 1 16W R1415 1 218 933 11 RES CHIP 22 5 1 16W R1416 1 218 941 81 RES CHIP 100 5 1 16W R1417 1 218 941 81 RES CHIP 100 5 1 16W R1419 1 218 941 81 RES CHIP 100 5 1 16W R1424 1 216 864 11 SHORT CHIP 0 R1443 1 218 990 11 SHORT CHIP 0 R1444 1 218 990 11 SHORT CHIP 0 R1445 1 218 990 11 SHORT CHIP 0 R1701 1 218 935 11 RES CHIP 33 5 1 16W R1702 1 218 935 11 RES CHIP 33 5 1 16W R1703 1 218 935 11 RES C...

Page 107: ...11 RES CHIP 22 5 1 16W R3620 1 218 933 11 RES CHIP 22 5 1 16W R3629 1 218 939 11 RES CHIP 68 5 1 16W R3630 1 218 933 11 RES CHIP 22 5 1 16W R3631 1 218 933 11 RES CHIP 22 5 1 16W R3637 1 218 965 11 RES CHIP 10K 5 1 16W R3638 1 218 965 11 RES CHIP 10K 5 1 16W R3639 1 218 965 11 RES CHIP 10K 5 1 16W R3650 1 218 935 11 RES CHIP 33 5 1 16W R3651 1 218 940 11 RES CHIP 82 5 1 16W R3652 1 218 933 11 RES ...

Page 108: ...ETWORK10K 1005X4 RB330 1 234 378 21 RES NETWORK10K 1005X4 RB331 1 234 378 21 RES NETWORK10K 1005X4 RB332 1 234 378 21 RES NETWORK10K 1005X4 RB333 1 234 714 11 RES NETWORK56 1005X4 RB334 1 234 714 11 RES NETWORK56 1005X4 RB335 1 242 963 21 RES NETWORK33 1005X4 RB336 1 242 963 21 RES NETWORK33 1005X4 RB337 1 242 963 21 RES NETWORK33 1005X4 RB338 1 242 963 21 RES NETWORK33 1005X4 RB339 1 242 963 21 R...

Page 109: ...21 RES NETWORK47 1005X4 RB823 1 234 371 21 RES NETWORK47 1005X4 RB824 1 234 371 21 RES NETWORK47 1005X4 RB825 1 234 371 21 RES NETWORK47 1005X4 RB826 1 242 963 21 RES NETWORK33 1005X4 RB827 1 242 963 21 RES NETWORK33 1005X4 RB828 1 242 963 21 RES NETWORK33 1005X4 RB831 1 242 963 21 RES NETWORK33 1005X4 RB832 1 234 378 21 RES NETWORK10K 1005X4 RB833 1 234 378 21 RES NETWORK10K 1005X4 RB901 1 234 36...

Page 110: ...tion Remarks 2 589 942 61 MANUAL INSTRUCTION PORTUGUESE AEP 2 589 942 71 MANUAL INSTRUCTION DANISH AEP 2 589 942 81 MANUAL INSTRUCTION SWEDISH AEP 2 589 942 91 MANUAL INSTRUCTION FINNISH AEP 3 071 119 91 LID BATTERY for RMT D217P ...

Page 111: ...RDR HX510 150 Sony Corporation Home Electronics Network Company 9 874 868 11 2005D1600 1 2005 4 Published by Quality Assurance Dept ...

Reviews: