background image

93

Settings (Basic Settings)

S

e

ttings and A

d

jus
tments

5

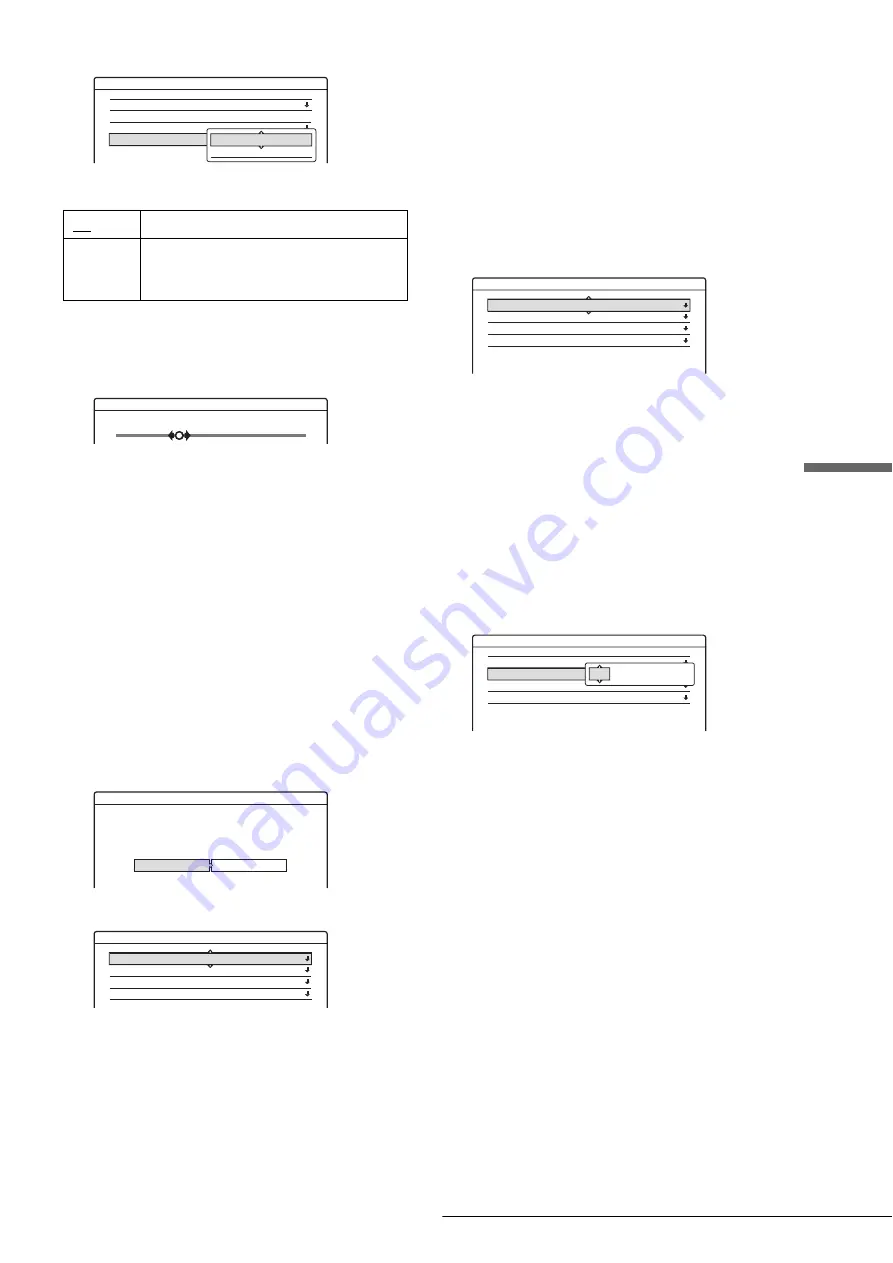
Press 

M

/

m

 to select “AFT,” then press ENTER.

6

Press 

M

/

m

 to select “On,” then press ENTER.

If the picture is not clear

A

Press 

M

/

m

 to select 

Off,

 then press ENTER.

The fine tuning bar appears.

B

Press 

<

/

,

 to obtain a clearer picture, the 

press ENTER.

7

To preset or disable another channel, repeat steps 
3 and 6.

Set VCR Plus+ Channels

Sets up the guide channel number assigned to each channel.
You need to set this correctly when you set the timer recording 
using the VCR Plus+ function. For details, see page 25.

Clock

Auto (Auto Clock Set)

Turns on the Auto Clock Set function when a channel in your 
local area broadcasts a time signal.

1

Follow steps 1 to 3 of Using the Setup Displays” 
(page 91)
 to select “Settings” in the Setup Display.

2

Press 

M

/

m

 to select “Clock,” then press ENTER.

3

Press 

<

/

,

 to select “Auto,” then press ENTER.

4

Press 

M

/

m

 to select “Full Auto,” then press 

ENTER.

5

Press 

M

/

m

 to select “Yes,” then press ENTER.

The recorder automatically sets the clock by 
searching for a channel that carries a time signal and 
sets your time zone and Daylight Saving Time (if 
applicable).

If the clock does not activate

If your clock is set to the wrong time zone or Daylight Saving 
Time, you can adjust these settings without turning off the Auto 
Clock Set function.

1

Follow steps 1 to 3 of “Using the Setup Displays” 
(page 91)
 to select “Settings” in the Setup Display.

2

Press 

M

/

m

 to select “Clock,” then press ENTER.

3

Press 

<

/

,

 to select “Auto,” then press ENTER.

4

Press 

M

/

m

 to select “Full Auto,” then press 

ENTER.

5

Press 

M

/

m

 to select “No,” then press ENTER.

6

Press 

M

/

m

 to select the item you want to set and 

press ENTER. Then press 

M

/

m

 to make the 

setting and press ENTER.

Clock Set CH

Select a channel that carries a time signal using the 
number buttons. 
Use this option if you know of a channel that carries 
a time signal. Most PBS member stations broadcast a 
time signal. For the fastest response select your local 
PBS station. Leave the setting at “--” to have the 
recorder automatically search for a channel that 
carries a time signal. To return to “- -,” enter “0.”

Time Zone

Select the time zone of your area, or select “Auto” to 
have the recorder automatically set your time zone.
The options are:
Auto 

y

 Atlantic 

y

 Eastern 

y

 Central 

y


Mountain 

y

 Pacific 

y

 Alaska 

y

 Hawaii 

y


Auto

Daylight Saving 

Select “On” or “Off” (standard time), or select 
“Auto” to have the recorder automatically set the 
daylight saving time.

z

Hint

If you set “Full Auto” to “Yes,” the Auto Clock Set function is activated 
whenever the recorder is turned off.

Manual (Manual Clock Set)

If the Auto Clock Set function did not set the clock correctly for 
your local area, set the clock manually.

1

Follow steps 1 to 3 of “Using the Setup Displays 
(page 91)
 to select “Settings” in the Setup Display.

On

Normally select this.

Off

Allows you to adjust the pictures manually. 
Select this if the Auto Fine Tuning function 
does not work effectively.

Settings - Tuner Preset

Ch1

Antenna / Cable :

Auto Preset

Manual Set :

AFT :

Cable

Add

On

On

Off

Fine Tuning

Ch34

Settings - Clock

Select a method for setting the clock.
If you select "Auto", this recorder will look for a
time signal when you turn it off.

Auto

Manual

Settings - Clock - Auto Clock Set

Full Auto :

Clock Set CH :

Time Zone :

Daylight Saving :

Yes

– –

Settings - Clock - Auto Clock Set

Full Auto :

Clock Set CH :

Time Zone :

Daylight Saving :

No

– –

Auto

Auto

Settings - Clock - Auto Clock Set

Full Auto :

Clock Set CH :

Time Zone :

Daylight Saving :

No

 – –

Auto

Auto 

– –

,

continued

Summary of Contents for RDR-GX7

Page 1: ...3 081 195 71 1 2003 Sony Corporation DVD Recorder RDR GX7 Operating Instructions ...

Page 2: ...ng measures Reorient or relocate the receiving antenna Increase the separation between the equipment and receiver Connect the equipment into an outlet on a circuit different from that to which the receiver is connected Consult the dealer or an experienced radio TV technician for help VCR Plus and PlusCode are registered trademarks of Gemstar Development Corporation The VCR Plus system is manufactu...

Page 3: ...s Install in accordance with the manufacturer s instructions 8 Do not install near any heat sources such as radiators heat resisters stoves or other apparatus including amplifiers that produce heat 9 Do not defeat the safety purpose of the polarized or grounding type plug A polarized plug has two blades with one wider than the other A grounding type plug has two blades and a third grounding prong ...

Page 4: ...a title 40 Timer Recording 40 Setting the timer manually Standard 40 Checking changing canceling timer settings Timer List 42 Changing the priority of overlapped settings 43 Recording TV programs using the VCR Plus system 44 Adjusting the Recording Picture Quality and Size 46 Recording from External Equipment with a Timer Synchro Rec 47 Playback Before Playing 49 Playable discs 49 Playing Discs 50...

Page 5: ...of the Edited Contents Copy Dubbing 86 Recording From Equipment Connected to the LINE IN Jacks 88 Connecting other equipment to the LINE 2 IN jacks 88 Recording from connected equipment 88 Settings and Adjustments About the Setup Display Structure 90 Using the Setup Displays 91 Settings Basic Settings 92 Video Settings 94 Audio Settings 95 Features Settings 97 Options Settings 99 Easy Setup Resett...

Page 6: ... playing or editing the disc Moreover you can have the recorder show the title s contents using thumbnail images The recorder also automatically takes program label information from the XDS Extended Data Service and displays it as the title name not available in some areas TV Virtual Surround Settings TVS page 58 Using only your TV s stereo speakers the recorder is capable of reproducing dynamic s...

Page 7: ...ed as scenes in a scene list where you can instantly delete or rearrange the scenes at will The recorder remembers which scenes you selected and saves this information as a program You can call up a program at any time and make additional copies of the program to a DVD Auto Scene Chaptering DVD RW in VR mode only page 78 79 81 While copying a DV Digital8 format tape to a DVD RW the recorder automa...

Page 8: ...can record on the following type of discs Step 2 Format the disc to start recording Notes Insert the disc in the recorder Unlike a VCR the recorder automatically starts formatting when an unused disc is inserted This is necessary to prepare the disc for recording When using a DVD RW These discs will be formatted in DVD RW Video format This type of disc can be played back on a variety of other DVD ...

Page 9: ... more accessible on a disc than on a tape the procedure is simple and unlike conventional VCRs no rewinding is necessary What are titles and chapters DVD contents consist of sections called titles and smaller sub sections called chapters On this recorder a title is created between the points where you start and stop a recording Chapters are created automatically at specified intervals or can be cr...

Page 10: ...e disc Playlist edit DVD RWs in VR mode only To edit a conventional tape without affecting the original recording you had to connect another VCR copy the master tape using the two VCRs and one more tape and start editing the copied tape When using a DVD RW in Video mode The disc needs to be finalized first to enable playback on anything other than this recorder No more editing or recording can be ...

Page 11: ... REC indicator 40 Lights up when a timer recording is set FINALIZED indicator 73 Lights up if an inserted disc has been finalized PROGRESSIVE indicator 51 Lights up when outputting progressive signals N ZOOM buttons 32 Switches the information displayed in the Title List menu O CURSOR MODE button 32 Switches the cursor page mode in the Title List etc P TOOLS button 32 Displays the TOOLS menu Q M m...

Page 12: ...laying a disc The button has a tactile dot G TIMER button 40 44 Displays the Timer programming menu on the TV screen H TOP MENU button 51 Displays the disc s menu on the TV screen I DISPLAY button 40 56 Displays disc information or playing recording status on the TV screen J TIME TEXT button 56 Displays the time information of the disc K SYSTEM MENU button 31 Displays the System Menu on the TV scr...

Page 13: ...he wide mode settings of your TV e MENU button 51 Displays the disc s menu on the TV screen ea INSTANT SEARCH button 52 Briefly fast forwards the current scene es INSTANT REPLAY button 52 Replays the current scene ed TOOLS button 32 Displays the TOOLS menu ef ZOOM buttons 32 Switches the information displayed in the Title List menu eg M m ENTER button 33 Selects items or settings eh NEXT button 52...

Page 14: ...n off the front panel display by setting Dimmer to Display Off in Options Setup page 99 Rear panel A VHF UHF IN OUT jacks 16 Connects antenna cables B COMPONENT VIDEO OUT Y PB PR jacks 18 Connects equipment having component video input jacks C AC IN terminal 22 Connects the power cord D LINE OUT S VIDEO VIDEO AUDIO L R 1 2 jacks 18 20 Connects the input of external equipment using an audio video o...

Page 15: ...ing the Video Cords m Step 4 Connecting the Audio Cords m Step 5 Connecting the Power Cord m Step 6 Preparing the Remote m Step 7 Easy Setup Quick Overview page 15 Step 1 Unpacking page 16 Step 2 Connecting the Antenna Cable page 16 Step 3 Connecting the Video Cords page 18 Step 4 Connecting the Audio Cords page 19 Step 5 Connecting the Power Cord page 22 Step 6 Preparing the Remote page 22 Step 7...

Page 16: ...al antenna connector not supplied to connect the antenna to the recorder If you have separate cables for VHF and UHF antennas use a UHF VHF band mixer not supplied to connect the antenna to the recorder Hookup 1 Antenna only no cable TV or cable without cable box Use this hookup if you are using a VHF UHF antenna or separate VHF and UHF antennas Also use this hookup if you watch cable channels wit...

Page 17: ... screen Hookup 3 Connecting a cable box with only a few scrambled channels Use this hookup if your cable system scrambles only a few channels With this hookup You can record any non scrambled channel by selecting the channel on the recorder You cannot record scrambled channels that require a cable box IN OUT AC IN S VIDEO VIDEO R AUDIO L COMPONENT VIDEO OUT PB Y PR S VIDEO VIDEO R AUDIO L 1 3 1 2 ...

Page 18: ...der by operating the remote toward the TV This feature is convenient when you placed the recorder and the TV away from each other After connecting the recorder to other equipment in pattern A B or C above connect the CONTROL S IN jack to your TV s CONTROL S OUT jack using a control S cord not supplied Refer to the instructions supplied with the TV to be connected AC IN S VIDEO VIDEO R AUDIO L COMP...

Page 19: ...n that best suits your system Be sure to read the instructions for the components you wish to connect 1 Manufactured under license from Dolby laboratories Dolby Pro Logic and the double D symbol are trademarks of Dolby Laboratories 2 DTS and DTS Digital Out are trademarks of Digital Theater Systems Inc Connection Your setup TV Surround effects Dynamic Wide Stereo amplifier receiver and two speaker...

Page 20: ...plied audio video cord instead of using a separate stereo audio cord A AC IN S VIDEO VIDEO R AUDIO L COMPONENT VIDEO OUT PB Y PR S VIDEO VIDEO R AUDIO L 1 3 1 2 VHF UHF IN OUT DIGITAL OUT PCM DTS DOLBY DIGITAL COAXIAL OPTICAL CONTROL S IN LINE IN LINE OUT LINE OUT S VIDEO VIDEO R AUDIO L 1 2 A AUDIO INPUT L R VIDEO DVD recorder to LINE OUT R AUDIO L 1 or 2 TV yellow white red yellow white red Audi...

Page 21: ...to On under Audio in Easy Setup page 24 Otherwise no sound or a loud noise will come from your speakers C C 1 C 2 AC IN S VIDEO VIDEO R AUDIO L COMPONENT VIDEO OUT PB Y PR S VIDEO VIDEO R AUDIO L 1 3 1 2 VHF UHF IN OUT DIGITAL OUT PCM DTS DOLBY DIGITAL COAXIAL OPTICAL CONTROL S IN LINE IN LINE OUT C 2 C 1 DIGITAL OUT PCM DTS DOLBY DIGITAL COAXIAL OPTICAL LINE OUT S VIDEO VIDEO R AUDIO L 1 2 DVD re...

Page 22: ...lace Do not drop any foreign object into the remote casing particularly when replacing the batteries Do not expose the remote sensor to direct sunlight or a lighting apparatus Doing so may cause a malfunction If you do not use the remote for an extended period of time remove the batteries to avoid possible damage from battery leakage and corrosion Step 7 Easy Setup Follow the steps below to make t...

Page 23: ...nd 2 Antenna Hookup 3 Cable h Press ENTER The Tuner Preset function automatically starts searching for all of the receivable channels and presets them To set the channels manually see page 92 After the Tuner Preset is finished the Setup Display for selecting the aspect ratio of the connected TV appears i Press M m to select the setting that matches your TV type If you have a 4 3 standard TV 4 3 Le...

Page 24: ...se the item that matches the audio connection you selected on pages 20 to 21 through Off On only if the amplifier receiver has a DTS decoder o Press ENTER when Finish appears Easy Setup is finished All connections and setup operations are complete To return to the previous step Press RETURN z Hint If you want to run Easy Setup again select Easy Setup in the Setup Display page 100 Notes If there ar...

Page 25: ...us Channels then press ENTER The display for setting VCR Plus channels appears e Press M m to select Guide CH TV CH then press ENTER f Enter the guide channel number assigned in the program guide using the number buttons then press SET g Enter the TV channel number For Hookup 1 or 3 page 16 Enter the actual number on your TV and recorder using the number buttons then press SET For Hookup 2 page 17...

Page 26: ...ew code number the code number previously entered will be erased When you replace the batteries of the remote the code number may be reset to the default setting Set the appropriate code number again Controlling TVs with the remote a Slide the TV DVD switch to TV b Hold down 1 c Enter your TV s manufacturer code see Code numbers of controllable TVs below using the number buttons d Release 1 When t...

Page 27: ...controllable AV amplifiers receivers If more than one code number is listed try entering them one at a time until you find the one that works with your AV amplifier receiver Manufacturer Code number Sony 01 default Akai 04 AOC 04 Centurion 12 Coronado 03 Curtis Mathes 12 Daytron 12 Emerson 03 04 14 Fisher 11 General Electric 06 10 Gold Star 03 04 17 Hitachi 02 03 J C Penney 04 12 JVC 09 KMC 03 Mag...

Page 28: ...ress ENTER d Press M m to select Command Mode then press ENTER e Press M m to select the Command mode DVD1 DVD2 or DVD3 then press ENTER f Slide the COMMAND MODE switch on the remote so it matches the mode you selected above To return to the previous step Press RETURN SYSTEM MENU M m ENTER COMMAND MODE RETURN SETUP Settings Video Audio Features Options Easy Setup Tuner Preset Set VCR Plus Channels...

Page 29: ...otection signals that prohibit any copying cannot be recorded How to connect to record on other equipment Connect a VCR or similar recording device to the LINE OUT jacks of this recorder Notes If you pass the recorder signals via the VCR you may not receive a clear image on the TV screen Do not connect the yellow LINE IN VIDEO jack when using an S VIDEO cord not supplied AC IN S VIDEO VIDEO R AUDI...

Page 30: ...ng from External Equipment with a Timer Synchro Rec on page 47 Refer to your satellite receiver s instructions for more information Notes Synchro Recording does not work with some boxes For details refer to the box s operating instructions When connecting the LINE IN jacks to the cable box be sure to also connect the recorder s antenna to the cable box AC IN S VIDEO VIDEO R AUDIO L COMPONENT VIDEO...

Page 31: ...of the recorder s main functions 1 TITLE LIST page 53 64 Turns on the Title List menu which shows recorded titles on the disc 2 TIMER page 40 Allows you to set a new timer recording setting 3 TIMER LIST page 42 Turns on the Timer List menu which allows you to check change or cancel timer settings 4 DV D8 EDIT page 79 Activates the DV Edit function which allows you to record and edit the contents o...

Page 32: ...IST The Title List menu appears 2 Press TOOLS The TOOLS menu appears 3 Press M m to select either Original or Playlist whichever is not displayed then press ENTER The display switches to the selected Title List menu To scroll the list display by page Page mode Press CURSOR MODE while the list display is turned on The display enters Page mode Each time you press M m the entire Title List changes to...

Page 33: ... The sub menu displays options for a specific title A Press M m to select the title on the list then press ENTER The sub menu appears B Press M m to select the option then press ENTER c Press RETURN repeatedly to turn off the list display To return to the previous display Press RETURN Sort Date Number Title My Movies TITLE LIST ORIGINAL RW VR 1 5 4 7GB 1 2ch 1 00PM 2 00PM 2 5ch 8 00PM 9 00PM 3 12c...

Page 34: ...character A Press M m to move the cursor to the input row B Press to move the cursor to the right of the point where you want to insert a character C Press M m to select the character you want to insert then press ENTER To erase all the characters Press M m to select Clear All then press ENTER d Press M m to select Finish then press ENTER To cancel the setting select Cancel To use the number butto...

Page 35: ...on 1 0 up to 4 speed DVD Rs Revision 1 0 or up to 4 speed DVD RWs Note that high speed discs will not record at higher speed You cannot record on the disc if it is not 1 speed compatible Use a disc with CPRM to record Copy Once TV programs page 36 It is recommended that you use discs with For Video printed on their packing You cannot add new recordings to DVD Rs and DVD RWs Video mode that contain...

Page 36: ...w may cause slight inaccuracies with the recording time Recording a program with poor reception or a program or video source of low picture quality Recording on a disc that has already been edited Recording only a still picture or just sound Unrecordable pictures Pictures with copy protection cannot be recorded on this recorder When the recorder receives a copy guard signal while recording the rec...

Page 37: ...large enough for the recording You cannot free up disc space on a DVD R Erasing a title will only hide the title name in the Title List menu The erased titles will still take up space on the disc How programs are recorded on a DVD RW VR mode A program is recorded on the free disc space a Check that the total remaining disc space is large enough for recording To free up disc space You can free up d...

Page 38: ... are erased freeing up disc space If you want to change your selection select Change D Press RETURN repeatedly to turn off the Title List menu Note You cannot erase a title during playback or recording Recording TV programs a Press 1 The recorder turns on and the power indicator on the front panel lights up in green b Turn on the TV and switch the input selector on your TV so that the signal from ...

Page 39: ...L1 L2 L3 or DV in step 5 For details see Recording from connected equipment page 88 You can also select the recording mode using the TOOLS menu page 46 Notes After pressing z REC it may take a short while to start recording While recording or during recording pause you cannot change the recording mode If there is a power failure the program you are recording may be erased When you use Hookup 2 pag...

Page 40: ...ed you may not be able to make additional recordings or edit the disc Timer Recording You can set the timer for a total of 30 programs up to one month in advance There are two setting methods the manual setting and VCR Plus setting Standard Set the date time and channel of the program manually VCR Plus Enter the PlusCode number designated for each TV program page 44 Setting the timer manually Stan...

Page 41: ...t Cancel To confirm change or cancel timer recording See Checking changing canceling timer settings Timer List page 42 z Hints For recording over the next day leave the starting date setting as it is and enter the ending time in the setting The date will automatically change to the next day You can also display the timer programming menu by selecting TIMER from the System Menu selecting Set Timer ...

Page 42: ...ys the recording date time recording mode etc indicates the overlapped setting a red indicates the setting currently being recorded z grey indicates that the setting cannot be recorded in the selected recording mode c Press M m to select the setting you want to check change cancel then press ENTER The sub menu appears d Press M m to select one of the following items Modify Erase Check Overlap To m...

Page 43: ... settings overlap The timer setting set last has priority If the timer settings overlap the program that has priority will be recorded A timer recording of lower priority will be canceled start from the middle or stop on the way Check the overlapped timer settings and change the priority if necessary When the timer settings overlap If the timer is set using the manual or VCR Plus setting the progr...

Page 44: ...at program are set automatically Check that the TV and guide channels are correctly set in Set VCR Plus Channels in Settings page 93 a Press 1 b Turn on the TV and switch the input selector on your TV so that the signal from the recorder appears on the TV screen When using an amplifier receiver Turn on the amplifier receiver and select the appropriate channel so that you can hear sound from the re...

Page 45: ...onnected equipment turned on To stop recording during timer recording Press x REC STOP If the timer settings overlap See page 41 To confirm change or cancel timer recording See Checking changing canceling timer settings Timer List page 42 z Hints The Rec Mode Adjust function also works with this timer setting method page 41 You can extend the recording duration time during recording page 42 You ca...

Page 46: ...he actual picture size is recorded regardless of the setting For instance if a 16 9 size picture is received the disc records the picture as 16 9 even if Rec Screen Size is set to 4 3 For DVD RWs the screen size is fixed at 4 3 Rec NR noise reduction Reduces noise contained in the video signal Rec Video Equalizer Adjusts the picture in greater detail Press M m to select the item you want to adjust...

Page 47: ...ing two types of sound select Main Sub Both sounds can be recorded You can select either sound when playing a disc Select Main Sub only when using a DVD RW VR mode For other discs select Stereo Only stereo sound is recorded f Press REC MODE repeatedly to select the recording mode HQ HSP SP LP EP or SLP g Set the timer on the connected equipment to the time of the program you want to record and tur...

Page 48: ...nceled Any program that contains a Copy Never copy guard signal cannot be recorded When you record a program that contains a Copy Once signal use a DVD RW Ver 1 1 with CPRM in VR mode for recording For details see Unrecordable pictures page 36 When using the Synchro Rec function do not use the VCR control function on connected equipment To use the connected equipment while the recorder is standing...

Page 49: ...will also play on this recorder If you try to play any other DVD VIDEO the message Playback prohibited by region code will appear on the TV screen Depending on the DVD VIDEO no region code indication may be labeled even though playing the DVD VIDEO is prohibited by area restrictions DVD VIDEO DVD RW Ver 1 0 Ver 1 1 Ver 1 1 with CPRM DVD RW DVD R DVD R Music CD CD R CD RW Music CD format only ALL R...

Page 50: ... or OPTICAL jack When you play a DVD with DTS sound tracks set DTS to On in the Audio Setup page 96 If you connect the recorder to audio equipment without a built in DTS decoder do not set DTS to On in the Audio Setup page 96 A loud noise may come out from the speakers affecting your ears or causing the speakers to be damaged Notes The following type of high speed discs can be played back on this ...

Page 51: ...GRESSIVE indicator lights up and connect the recorder using the COMPONENT VIDEO OUT jacks to a TV that is able to accept the video signal in progressive format Press PROGRESSIVE repeatedly to toggle the displays as follows INTERLACE Select this when you are connected to a standard Interlace format TV PROGRESSIVE Select this when you are connected to a TV compatible with progressive signals The rec...

Page 52: ...rd fast reverse search During playback briefly push the Jog Stick to the left or right Each time you push the Jog Stick the search speed changes as follows fast reverse m fast forward M FR1 T t FF1 FR2 T T t t FF2 FR3 T T T t t t FF3 To resume to the normal speed press H PLAY When you push and hold the Jog Stick down to the left or right fast forward fast reverse continues at the selected speed un...

Page 53: ...u open the disc tray you play another title you switch the Title List menu Original or Playlist you edit the disc such as erasing a title you change the settings on the recorder you turn off the recorder CD only you make a recording except for DVD RWs in VR mode Selecting a Recorded Title on a Disc The Title List menu displays all the titles recorded on the disc and you can select the one you want...

Page 54: ...in the background 4 While watching the playback picture press H PLAY X PAUSE or m M to select the scene you want to set for a thumbnail picture then press ENTER Playback pauses at the selected scene and the display asks for confirmation To change the selection select Change 5 Press to select OK then press ENTER The scene is set for the title s thumbnail picture 6 Press RETURN to turn off the displ...

Page 55: ...ring the time code The display for entering the number appears Example Title Search The number in parentheses indicates the total number of titles tracks etc c Press the number buttons to select the number of the title chapter track time code etc you want For example Time Search To find a scene at 2 hours 10 minutes and 20 seconds enter 21020 If you make a mistake Press CLEAR to cancel the number ...

Page 56: ...eatedly while the Display 2 is displayed above Each time you press the button the display changes in the following order When playing a DVD Playing time of the current title hours minutes seconds Remaining time of the current title Playing time of the current chapter Remaining time of the current chapter Disc name DVD RW DVD RW DVD R only When playing a CD Playing time of the current track minutes...

Page 57: ... right channel and the instruments on the left channel you can listen to the instruments only from both speakers by selecting the left channel Press AUDIO repeatedly during playback to select one of the audio options The following display appears Example DVD VIDEO When playing a DVD VIDEO Depending on the DVD VIDEO the choice of language varies When four numbers are displayed they indicate a langu...

Page 58: ...he disc contains DTS tracks page 96 TV Virtual Surround Settings TVS When you connect a stereo TV or two front speakers TVS TV Virtual Surround lets you enjoy surround sound effects by using sound imaging to create virtual rear speakers from the sound of the front speakers L left R right without using actual rear speakers If the recorder is set up to output the signal from the DIGITAL OUT OPTICAL ...

Page 59: ...rround setting of the connected TV or amplifier receiver Make sure that your listening position is between and at an equal distance from your speakers and that the speakers are located in similar surroundings Not all discs will respond to the Night function in the same way The TVS function cannot be used with discs recorded on this recorder Changing the Angles If various angles multi angles for a ...

Page 60: ...corded on it You also may not be able to turn them off You cannot change the subtitles when playing a disc recorded on this recorder Adjusting the Playback Picture and Sound You can adjust the video audio signal from the recorder to obtain the picture or sound quality you want Adjusting the picture quality a Press TOOLS during playback The TOOLS menu appears b Press M m to select Video Settings th...

Page 61: ...the BNR setting may have little effect Adjusting the sound quality a Press TOOLS The TOOLS menu appears b Press M m to select Audio Settings then press ENTER The following display appears c Press M m to select the item then press ENTER Example Surround TVS Surround DVD VIDEO only Selects one of the surround modes For more information see TV Virtual Surround Settings TVS page 58 Off default Dynamic...

Page 62: ...status Edit options for DVD RWs Video mode DVD RWs DVD Rs You can perform simple edits Since Video mode titles are actual recordings on the disc you cannot undo the edits you have done Basic edit functions available with Video mode titles Setting protection against erasure page 64 Labeling a title page 64 Erasing a title page 65 Erasing multiple titles page 65 Notes Once the disc is finalized you ...

Page 63: ...a digest with the goal scenes and other highlights but you also want to keep the original recording In this case you can collect the scenes of the highlights and create playback information a Playlist title You can even rearrange the scene order within the Playlist title The above is only an example Try using the Playlist s various edit functions or use them in conjunction with an Original edit De...

Page 64: ...to select Finish A new Title List menu appears with the title of the entered name Protecting a title Protect Title You can set protection for a title so that the title cannot be erased a Press TITLE LIST The Title List menu appears If you are using a DVD RW VR mode press TOOLS and select Original from the TOOLS menu b Press M m to select the title then press ENTER The sub menu appears c Press M m ...

Page 65: ...38 Erasing multiple titles Erase Titles You can erase more than two titles at one time using the TOOLS menu For DVD Rs Note that erasing titles on a DVD R does not increase available disc space For DVD RWs VR mode Note that you are unable to erase the original title if there is a Playlist title derived from the original title a Press TITLE LIST The Title List menu appears If you are using a DVD RW...

Page 66: ... press ENTER The sub menu appears c Press M m to select A B Erase then press ENTER The display for setting point A appears The selected title plays in the background The slider indicates the current playback point When the selected title is protected The display asks for confirmation To continue the procedure press to select Change The protection display appears Select Off by pressing then press E...

Page 67: ...otes Playback may momentarily stop when inserting a chapter mark A message will appear when no more chapter marks can be added In this case you may not be able to record or edit the disc Advanced Editing Playlist Edit This section explains how to create a Playlist and then covers available edit functions for the created Playlist Playlist titles can be created from scenes that are selected original...

Page 68: ...press ENTER The display asks for confirmation To view the selected scene select Preview To reset either the IN or OUT point select Change IN or Change OUT k Press to select OK then press ENTER The selected portion is captured as a scene and the display asks whether to continue scene capture Sort Date Number Title My Movies TITLE LIST ORIGINAL RW VR 1 5 4 7GB 1 2ch 1 00PM 2 00PM 2 5ch 8 00PM 9 00PM...

Page 69: ...ene you want to change then press ENTER The sub menu appears B Press M m to select Change IN then press ENTER The display for setting the IN point appears C Repeat steps 9 to 14 To reset the OUT point select Change OUT then repeat steps 10 to 14 The display returns to the Scene List menu To add another scene Press M m to select Add then press ENTER Repeat steps above To preview the entire Playlist...

Page 70: ... List Original menu appears press TOOLS and select Playlist from the TOOLS menu b Press M m to select the title then press ENTER The sub menu appears c Press M m to select Divide Title then press ENTER The display setting the dividing point appears The selected title starts to play in the background d While watching the picture on the screen move the playback point using H PLAY X PAUSE and m M e P...

Page 71: ...ct Enter Text and follow the explanations on page 34 h Press M m to select a name then press ENTER The titles are combined and the display returns to the Title List menu Additional Playlist edit functions You can also do the following edits for Playlists Label a Playlist title page 64 Erase a Playlist title page 65 Erase multiple Playlist titles page 65 Erase a section of a Playlist title A B Eras...

Page 72: ...ed on a different recorder Protecting a disc Protect Disc You can protect an entire disc To protect individual titles see page 64 Note that this protection is effective only for inadvertent edit commands and erasure a Press TOOLS while the disc is in the recorder The TOOLS menu appears b Press M m to select Disc Info then press ENTER The Disc Information display appears TOOLS M m ENTER RETURN Disc...

Page 73: ...er Notes Depending on the condition of the disc recording or the DVD equipment discs may not play even when the discs are finalized The recorder may not be able to finalize the disc if it was recorded on another recorder Erasing all the titles on the disc Erase All You can erase all the titles on the disc except the titles you have set protection The disc name and recording format remain the same ...

Page 74: ...for confirmation d Press to select OK then press ENTER When you place a DVD RW and set Format Disc to Selectable in Options Setup The display asks you to select the recording format Press to select VR or Video then press ENTER The recorder starts formatting the disc Notes Even when you have set protection for the title all the contents will be erased after formatting the disc A protected disc cann...

Page 75: ...corder will fast forward and rewind the tape for you you do not need to operate your digital video camera Do the following to start using the DV Edit functions of this recorder See also the instruction manual supplied with the digital video camera before connecting If you connect a digital video camera but cannot use the DV Edit functions See Recording from connected equipment page 88 Notes The DV...

Page 76: ...stereo 2 Stereo2 You are ready to start recording z Hints You can adjust the settings for the recording picture before recording See Adjusting the Recording Picture Quality and Size page 46 If you plan to re edit the program page 77 insert a DVD RW and format it in VR mode Notes You cannot connect more than two pieces of digital video equipment to the recorder Depending on the digital video equipm...

Page 77: ...s see below in the DV D8 Edit List see below to a disc of your choice When making copies you will need the original DV Digital8 format tapes used to create the program About programs Programs are automatically created whenever you make a One Touch Dub Program Edit or Advanced Program Edit These programs are stored in the DV D8 Edit List see below and contain editing information such as which scene...

Page 78: ...the recording made with your digital video camera is assigned as the program name in the DV D8 Edit List page 84 example DV 10 25 03 10 00PM 10 31 03 11 30PM If you set Finalize Disc to Auto in Features Setup page 98 the recorded disc will automatically be finalized after recording is finished Notes The recorder does not start One Touch Dub when you set Add to Edit List to On default in Features S...

Page 79: ...will fast forward and rewind the tape automatically and record the scenes to a disc of your choice a Follow steps 1 to 7 of Preparing for recording using the DV IN jack page 75 then press SYSTEM MENU b Press M m to select DV D8 EDIT then press ENTER The DV D8 Edit menu appears c Press M m to select Program Edit then press ENTER The display asks whether to start selecting scenes If you have previou...

Page 80: ... m to select the point then press ENTER The scene moves to the selected location To reset the start or end of the scene Press M m to select Change IN or Change OUT then press ENTER To preview the scene Press M m to select Preview then press ENTER To cancel press M m to select Quit in the Scene List menu then press ENTER j When you finish editing the Scene List press M m to select OK then press ENT...

Page 81: ...uctions of Recording From Equipment Connected to the LINE IN Jacks page 88 Advanced Program Edit You can quickly edit a DV Digital8 format tape by first copying the entire contents of the tape to a DVD RW VR mode and then select the scenes you want from the disc After you select the scenes you can change discs and record the scenes to another disc of your choice If necessary you can also create a ...

Page 82: ...the scene appears C While watching the playback picture press m or M to search for the OUT point then press ENTER The OUT point is set and the display asks whether to add the selected scene to the Scene List menu To preview the scene select Preview To reset either the IN or OUT point select Change IN or Change OUT D Press M m to select OK then press ENTER A new Scene List menu appears with the sel...

Page 83: ...laylist title of the default title name is created on the same disc and the display returns to the DV D8 Edit menu You now have a disc containing both the entire contents of the DV Digital8 format tape and a Playlist of the selected scenes To edit the Playlist title see Advanced Editing Playlist Edit page 67 i Dub the selected scenes to a disc Make copies of the selected scenes to a disc of your c...

Page 84: ...pear next to the program that corresponds to the inserted disc You can only edit the programs that display a disc mark 1 1 Disc mark 2 Program name 3 Total playing time 4 Date of editing or recording d Press M m to select the program you want to edit then press ENTER The sub menu appears e Press M m to select Edit then press ENTER The Scene List menu appears with all the scenes the program contain...

Page 85: ... cancel press M m to select Quit in the Scene List menu then press ENTER h When you finish editing the Scene List press M m to select OK then press ENTER The display asks if you want to make a Playlist title If you select No the edited program is saved and the display returns to the DV D8 Edit List Note that the original program will be rewritten To dub the selected scenes to a disc go to step 4 o...

Page 86: ...ure to insert the original DV Digital8 format tape that corresponds to the program in the DV D8 Edit List m m The recorder will fast forward and rewind the tape automatically and record the scenes to a disc of your choice On a DVD RW VR mode chapter marks are inserted at the start of each scene and where the recordings start on the tape For other discs the recorder marks chapters either in 6 or 15...

Page 87: ...R The display for entering the program name appears 3 Enter a name by following the explanations on page 34 To erase a program 1 While the DV D8 Edit List is displayed press M m to select the program you want to erase then press ENTER 2 Press M m to select Erase from the sub menu then press ENTER 3 Press to select OK then press ENTER z Hints You can preview the scenes within the program title by s...

Page 88: ...of this recorder to another equipment s input jack with the other equipment s output jack connected to the input jack of this recorder Noise feedback may result Pictures containing copy protection signals that prohibit any copying cannot be recorded Recording from connected equipment a Turn on your TV and this recorder then set it to the connected channel VIDEO etc b Press Z OPEN CLOSE and place a...

Page 89: ... sound is recorded g Press X REC PAUSE to set this recorder to record pause h Insert the source tape into the connected equipment and set to playback pause i At the same press X REC PAUSE on this recorder and the pause or play button on the connected equipment Recording starts j To stop recording press x REC STOP on this recorder If you connect a digital video camera with a DV IN jack without usin...

Page 90: ...ptions Easy Setup Auto Stereo Tuner Audio Audio ATT Audio DRC Downmix Digital Out Dolby Digital DTS On Main Off Standard Dolby Surround On D PCM Off SETUP Settings Video Audio Features Options Easy Setup Auto Chapter Parental Control One Touch Dubbing 6 Min SETUP Settings Video Audio Features Options Easy Setup Format Disc Dimmer Auto Display Command Mode Factory Setup Selectable Bright On DVD3 SE...

Page 91: ... Features Settings page 97 e Press M m to select an option then press ENTER The set option is displayed next to the setup item Example when 16 9 is set To turn off the display Press SYSTEM MENU repeatedly M m ENTER RETURN SYSTEM MENU TITLE LIST TIMER TIMER LIST DV D8 EDIT SETUP Plays erases edits recorded titles SYSTEM MENU DVD Recorder Dual RW Compatible SETUP Settings Video Audio Features Option...

Page 92: ...to Preset or Easy Setup Set the correct tuner system manually by the steps below 1 Follow steps 1 to 3 of Using the Setup Displays page 91 to select Settings in the Setup Display 2 Press M m to select Tuner Preset then press ENTER 3 Press M m to select Antenna Cable then press ENTER To preset cable TV channels Press M m to select Cable then press ENTER To preset VHF and UHF channels Press M m to s...

Page 93: ...set and press ENTER Then press M m to make the setting and press ENTER Clock Set CH Select a channel that carries a time signal using the number buttons Use this option if you know of a channel that carries a time signal Most PBS member stations broadcast a time signal For the fastest response select your local PBS station Leave the setting at to have the recorder automatically search for a channe...

Page 94: ...recorded on the DVD VIDEO one of the recorded languages will be automatically selected Video Settings Choose the settings according to the TV tuner or decoder to be connected Select Video in the Setup Display To use the display see Using the Setup Displays page 91 The default settings are underlined TV Type Selects the aspect ratio of the connected TV 4 3 standard or wide Note Depending on the dis...

Page 95: ...ation If the playback sound is distorted set this item to On The recorder reduces the audio output level This function affects the output of the following jacks LINE OUT AUDIO L R 1 2 jacks Auto The picture including subjects that move dynamically is output with no jitter Normally select this position Frame The picture including subjects that do not move dynamically is output in high resolution On...

Page 96: ... affect your ears or cause speaker damage Dolby Digital DVDs only Selects the type of Dolby Digital signal DTS DVD VIDEO only Selects whether or not to output DTS signals Standard Normally select this position TV Mode Makes low sounds clear even if you turn the volume down Wide Range Gives you the feeling of being at a live performance Dolby Surround Normally select this position Multi channel aud...

Page 97: ...imitation level then press ENTER The area is selected When you select Others press the number buttons to select and enter an area code in the table on page 98 Then select OK and press ENTER 6 Press M m to select Level then press ENTER The selection items for Level are displayed 7 Select the level you want using M m then press ENTER Parental Control setting is complete The lower the value the stric...

Page 98: ...2047 Austria 2046 Belgium 2057 Brazil 2070 Canada 2079 Chile 2090 China 2092 Denmark 2115 Finland 2165 France 2174 Germany 2109 India 2248 Indonesia 2238 Italy 2254 Japan 2276 Korea 2304 Malaysia 2363 Mexico 2362 Netherlands 2376 New Zealand 2390 Norway 2379 Pakistan 2427 Philippines 2424 Portugal 2436 Russia 2489 Singapore 2501 Spain 2149 Sweden 2499 Switzerland 2086 Thailand 2528 United Kingdom ...

Page 99: ...ctory Setup then press or ENTER The display for selecting the group of settings appears 3 Press M m to select the group of settings you want to return to default from Settings Video Audio Features Options Parental Control and All then press or ENTER The dialogue box appears 4 Press to select Start then press ENTER The selected settings return to the default settings 5 Press ENTER when Finish appea...

Page 100: ...the Setup Display To use the display see Using the Setup Displays page 91 Easy Setup 1 Follow steps 1 to 3 of Using the Setup Displays page 91 to select Easy Setup in the Setup Display 2 Press to select Start then press ENTER 3 Follow the Easy Setup explanation from step 5 on page 22 Settings Video Audio Features Options Easy Setup Easy Setup SETUP ...

Page 101: ...e DVD programs could affect picture quality If you still experience this problem even when you connect your recorder directly to your TV try connecting your recorder to your TV s S VIDEO input You have set the recorder to progressive format the PROGRESSIVE indicator lights up even though your TV cannot accept the progressive signal In this case press the PROGRESSIVE button on the front panel until...

Page 102: ...through the DIGITAL OUT OPTICAL or COAXIAL jacks check the Audio Setup settings page 95 Sound distortion occurs Set Audio ATT in Audio Setup to On page 95 Sound is noisy The disc is dirty or flawed When playing a CD with DTS sound tracks noise will come from the LINE OUT AUDIO L R 1 2 jacks page 50 The sound volume is low The sound volume is low on some DVDs The sound volume may improve if you set...

Page 103: ...e or did not start from the beginning There was a power failure during recording If the power recovers during the time a timer recording is set the recorder resumes recording Should the power failure continue for more than 1 hour reset the clock page 93 The timer setting overlapped with another setting that was set later or has priority page 43 Disc space was not enough Contents previously recorde...

Page 104: ...corded or edited a disc This is because the recorder is adding disc data to the disc The disc tray does not open and TRAY LOCKED appears on the front panel display Contact your Sony dealer or local authorized Sony service facility RECOVERY appears in the front panel display The recorder s recovery function was activated when the recorder was turned on because the power was turned off or failed dur...

Page 105: ... a 96 kHz sampling frequency the output signals from the DIGITAL OUT OPTICAL or COAXIAL jack are converted to 48 kHz sampling frequency Inputs and outputs LINE OUT 1 2 AUDIO Phono jack Output level 2 Vrms Load impedance 10 kilohms VIDEO Phono jack Output level 1 0 Vp p S VIDEO 4 pin mini DIN Output level Y 1 0 Vp p C 0 286 Vp p NTSC LINE IN 1 2 3 AUDIO Phono jack Input level 2 Vrms Input impedance...

Page 106: ...a transport bus proposed by SONY and is a trademark approved by many corporations IEEE 1394 is an international standard standardized by the Institute of Electrical and Electronics Engineers i LINK Baud rate i LINK s maximum baud rate varies according to the equipment Three maximum baud rates are defined S100 approx 100 Mbps S200 approx 200 Mbps S400 approx 400 Mbps The baud rate is listed under S...

Page 107: ... variable rate coding technology that changes the data to be allocated according to the status of the picture Audio information is recorded in a multi channel format such as Dolby Digital allowing you to enjoy a more real audio presence Furthermore various advanced functions such as the multi angle multilingual and Parental Control functions are provided with the DVD DVD R page 35 A DVD R is a rec...

Page 108: ...97 Kazakh 1298 Greenlandic 1299 Cambodian 1300 Kannada 1301 Korean 1305 Kashmiri 1307 Kurdish 1311 Kirghiz 1313 Latin 1326 Lingala 1327 Laothian 1332 Lithuanian 1334 Latvian Lettish 1345 Malagasy 1347 Maori 1349 Macedonian 1350 Malayalam 1352 Mongolian 1353 Moldavian 1356 Marathi 1357 Malay 1358 Maltese 1363 Burmese 1365 Nauru 1369 Nepali 1376 Dutch 1379 Norwegian 1393 Occitan 1403 Afan Oromo 1408...

Page 109: ...e 65 Erase All 73 Erase Titles 65 Extend Rec Time 42 F Factory Setup 99 Film based software 51 107 Finalize Disc 98 Finalizing 73 Format Disc 99 Formatting 74 Front panel display 14 57 H Handling discs 3 I Index 107 INSTANT REPLAY 52 INSTANT SEARCH 52 INTERLACE 51 Interlace format 51 107 J Jog Stick 52 L Language 94 Line1 Input 95 Line3 Input 95 M Menu DVD s menu 51 Top menu 51 Move Title 70 O One...

Page 110: ...m 44 Title 107 Title List 32 53 67 Sort 54 Thumbnail 54 Zoom 54 Title Name 64 TOOLS menu 32 Track 107 Troubleshooting 101 Tuner Audio 95 Tuner Preset 23 92 TV Type 23 94 TV Virtual Surround TVS 58 Dynamic 58 Night 59 Standard 59 Wide 58 V VCR Plus 44 Video based software 51 107 Video mode 62 VR Video Recording mode 36 63 Z Zoom 54 ...

Page 111: ......

Page 112: ...the manual Most suitable Can be used Some functions are limited Cannot be used Record TV programs Reuse by deleting unwanted contents Edit recorded contents Edit Record from connected equipment Copy discs for distribution Play on other DVD equipment You want to 1 1 Features Recording Rewritable Yes Yes Yes No Yes Yes Yes Yes Yes No No No Yes Yes Yes Yes 3 2 4 Yes No No No Yes Yes Yes Yes Yes Yes Y...

Reviews: