


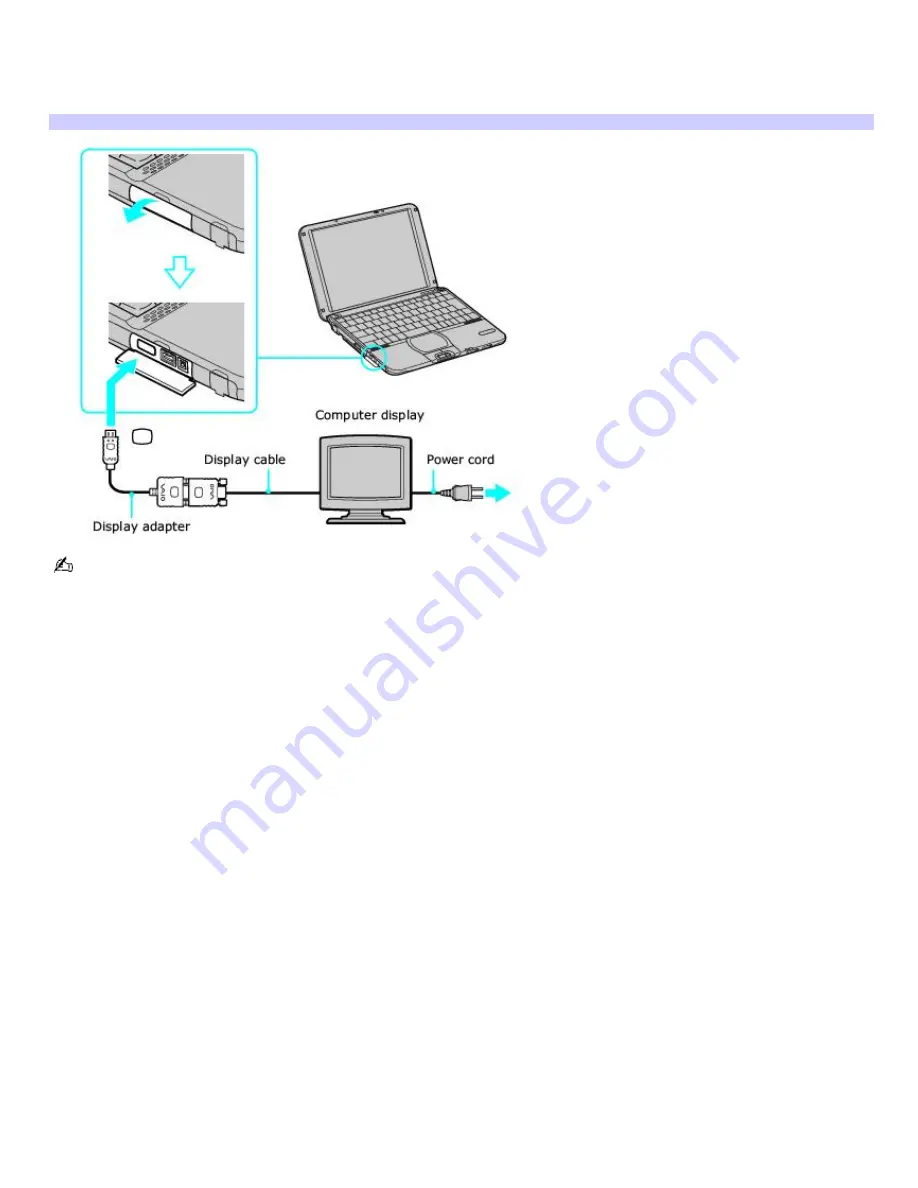
To connect a computer display
1.
First make sure the display adapter is connected to the computer.
2.
Connect the computer display's VGA adapter to the supplied display adapter's Monitor port.
Connecting a Display
See the manual supplied with your computer display for more information on its installation and use.
Page 65
Summary of Contents for PCG-SRX87P VAIO
Page 39: ...16 Click OK Page 39 ...


