1-9
38
B
Viewing images with a computer connected with the USB cable
Once you install DirectCD included in the supplied CD-ROM, you do not need to
finalize the disc to view images on the disc.
You can exchange data between the camera and a computer using the supplied USB
cable and CD-ROMs.
Installing the USB driver
Before connecting your camera to your computer, install the USB driver to the
computer. The USB driver is contained in the supplied CD-ROM (SPVD-006).
If the drive is not recognized, see “Troubleshooting” on page 93.
E.g., for Windows Me users
Do not connect the camera to the computer yet.
1
Turn on your computer and allow Windows to load.
Do not connect the USB cable in this step.
2
Insert the supplied CD-ROM (SPVD-006) in the CD-ROM drive of
your computer
If the setup screen of DirectCD appears, click [Finish] on the screen.
3
Open [
My Computer] on Windows and right-click the CD-ROM
drive (Example:
CD-ROM (D:)), then select [Open (O)].
The file list of the CD-ROM appears. If other application software works, quit
the application software.
4
Double-click the [SONY USB] folder in the file list, and then double-
click [
SET UP].
The installer of device driver starts and the necessary files are automatically
copied to the computer.
5
Restart the computer.
If the message appears after the installation to verify that you restart the
computer, restart the computer. In other cases, restart it manually.
6
Prepare the camera before connecting the computer.
•
Connect the AC power adaptor to the camera.
•
Turn on the camera.
BBBB
P
lay
b
a
ck
39
Viewing images
When you view images on the disc which was not finalized, you have to install
DirectCD included in the supplied CD-ROM. For details on DirectCD, refer to the
software operating instructions of DirectCD.
E.g., for Windows Me users
7
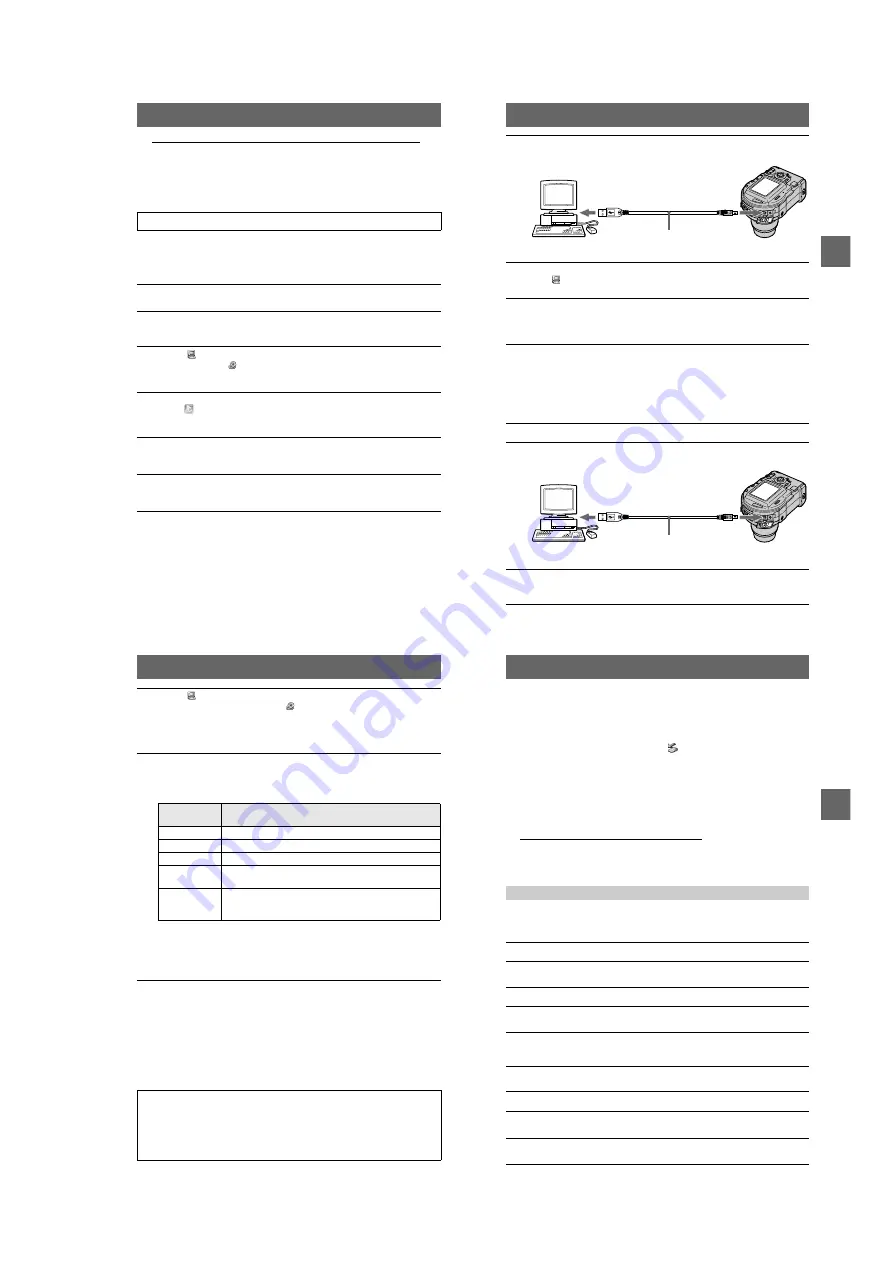
Connect the USB jack on your camera with the USB connector on
your computer using the supplied USB cable.
8
The computer automatically recognizes the camera.
Open [
My Computer], the newly recognized drive (Example: (E:)) is added.
Installing driver is complete.
9
Insert the disc into the camera, connect the AC power adaptor to
the camera, then turn on the power of the camera.
Go to “Viewing images” below. If you remove the disc without viewing an
image, be sure to read “Before disconnecting the USB cable” on page 40.
1
Turn on your computer and allow Windows to load.
2
Connect the USB jack on your camera with the USB connector on
your computer using the supplied USB cable.
3
Insert the disc into the camera, connect the AC power adaptor to
the camera, then turn on the power of the camera.
“USB MODE” appears on the LCD screen of the camera.
computer
to the USB connector
USB
cable
to the USB jack
Push the
connector as far
as it will go
computer
to the USB connector
USB
cable
to the USB jack
Push the
connector as far
as it will go
40
Copying a file in the disc to a computer
Select the desired file, and drag it to the desired drive or folder.
Copying a file in a computer to a disc
Once you install DirectCD included in the supplied CD-ROM into your computer,
you can drag and drop the desired file to the disc. To view the image using this
camera, the file name format must be as follows, “DSC0
ssss
.JPG”.
For details, see “Image file storage destinations and image file names” (page 43).
4
Open [
My Computer] on Windows and double-click the newly
recognized drive. (Example: [
CD Mavica (E:)])
The folders inside the disc are displayed, and the disc cover of the camera will
be locked. To remove the disc, carry out the operation for removing the disc
described on the software operating instructions of DirectCD.
If the drive is not recognized, see “Troubleshooting” on page 93.
5
Select and double-click the desired image/sound file from the
folder.
For the detailed folder and file names, see “Image file storage destinations and
image file names” (page 43).
∗
Copying a file to the hard disk of your computer before viewing is recommended. If you
play back the file directly from the disc, the image and sound may break off.
Before you remove the disc, be sure to read “Before disconnecting the USB
cable” on page 40.
Before disconnecting the USB cable
Before disconnecting the USB cable, you must carry out the operation for
removing the disc. This operation is described in “Removing the disc” of the
software operating instructions of DirectCD.
The data in the disc may be broken if you do not carry out this operation.
Refer to the procedure below.
Desired file
type
Double-click in this order
Still image
“DCIM” folder
t
“100MSDCF” folder
t
Image file
Moving image* “MSSONY” folder
t
“MOML0001” folder
t
Image file
Audio*
“MSSONY” folder
t
“MOMLV100” folder
t
Audio file
Clip Motion
image
“DCIM” folder
t
“100MSDCF” folder
t
Image file
E-mail image
Tiff image
(uncompressed)
“MSSONY” folder
t
“IMCIF100” folder
t
Image file
BBBB
P
lay
b
a
ck
41
C
Viewing images using a CD-R/CD-RW drive
You do not need to finalize the disc. You have to install DirectCD included in the
supplied CD-ROM. For details on DirectCD, refer to the software operating
instructions of DirectCD.
Viewing images with a CD-ROM drive
Finalize the disc beforehand (page 32). You have to install the driver, Adaptec UDF
Volume Access included in the supplied CD-ROM (SPVD-006).
Viewing images
1
Remove the disc.
For details, refer to the software operating instructions of DirectCD.
2
When using Windows Me, Windows 2000 Professional:
When using other operating systems than above:
Simply, disconnect the USB cable.
Viewing images on a Macintosh computer
1
Start up your computer and allow the Mac OS to load.
2
Insert the supplied CD-ROM (SPVD-006) in the CD-ROM drive of
your computer.
3
Double-click the CD-ROM drive icon to open the window.
4
Double-click the icon of the hard disk containing the OS to open
the window.
5
Move the driver, “Adaptec UDF Volume Access” from the window
opened in step
3
to the “System Folder” folder in the window
opened in step
4
(drag and drop).
6
When “Put these items into the Extensions folder?” appears, click
“OK.”
7
Restart your computer.
1
Start up your computer and insert the disc into the CD-ROM drive
of your computer.
1
Select the applicable drive from [
] on the task bar, then stop it.
2
After the message informing you that the drive has been removed safely
appears, disconnect the USB cable.


