Chapter 4: the Tape Player
EN
21
8
Press
·∏
on the CD player.
The CD starts playing.
Recording a CD:
Specifying Tape
Length (time edit)
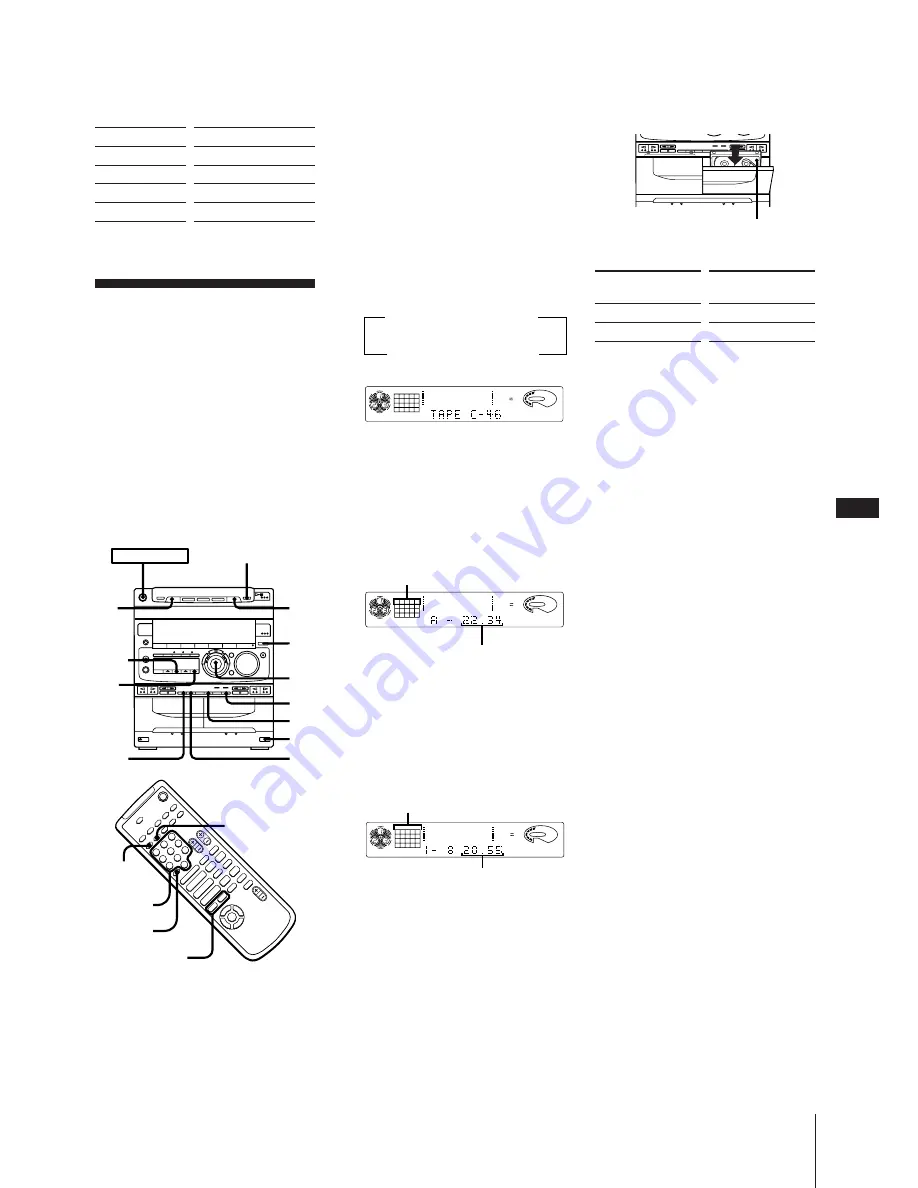
You can have the stereo system create
programs based on the tape length. The CD
player makes programs that will fit the tape
length. For example, if you use a 40-minute
tape to record a 46-minute CD, the CD
player will automatically choose tracks that
will fit within the 40-minutes, filling as
much of the tape as possible. The player
will not program those tracks beyond track
number 20. Use the buttons on both the
unit and the remote to do this operation.
1
Press FUNCTION repeatedly until “CD”
appears in the display.
2
Press
§
OPEN/CLOSE and place a CD.
Then, press
§
OPEN/CLOSE again to
close the disc tray.
If the button for the disc tray containing
the CD you want to record is not lit
green, press DISC SKIP repeatedly so
that it lights green.
3
Press EDIT twice.
“TIME EDIT” appears in the display.
Then “SELECT” and “TIME” appear
alternately in the display.
4
Turn the JOG dial (or press PREV
=
or NEXT
+
on the remote) to choose
the indication that corresponds to the
length (in minutes) of your tape.
The indications change as follows:
Choose “HALF” if you want the CD
player to half the total playing time of
the CD. You cannot select “HALF”
when recording CDs with more than 20
tracks.
5
Press EDIT.
The CD player determines the tracks to
be recorded on side A automatically.
6
When you want to record on both sides,
press EDIT again.
The CD player determines the tracks to
be recorded on side B.
When you want to record only on side
A, press
p
on the CD player to stop the
indication from flashing.
7
Press
§
EJECT and insert a blank tape
into deck B with the side you want to
record on facing forward.
Recording will start from the front side
of the tape, unless you have changed the
playing direction before recording.
Make sure the tabs on the cassette have
not been removed.
8
Select dual or single-sided recording.
* Recording always stops at the end of the
reverse side. Be sure to start from the
front side.
9
Press CD SYNCHRO.
Deck B stands by for recording.
10
Press
P
PAUSE to release recording
pause.
Recording starts.
After about 10 seconds, the CD starts
playing.
To stop recording
Press
p
on the tape deck or CD player.
To cancel time edit
Press
p
on the CD player and then press
PLAY MODE.
To check the order
Press CHECK on the remote repeatedly.
Each time you press CHECK, the number
of the next programmed tracks appears in
the display.
To select the desired tracks
beforehand
You can place priority on some tracks to be
recorded by selecting them before
programming (only up to 20 tracks). See
“Playing Tracks in the Desired Order
(program play)”.
To start recording without a 10
second space
First, playback or record on deck B for a
few seconds, then press CD SYNCHRO.
The CD starts playing immediately after
recording starts.
This will not work if you press
§
on deck B
before recording.
To activate DOLBY NR
When you want to reduce the hiss noise in
low-level high-frequency signals, press
DOLBY NR so that “DOLBY NR B” appears
in the display after step 8.
Recording side facing forward
Press DIRECTION to
select
A
ß
or RELAY
To record
One side of the tape
Both sides*
To
Stop recording
Pause recording
Stop CD play
Pause CD play
Press
p
on deck
P
PAUSE
p
on the CD player
·∏
on the CD player
Tracks to be recorded on side A
Total playing time on side A
125
63
250
500
1k
2k
4k
8k
16k(Hz)
DOLBY NR
OFF
CD
DISC PROGRAM
1
2
3
5
VOLUME
125
63
250
500
1k
2k
4k
8k
16k(Hz)
DOLBY NR
OFF
CD
DISC PROGRAM
1
2
3 4
5
6
7
8
REC
VOLUME
125
63
250
500
1k
2k
4k
8k
16k(Hz)
DOLBY NR
OFF
CD
DISC PROGRAM
1
2
3 4
5
6
7
8
VOLUME
Total playing time on side B
Tracks to be recorded
both side A and B
HALF
C-90
(23:00)
C-54
(27:00)
˜
C-74
(37:00)
C-60
(30:00)
C-90
(45:00)
˜
˜
˜
n
N
n
N
–
p
+
P
)
0
p
P
)
0
+
=
·
·
ª
·
ª
4
$
“
”
ˆ
POWER
m
ON
p
DISC
SKIP
2
1
4
9
7
10
3,
5,
6
8
PLAY
MODE
CHECK
EDIT
=/+
Numeric
buttons
> 10
DOLBY
NR


