


HVR-DR60
6-12
6-11. G-sensor Check
Confirm that the G sensor of HVR-DR60 works.
Jig specified:
• PC (with IEEE1394 terminal and driver exclu-
sive for HVR-DR60 adjustment/confirmation
installed)
• iLINK cable
• AC adapter
Procedures
1. Read the output values in the G sensor, using the HVR-DR60
check software.
And confirm that they meet the specification.
Check Software Name: Gsen_e.bat
Procedure
(1) Connect the PC and HVR-DR60 with the i.LINK cable.
(2) Set the POWER (mode selector) switch to VIDEO.
(3) Double-click “Gsen_e.bat” copied to the PC.
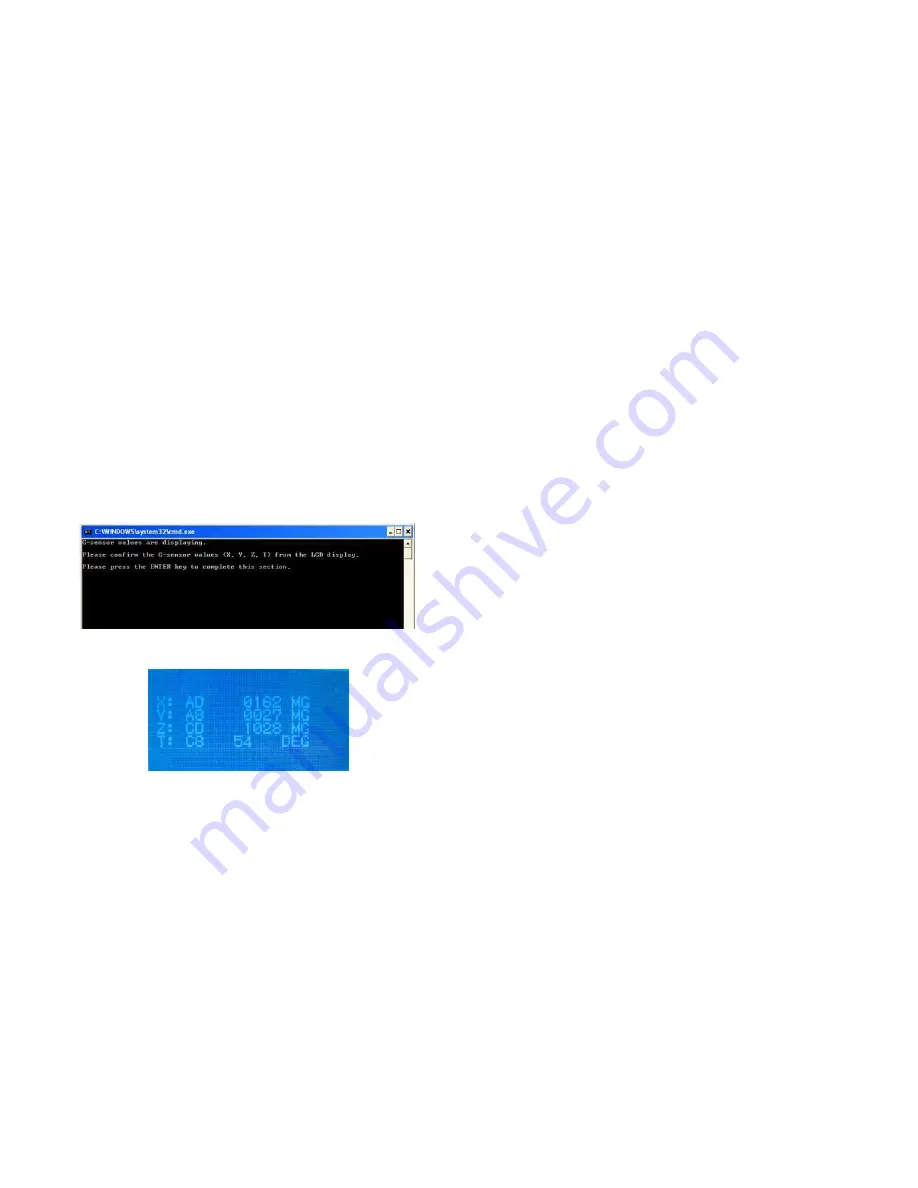
The command prompt starts up.
The test command is automatically executed. and the message
“Press any key to continue” appears on the command line and
the prompt waits for command entry.
In this state, check the values displayed on the LCD menu.
x: ***
y: ***
z: ***
Fig. 6-11-1
Fig. 6-11-2
(4) Press the ENTER key.
The command prompt automatically closes and the check pro-
gram is terminated.
Inspection Specifications
X: 200 - 001 or 000 - 200
Y: 200 - 001 or 000 - 200
Z: 900 - 1300
6-12. HDD Format (File Erasure)
To erase files on the HDD of HVR-DR60, format the HDD.
(This is executed when the HDD is replaced.)
Procedures
1. Format the HDD built-in the HVR-DR60.
(1) Set the POWER switch to VIDEO.
(2) Press the MENU button.
The MAIN MENU appears on the LCD.
(3) Press the FF button to set the cursor to DELETE.
(4) Press the PLAY button to delete.
(5) Press the FF button to set the cursor to FORMAT.
(6) Press the PLAY button to format.
(7) Press the FF button to set the cursor to OK.
(8) Press the PLAY button.
• Formatting starts.
(9) When “COMPLETE” appears on the LCD, press the STOP
button.
• Confirm that “270min” appears on the LCD.
• Formatting completes.


