22(E)
Recording Images
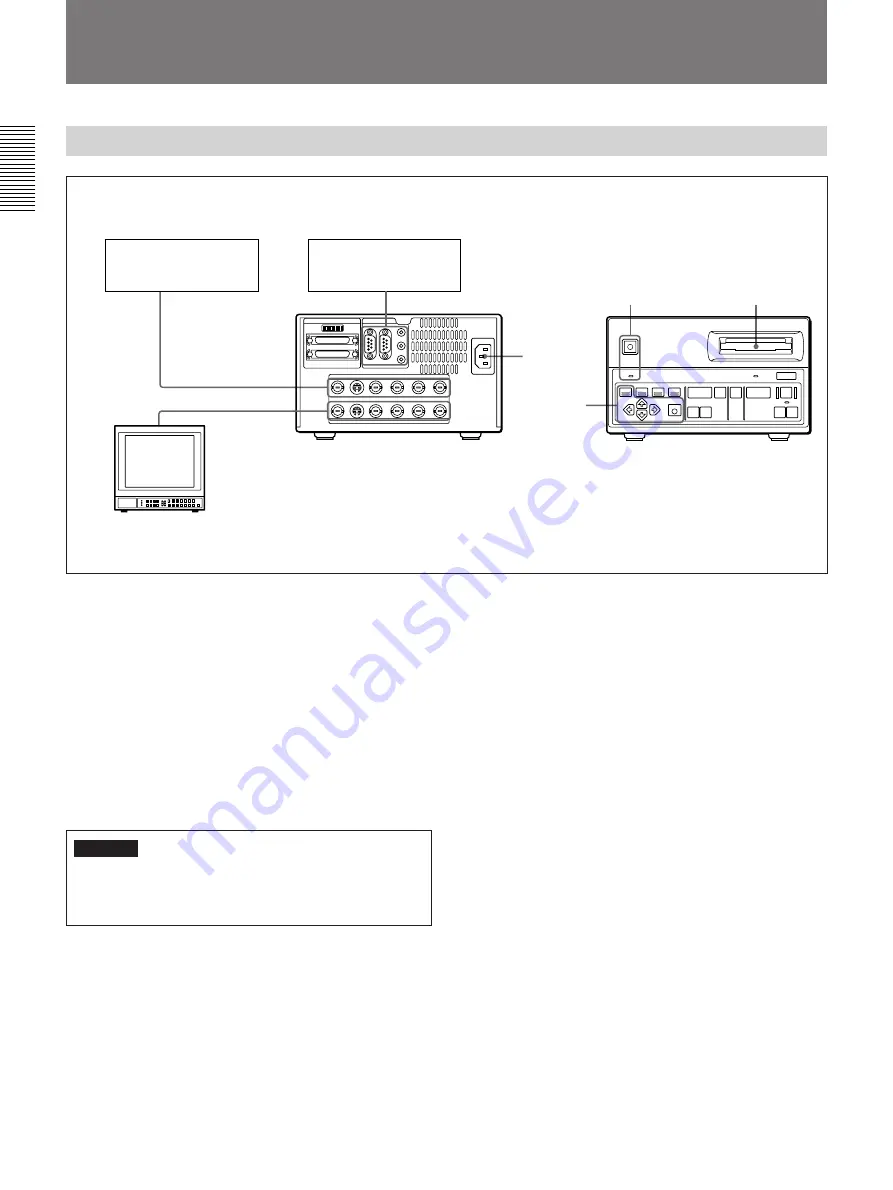
Preparing to Record
1
2
4
4
5
6
3
Video camera, LaserDisc
player, VCR, etc.
Video
output
connector(s)
Video monitor
Video input
connector(s)
Remote connector(s)
RM-C700, foot switch,
flash unit, etc.
Illustration: DKR-700
1
Connect a video camera, LaserDisc player, VCR,
etc. to the proper video input connector(s) on the
rear panel (see page 16(E)).
2
Connect a video monitor to the proper video output
connector(s) on the rear panel (see page 16(E)).
3
Connect necessary auxiliary devices (RM-C700,
foot switch, flash unit, etc.) to the proper remote
connector(s) on the rear panel (see page 16(E)).
4
Power the DKR-700/700P (see page 18(E)).
Warning
When using the DKR-700P, make sure that the
voltage setting meets the voltage in the mains line
prior to the operation.
5
Insert a disc into the disc slot, after verifying that
the disc has been properly initialized and that the
write-protect switch is set to allow recording (see
page 18(E)).
6
Using the menus, make the following settings:
1) On the main menu, set “Input” appropriately for
the input video signal to be used (see page
39(E)).
2) Set each item in the Source Setup menu
appropriately for the input video signal to be
used (see page 40(E)).
3) Set the necessary items on the System Setup
menu (see page 45(E)) and Capture/Rec Setup
menu (see page 41(E)) appropriately for the
external devices to be used.
Adding ID numbers or image names to images
When an image is recorded, its image numbers and
recording date are automatically recorded as well.
When using the RM-C700, ID numbers and image
names can also be recorded.
For information about ID number and image name
recording procedures, see “Image Data Management
(Using the RM-C700)” on page 32(E).
Summary of Contents for DKR-700
Page 108: ...Sony Corporation Printed in Japan ...


