7
Quick Start Guide for Tempo RAID133
8.
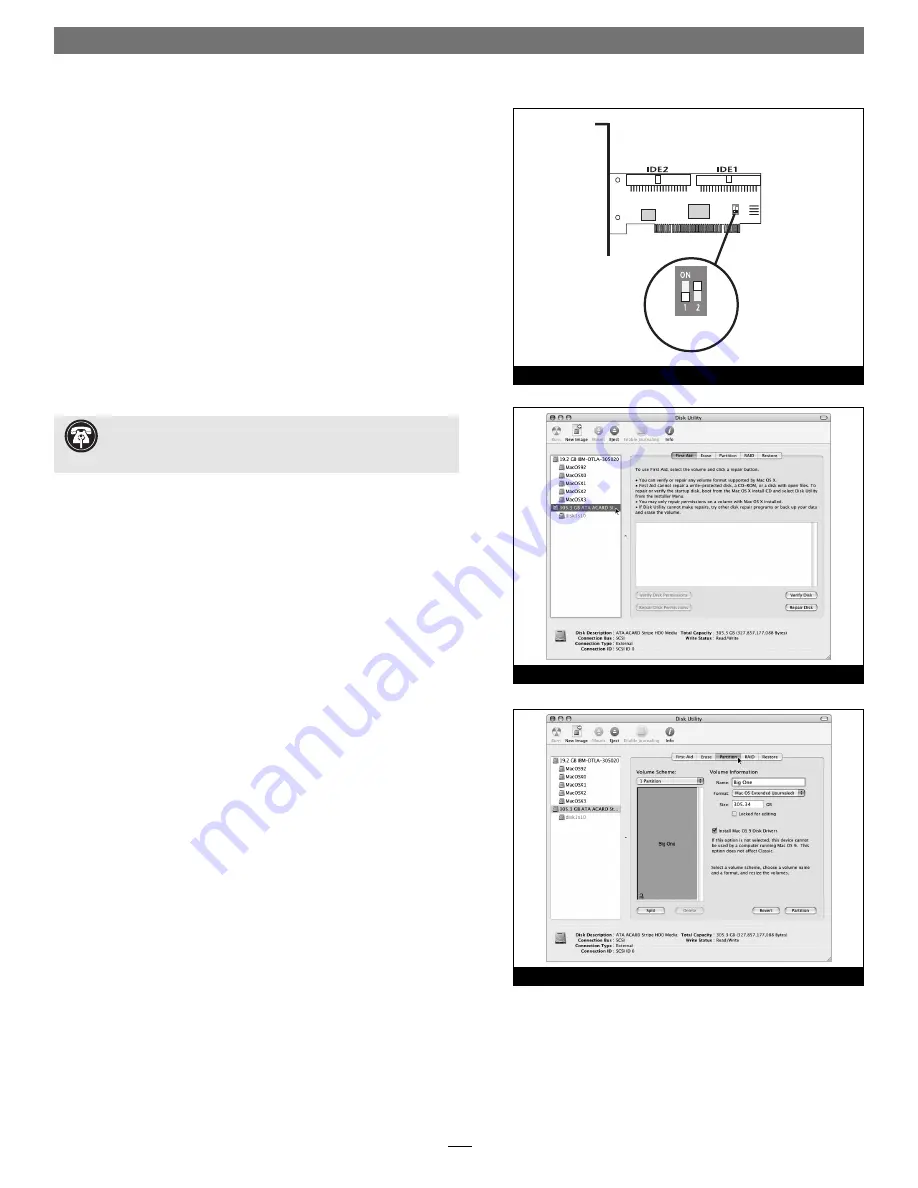
Move DIP switch 2 on the Tempo RAID133 to ON to select the
striping mode
(Figure 15)
.
9.
If you removed the card to move the DIP switches, verify the
card is seated fi rmly in the slot.
10.
Recheck the cable connections; make sure all cables are properly
connected to the Tempo RAID133 and the hard drives.
11.
Close the computer and carefully replace its case cover; be very
careful not to crimp the cables.
12.
Turn on your computer. During the boot process, the informa-
tion window stating “You have inserted a disk containing no
volumes that Mac OS X can read” may appear. If this is the case,
click the Initialize… button to launch Disk Utility.
13.
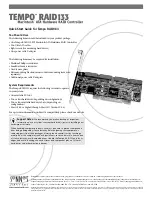
If it is not already open, launch Disk Utility again
(Figure 16)
.
Note that each pair of drives connected to the Tempo RAID133
now appear as single volumes.
14.
Select the fi rst volume you will format (as a RAID volume) by
single-clicking the drive symbol
(Figure 16)
.
15.
Click the Partition button
(Figure 17)
. When the Partition win-
dow appears, click on the drop-down menu beneath “Volume
Scheme:” and select a number of partitions for the volume; you
may optionally choose to partition each RAID volume to create
two or more smaller “virtual” drives to store and retrieve data
faster and more effi ciently.
16.
Type a name for your RAID volume in the Name fi eld
(Figure 17)
. Make sure that the “Install Mac OS 9 Disk Drivers”
option is checked, and then click the Partition button at the bot-
tom of the window.
Tempo RAID133 Macintosh
ATA Hardware RAID Controller
striping
mode
Figure 15
Figure 17
Figure 16
Support Note:
The Tempo RAID133 creates one striped vol-
ume for each pair of hard drives installed—one pair of drives
creates one volume, two pairs of drives create two volumes.


