


-81-
M
e
d
i
c
a
l
D
e
v
i
c
e
s
f
o
r
S
l
e
e
p
D
i
a
g
n
o
s
t
i
c
s
a
n
d
T
h
e
r
a
p
y
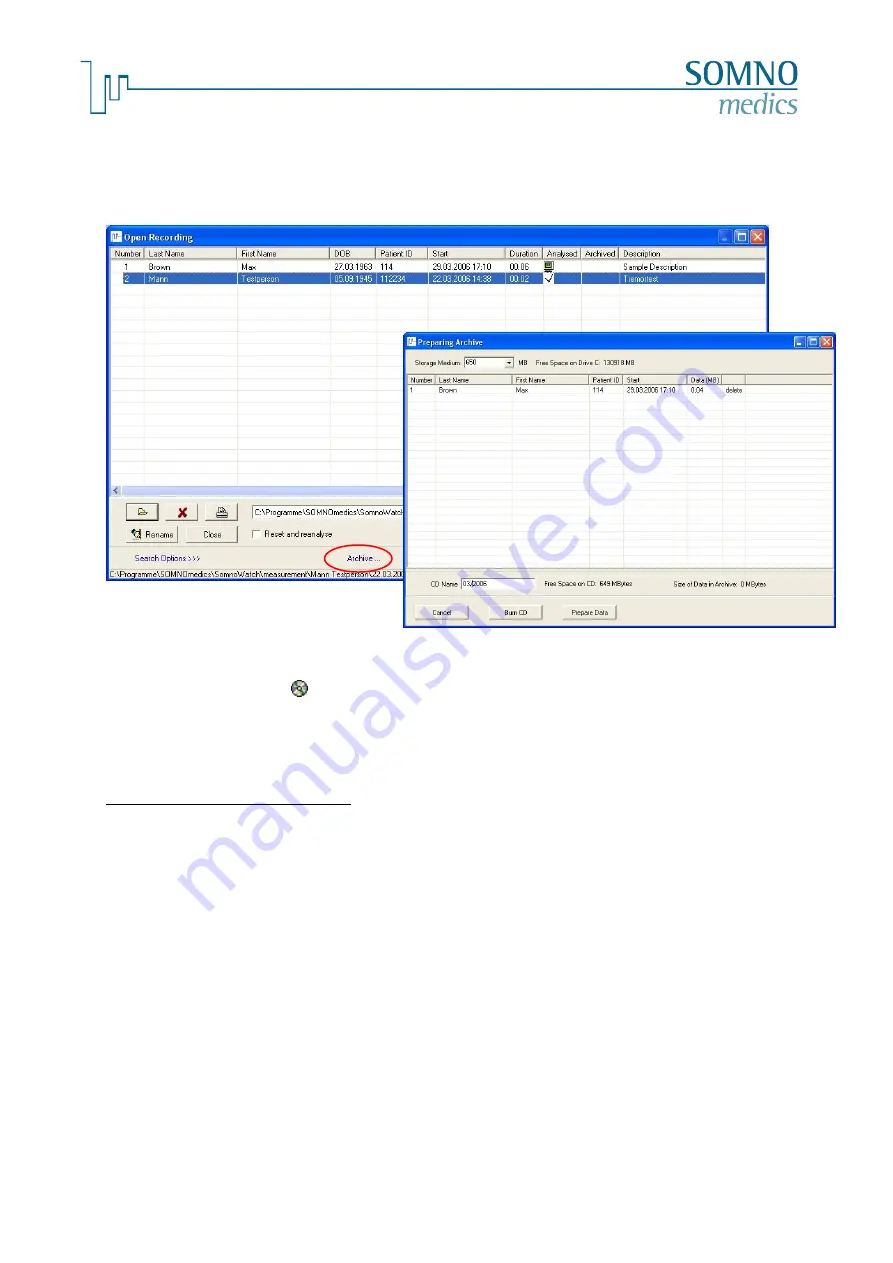
The window will display all marked recordings which were added to the archives. Check that the
capacity of the disk (
3
) (see fig. 7-42) has not been exceeded. Finally, click on the button
Burn CD
to
start burning. Clicking on the
Prepare Data
button, all marked recordings will be saved to the folder
which was defined as the Archive Folder in the
Global Preferences
(see chapter 7.3.1).
fig. 7-42: Archiving Data
Writing Successful
will be displayed on the screen after the recording has successfully been
completed. The CD symbol
and
the CDs’ Name will be displayed under the
Archived Heading
against each patient’s recording.
Please delete the recordings from the hard drive after a successful archive!
Importing an Archived Recording:
Please copy the complete folder (folder name = patient name) from the CD/DVD to the default
recordings directory you defined in the global preferences
(see chapter 7.3.1) and remove the write
protection. The copied measurements will be displayed in the Open Dialog Menu.
7.8.2
Archiving database
This is an optional feature if the database is included in the delivery.
We recommend that the Database is archived on a weekly basis as follows:
First, close the
DOMINO light
panel and all other applications. Start Windows Explorer and select the
directory which contains your folders
Archives
,
Form Letters
and
SOMNODB
(Default Location:
C:\SOMNOmedics\Somnowatch). Now select the files and copy them to a local directory (for example,
C:\Backup\...). Save this directory to a CD using the CD burning programme that was supplied with
your CD drive. Examples of CD recording programs are Nero, Win-on-CD, Roxio, etc.
Clearly mark the CD or DVD by labelling it with the name used when creating the Archive!
3


