


15
2
)
Matching between two parts of the screen: When the
screen is split in two, with separate performance on both parts
at the same time and both parts requiring touch functionality,
carry out positioning on both sides, first on the left, then on the
right.
5.
Options
:
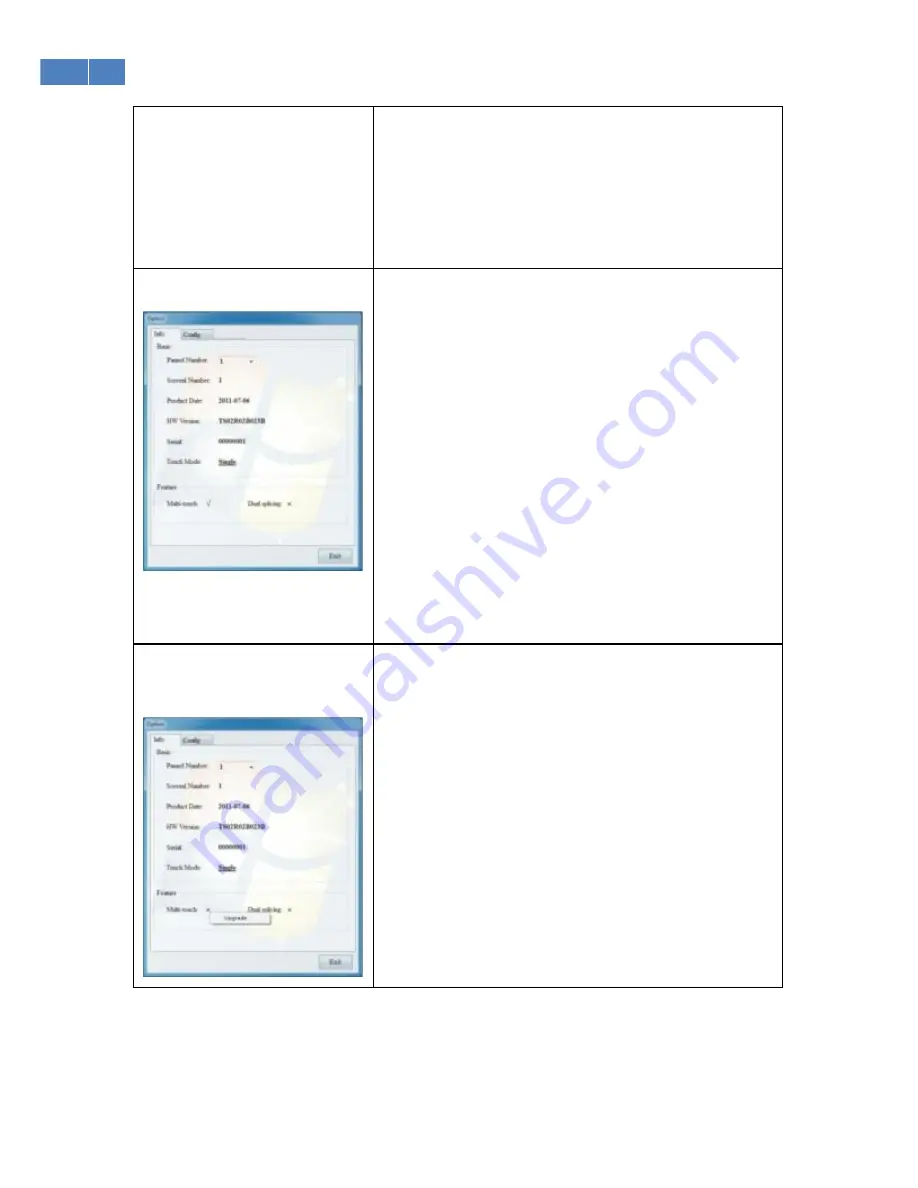
Information:
The “Basic” box shows information regarding the current
screen. If there is more than one touch screen device, a
number will be assigned to each one and their specific
information displayed.
The “features” box shows updated information regarding the
touch screen, “√” is supported, and “×” is not supported.
Upgrading method: (related authorized documents are needed
before upgrading.)
Click “×” in “features” to show the upgrading box:
Click “upgrade” to search for the authorized documents for
upgrading.
6.
Configuration
:
For “service parameters” configuration, we suggest using the
default value, unless there is a specific requirement.
Description of parameters: right button enabling: select “Yes”
to use right button; select “No”, the right button is disabled.
Delayed time length: Sets the time length for right button
enabling.
Fault-tolerant space: Errors while pressing on the screen with
the hand; errors within a range are permitted.
Sleek coefficient: set sampling points, to ensure data points
sent to the system are smooth and to avoid excessive vibration
of scribing line.


