9
Select Signal Source
Via the buttons on the control panel
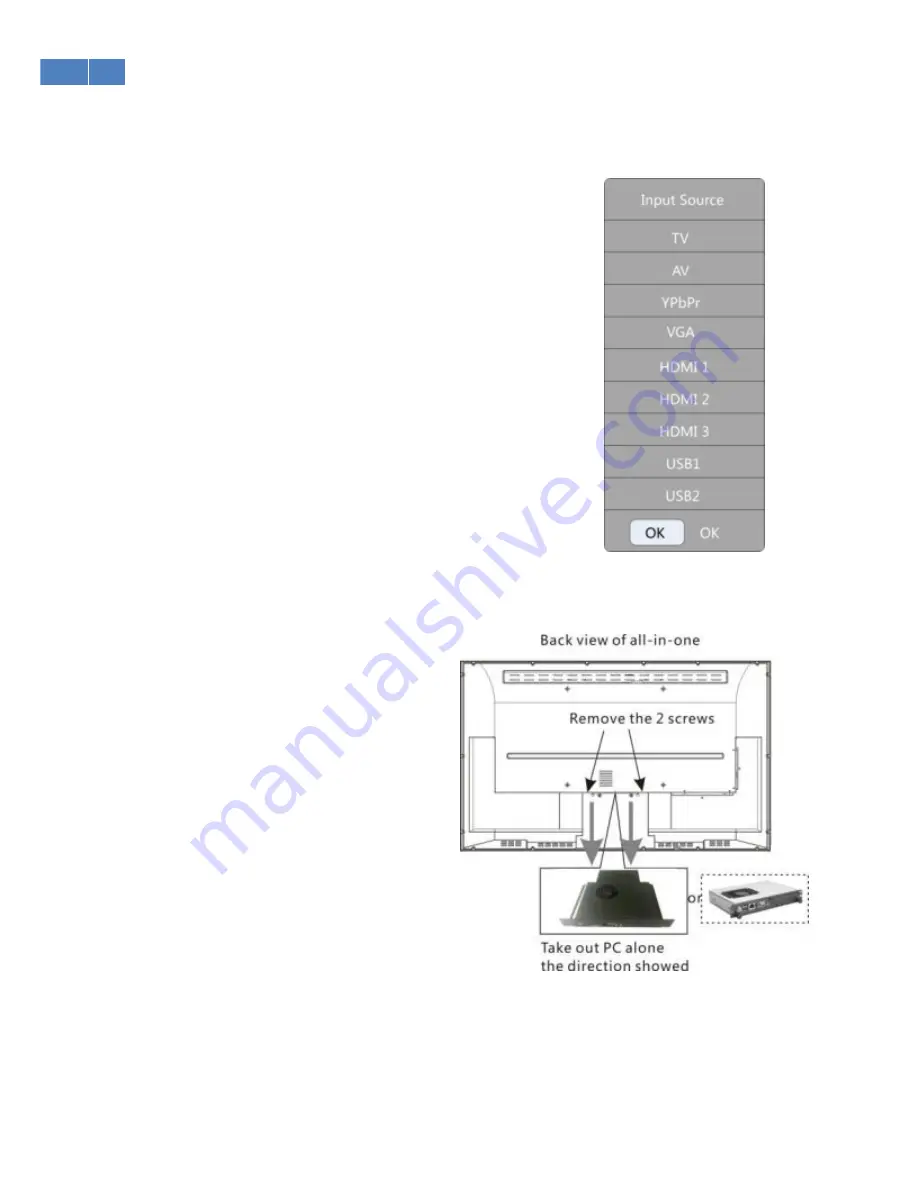
① Press SOURCE button on front control panel: the sources will be listed as
shown on the right.
② Press P+ or P- to select signal source.
③ Press SOURCE button on front control panel to confirm the signal source
selected.
Via remote control
① Press SOURCE BUTTON on remote control; the sources will be listed as
shown on the right.
② Press
▲
or
▼
to select signal source
③ Press SOURCE button on remote control to confirm the signal source
selected.
Auto Switch Source
Both the built-in PC (optional) and HDMI port on the front control panel are in
HDMI 1 source as default setting. When you connect an external PC to the
HDMI port on the front control panel, the source will be automatically
switched to HDMI 1.
When the built-in PC (optional) and the HDMI port on the front control panel
are connected at the same time, you must unplug the HDMI connection on the front control panel and
external PC in order to have the signal source from the built-in PC.
Installing and Removing the built-in PC (optional)
The built-in PC box allows for easy installation and
maintenance.
The PC is built into the back of the monitor. Loosen
the screws and grasp the PC to move it out smoothly.
Do not remove the PC if it is functioning properly. If it
is necessary to remove it, disconnect the power from
the monitor first.
Installation is the same for OPS and Mini ATX PCs.


