28
Singer Furtura III series
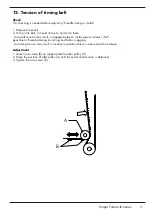
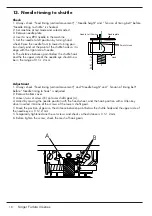
23. The needle stop position
Check
1. Set machine at function mode and select straight stitching.
2. Connect the foot control and run the machine.
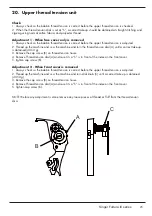
3. Release the foot control, machine should stop, and the tip of
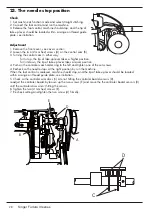
take-up lever should be located within a range on thread guide
plate, see illutration.
Adjustment
1. Remove the front cover, see covers section
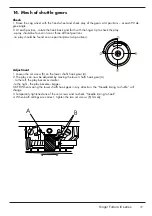
2. Loosen the two (2 mm hex) screws (A) on the control cam (B)
3. Turning the control cam in either way.
- Turn it up, the tip of take-up lever takes a higher position
- Turn it down, the tip of take-up lever takes a lower position.
4. Push on the controler cam holder ring to the left and tighten one of the set screws.
4. Recheck so the needle stops at the right position,by run the machine.
When the foot control is realesed, machine should stop, and the tip of take-up lever should be located
within a range on thread guide plate, see illutration.
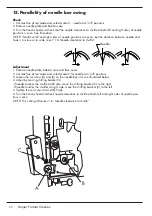
5. Check so the controler arm discs (C) are not hitting the controler board sensors (D).
re-adjust the controler board by loosen up the two screws (E) and move the the controler board sensors (D)
until the controler discs aren’t hitting the sensor.
6. Tighten the two (2 mm hex) screws (E).
7. Re check setting and tighten the two screw (A) fi rmelly.
C
D
A
B
E
D


