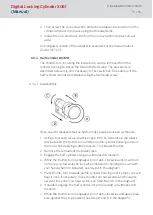
U section:
No restore force on the cam
R section:
Restore force section towards U section
O section:
Top dead point in deadbolt throw - no restore force on
the cam
OG:
Top threshold section
UG:
Lower threshold section
1:
Thumb-turn
2:
Cam position (concealed)
1. With the cylinder engaged, first turn the thumb-turn in the direction of
locking as far as the deadbolt throw in the 'R' section.
9
You will feel the restore force. When you release the thumb-turn in
this position, it must turn back to the 'U' section of its own accord.
2. Lock the locking device and check the restore force. To do so, turn the
engaged thumb-turn in the direction of locking through the 'R' section
and into the 'O' section.
9
The dead bolt extends. There is no restore force in the 'O' section.
3. Move the thumb-turn slightly over the threshold between the 'O' and 'R'
section in the same direction of rotation.
9
The dead bolt will extend. The restore force must turn the thumb-
turn automatically from this point as far as the 'U' section if it is
released.
9
If the thumb-turn does not automatically rotate as far as the 'U'
section, either the fastening screw has been tightened too firmly or
the locking device has been aligned incorrectly. The test is to be
repeated after the fault has been eliminated. A fastening screw
which has been tightened too firmly acts as a brake on the restoring
force mechanism.
4. Lock the door and check that the locking device functions correctly by
pressing the door fitting or panic bar in the direction of escape.
9
The dead bolt must spring back and it must be possible to open the
door easily.
9
If the dead bolt does not draw back when the handle is turned or the
door fitting catches, either the locking cylinder or the locking device is
incorrectly aligned or defective. The test is to be repeated after the
fault has been eliminated as described above.
Please contact the lock manufacturer if you are unable to ensure that the
locking device functions correctly after the functional test.
Digital Locking Cylinder 3061
(Manual)
6. Installation instructions
29 / 54


