Getting Started with Silhouette Portrait
17
Send Tab
The Send tab is very similar to Cut Settings of the past, but it is divided by actions. The Send tab was
designed to streamline the cutting process and make cutting even easier.
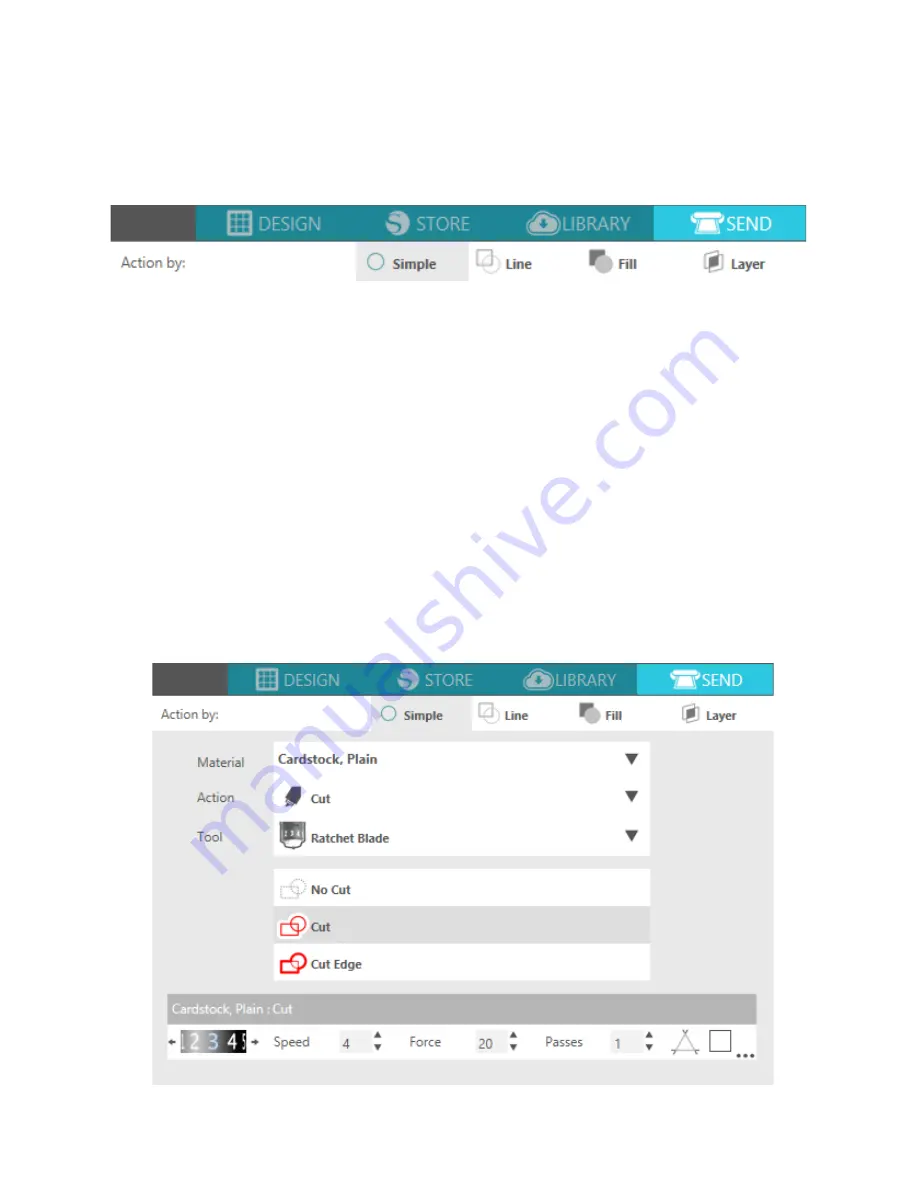
There are four actions you can choose in the Send tab: Simple, Line, Fill, and Layer.
Each action allows you to adjust specific cut settings. Cutting is as easy as choosing your material, your
action, and your blade in the Simple panel and clicking “Send.”
The Send screen has two parts: the panel on the right-hand side and the screen displaying your design on
the left. The panel on the right-hand side includes the action tabs as well as the action options. When you
enter the Send tab, cut lines in your design will become thicker and bolder so you can see exactly what
your Silhouette is going to cut.
If you want to make any adjustments to your design, you must go back to the Design screen by clicking on
the Design tab. You can move your design while you are in the Send tab, but you cannot make any other
adjustments to the design.
The Action Options
The first option on the Action panel is the Simple tab. This is where you can select the material type, the
action you want your Silhouette to perform, what kind of blade you are using, what lines you want to be
cut, etched, scored, embossed, or stippled.
Summary of Contents for Portrait
Page 1: ...Getting started with your ...


