Instruction Manual DualScat Ex
36
10118E/5
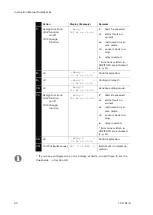
Action
5.
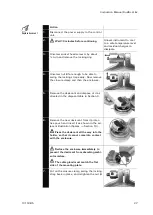
Reconnect the power supply to the control unit
and let the instrument warm up for at least
3 minutes.
6.
Flush out the test setup two or three times with
the calibration suspension.
7.
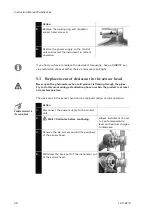
Fill calibration suspension carefully into the test
setup until it is completely full.
Be careful not to allow any bubbles to form dur-
ing filling, because air bubbles inside the test
setup could cause trouble.
8.
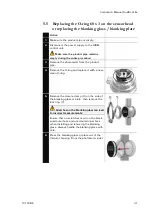
Make sure the measuring chamber is protected
against outside light.
9.
Carry out the recalibration on the control unit as
directed in Section 5.6.3.
10.
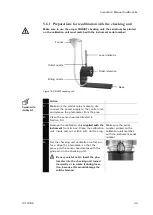
Drain the test setup, remove the photometer
and replace it in your product pipe.
Section 3.1
11.
Restart the instrument in normal operation.
5.6.3
Recalibration procedure
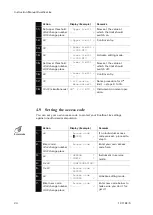
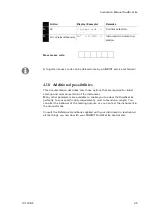
The recalibration itself is carried out on the control unit.
Action
Display (Example)
Remarks
1.
Access code
> ▓00000 <
If no individual access
code was set, proceed to
step 3.
2.
Enter code:
/
change number
/
change place
Access code
> ...... <
Enter your own access
code here.
3.
* SENSOR *
* CHECK *
Instrument in service
mode.
4.
* RECALIBRATION*
5.
> Val.Adjust 90<
0.00 NTU
On single-angle instrument:
depending on meas. angle
90° or 25°.
6.
Val.Adjust 90
> 0.00 NTU <
Activate editing mode.
7.
Enter nominal value:
/
Wert ändern
/
Stelle wechseln
Val.Adjust 90
> ▓.00 NTU <
Now enter the nominal
value of the checking unit
for the relevant measuring
angle or the precise value
of the calibration suspen-
sion in the NTU unit.
Recalibration
Summary of Contents for DualScat Ex
Page 2: ... SIGRIST PHOTOMETER AG Subject to change without notice 9 2016 ...
Page 6: ...Instruction Manual DualScat Ex iv 10118E 5 ...
Page 53: ...Instruction Manual DualScat Ex 10118E 5 47 ...
Page 54: ...Instruction Manual DualScat Ex 48 10118E 5 11 Appendix ...

