


19
❑
6) Make sure you can get to your engine’s main needle valve
for on-field adjustments. In most cases this will probably require
making an extension to get the needle valve to exit the cowling.
The main needle valve of most modern engines will have a hole in
the end and a set screw to accept a homemade music wire needle
valve extension. Our Saito 1.00 needle valve has this feature, with
a center hole just large enough to accept a 5/64” dia. (.078”) music
wire needle valve extension. Here’’s the step-by-step method we
used to make a simple neat needle valve extension for our Saito
1.00, and to figure out where it will exit the cowling.
First, remove the cowl. Cut a 2” long piece of 5/64” dia. music wire
and deburr the ends. Insert one end of the wire fully into the hole
in the end of the needle valve and tighten the set screw. Screw the
needle valve all the way into the carburetor. Lay a straight edge
against the side of the fuselage at the nose, intersection the piece
of wire. Mark this point on the wire with a marker pen. Remove
the needle valve from the engine and remove the wire extension
from the needle valve. Cut the wire to length at the mark just
made. Sharpen the end of the wire to a sharp, tapered point using
a bench grinder or a Dremel
®
Tool.
Reinstall the wire back in the needle valve, with the blunt end in the
needle valve and the sharpened end exposed. Screw the needle
valve fully back into the carburetor. Mount the cowling on the
fuselage. From the front of the cowling, use a pair of hemostats to
begin turning the needle valve out of the caburetor. As the needle
valve is turned, the sharpened end of the wire will come into
contact with the inside surface of the cowl. Continue turning the
needle valve until it is firmly pressed against the cowl. Place a pad
of paper over the cowl at the location of the sharpened wire point
and lightly tap the paper pad with a small hammer or block of
hardwood. Removing the pad, you should see a small dimple on
the outside of the cowl.
Remove the cowl and use a 3/32” dia. (.093”) bit to drill a hole
through the cowl at the dimple mark. Remove the needle valve
from the engine, and then remove and disgard the sharpened
piece of wire. Cut a new 3” long piece of 5/64” dia. music wire and
deburr the ends. Grind a small flat spot, about 3/32” long, on one
end of the music wire. Install the new wire in the needle valve,
tightening the set screw against the flat spot.
Remount the cowling on the fuselage. Use a hemostats or long
needle nose pliers to insert the needle valve inside the cowling
through the front opening.
Guide the wire extension through
the 3/32” hole in the cowl.
Line up the needle valve with the
carburetor and then screw it full back in. At the outside of the
cowling, use a fine-tip pen to mark the wire about 1/8” or so away
from the cowl. Once again, take the needle valve out of the cowl.
Use a heavy pliers to bend the wire 90
O
at the mark. Cut off the
bent end of the wire to a length of 1/2” or so, and deburr the end.
Reinstall the needle valve for the final time.
FUEL TANK INSTALLATION
❑
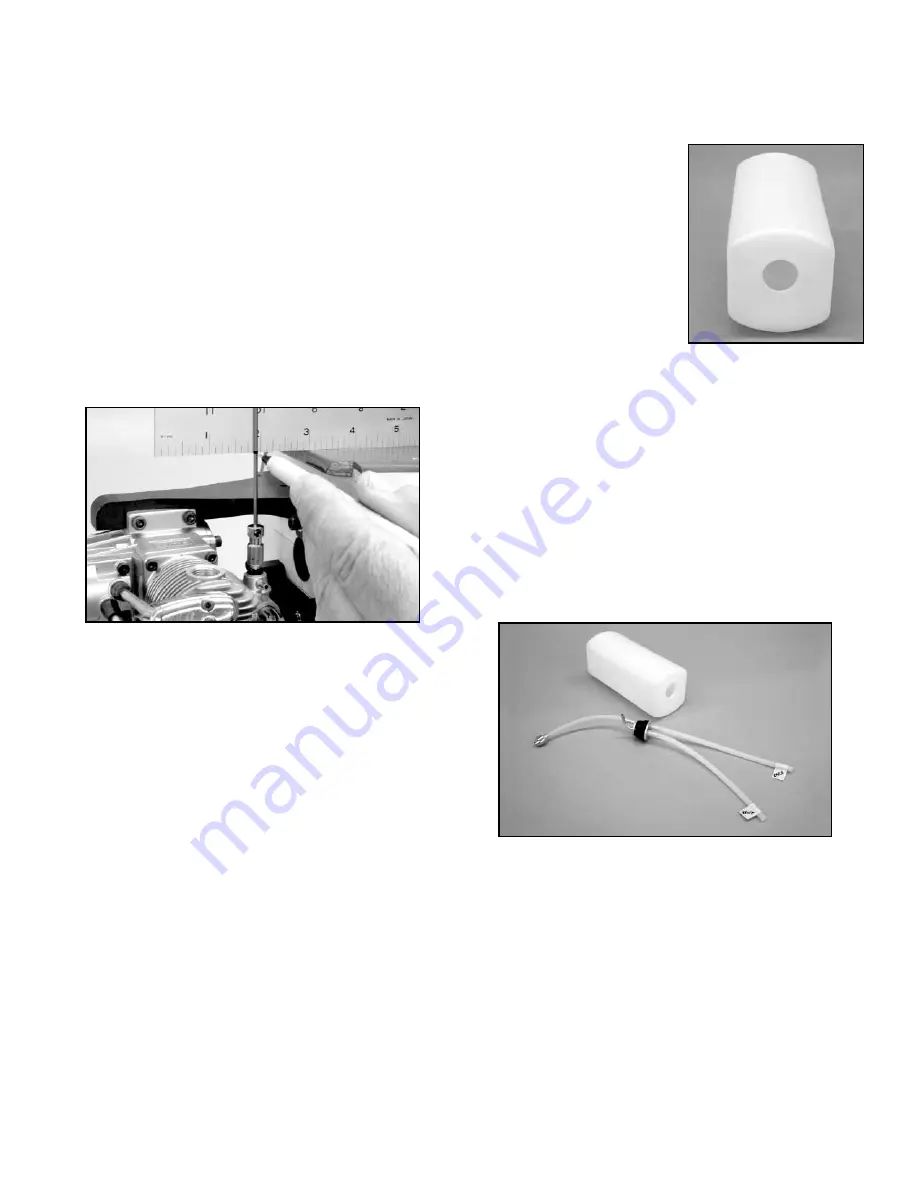
1) Assemble the fuel tank as shown. We recommend that you
plumb the tank with a simple two-line fuel delivery setup. One fuel
line is connected from the fuel tank’s pick-up or "clunk" line to the
engine's carburetor. The second line is the overflow or vent line.
After filling the tank, this same fuel
line is then connected to the
engine's muffler pressure nipple,
providing some manifold pressure
to the tank. Note that the rubber
stopper for the tank has two holes
that go all the way through it. Use
these two holes for the two
aluminum fuel lines. Also, note that
the correct orientation of the fuel
tank body in the tank compartment
is with its neck "up", in the front
view.
Use the shortest of the three supplied aluminum tubes for the fuel
feed tube. Use the longest of the aluminum tubes for the vent tube.
Gently bend the vent tube upwards to 90
O
, so it will be near the top
of the tank. The fuel pick-up aluminum tubing requires no bending.
Adjust the length of the internal silicone fuel tubing to allow free
movement of the metal clunk pick-up inside the tank.
Install
the stopper assembly into the neck of the tank and secure by
tightening the clamp bolt.
Tighten this bolt firmly, causing the
rubber stopper to compress and expand in the tank's hole,
creating a secure seal around the neck of the tank.
Cut two 8” or so lengths of silicone fuel tubing (not included), and
slide them over the two exposed aluminum fuel lines. Correctly
identify each of them as "vent" and "carb" and label them with
small pieces of tape. Doing this now avoids any confusion later.
❑
2) Trial fit the tank in place into the front of the fuselage to
familiarize yourself with how it mounts. The front of the tank should
fit through the hole in the firewall. The main body of the tank is
supported by the contoured hole in the fuselage former. Take the
tank back out of the fuselage.
❑
3) Apply a generous bead of silicone sealer around the neck
of the tank (regular household bathroom type silicone sealer,
available at most hardware stores, is recommended).
Slide the
tank in place in the fuselage, feeding the two silicone fuel lines and
the neck of the tank through the hole in the firewall. Push the tank
firmly up against the back side of the firewall, compressing the
silicone sealer to make a good seal.
Note: If your engine mounting bolts are protruding behind the
firewall, it’s a good idea to take them out and cut them off so they
don’t protrude. If they contact the tank, they might dig into the tank
and cause a leak in the future. Cut them off or use shorter bolts.