


Configuration with the CCIC1410 Homepage
67
Siemens Building Technologies
Fire Safety & Security Products
05.2009
–
Saturation:
Adjust the image saturation level, which ranges from -5 to +5. The default value
is set to 0.
–
Contrast:
Adjust the image contrast level, which ranges from -5 to +5. The default value is
set to 0.
–
Sharpness:
Adjust the image sharpness level, which ranges from -3 to +3. The default value
is set to +3.
–
White balance:
Adjust the value for best colour temperature. "Auto" – The network camera
automatically adjusts the colour temperature of light according to the light
source. The white balance setting defaults to "Auto" and works well in most
situations.
Keep current value. Proceed as follows to manually set the white balance to
compensate for the ambient lighting conditions.
1.
Set the white balance to "Auto" and click
Save
.
2.
Place a sheet of white paper in front of the lens; then allow the network
camera to adjust the colour temperature automatically.
3.
Select "Keep current value" to confirm the setting while the white balance is
being measured.
4.
Click
Save
for the setting to take effect.
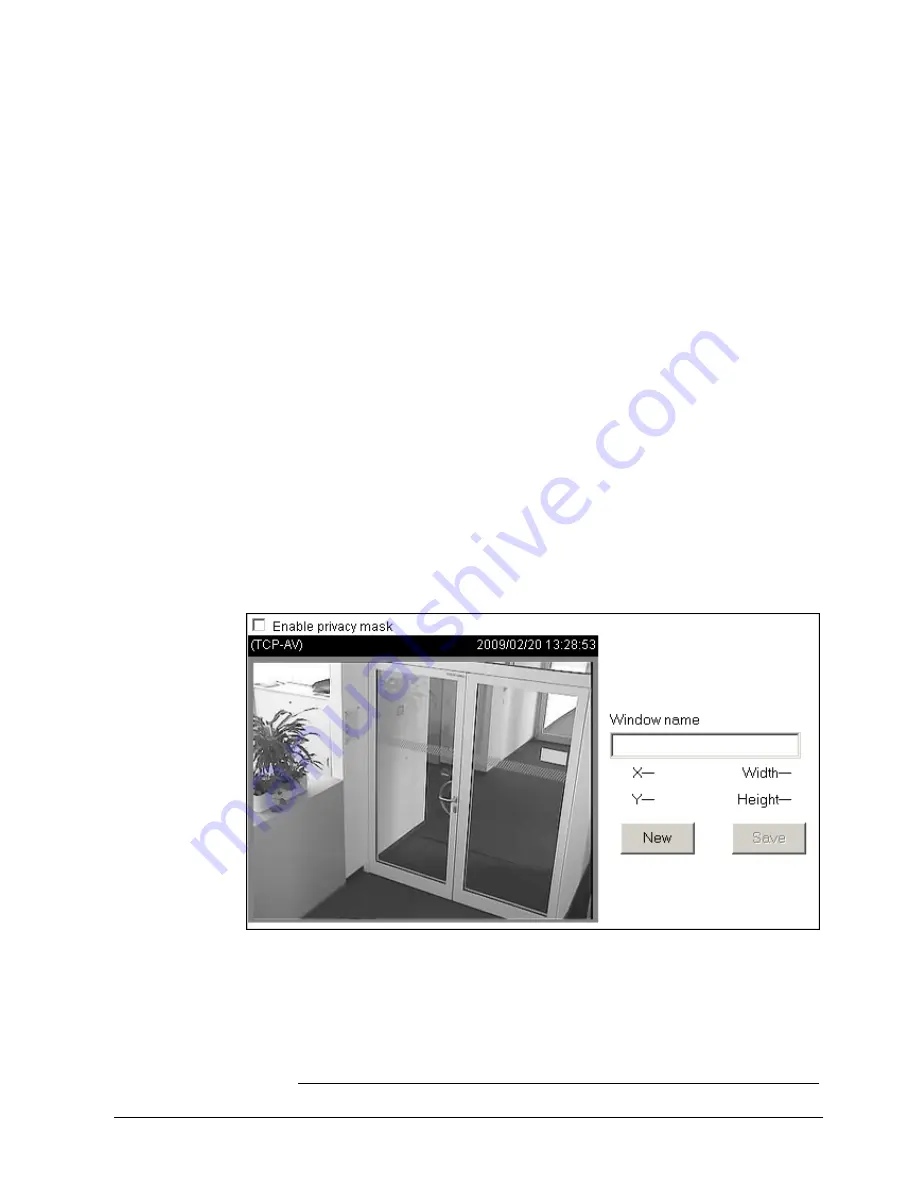
Privacy mask
Click
Privacy Mask
to open the privacy mask page. In this page, you can mask out
sensitive zones for privacy concerns.
To set the privacy mask windows, proceed as follows:
1.
Click
New
to add a new window.
2.
You can resize and drag-drop the window, which should be at least twice the
size of the object (height and width) you want to cover.
3.
Enter a descriptive window name and click
Save
for the settings to take effect.
4.
Select
Enable privacy mask
to enable this function.
Summary of Contents for CCIC1410
Page 95: ......