E-29
Setting Up the System
■
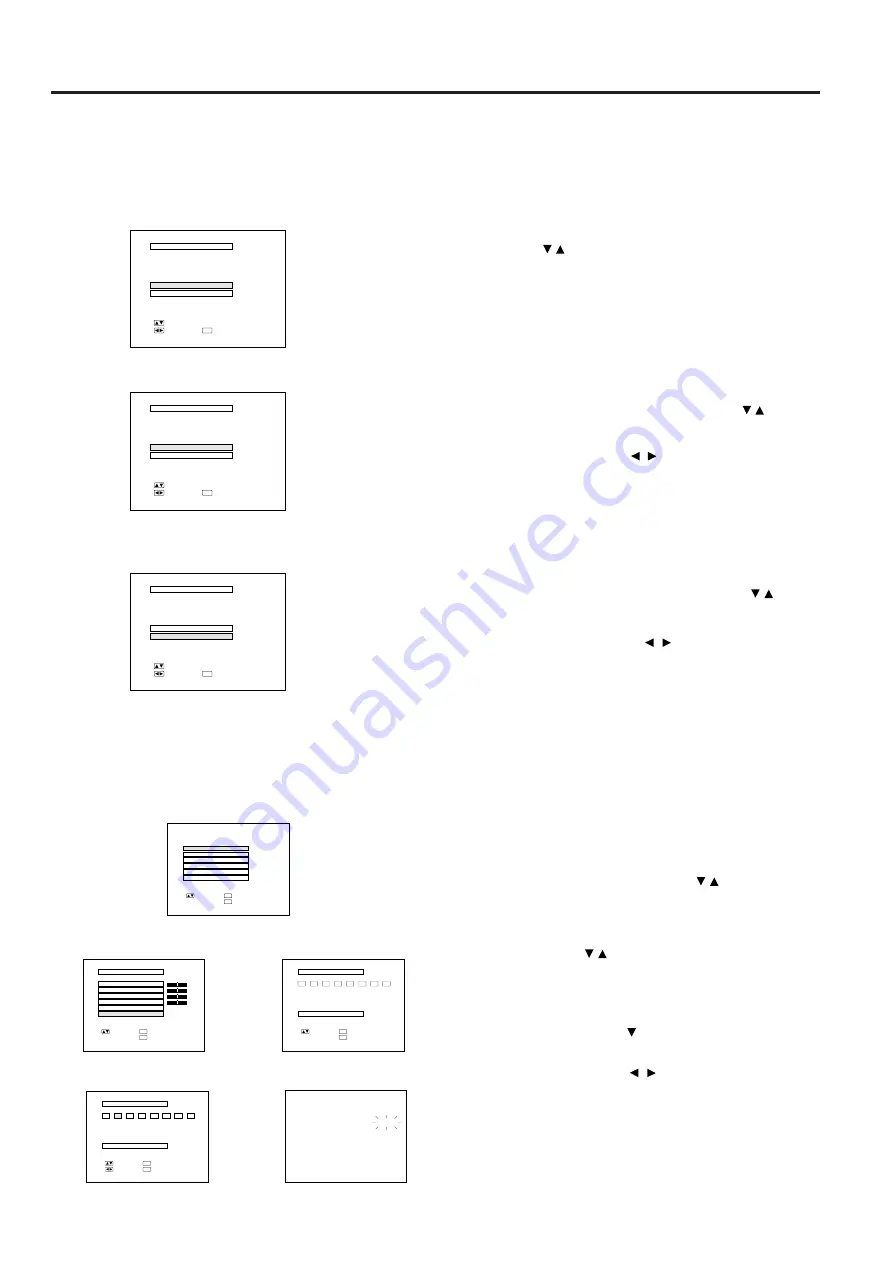
Using this function, you can check the input signal,
select the remote mouse, and select DC 5V output.
Checking the system
•
Press the MENU button. Select “SYSTEM SETUP” with the
ADJUSTMENT / buttons. Then press the ENTER button to
change to the picture indicated on the left.
•
The current system conditions will be displayed on the screen.
•
Press the MENU button to select the normal screen mode.
Note:
•
In the video screen, the resolution and frequency settings will
not be displayed.
Selecting the Remote Mouse
•
Press the MENU button.
•
Select SYSTEM SETUP with the ADJUSTMENT / buttons.
Then press the ENTER button.
•
Select “REMOTE MOUSE” and then select either “[AT]” or
“[98] ”with the ADJUSTMENT
/
buttons.
•
Select [AT] when using IBM compatibles and Apple Macintosh
series.
•
Select [98] when using NEC PC98 series (for Japan).
•
Press the MENU button to select the normal screen mode.
Selecting DC 5V output
• Press the MENU button.
• Select “SYSTEM SETUP” with the ADJUSTMENT
/
buttons. Then press the ENTER button.
• Select “DC 5V OUTPUT” and then select either “M.PWR” or
“LAMP” with the ADJUSTMENT
/
buttons.
• Select “M.PWR” when you want a continuous current supply
from the DC 5V OUTPUT with the main power on.
• Select “LAMP” when you want a current supply from the DC
5V OUTPUT only when LAMP is set to “ON”.
• Press the MENU button to select the normal screen mode.
Checking the Lamp Usage Time
The lamp usage time can be checked with the On-Screen
display.
1
Press the INPUT SELECT button on the projector or
remote control and select RGB 1 or RGB 2 INPUT.
2
Press the MENU button. While the MENU screen is
displayed, press the ADJUSTMENT / buttons to
select “RGB1 ADJ.” Press the ENTER button. The
MENU mode changes as shown.
3
While the RGB adjustment menu is displayed, press
the ADJUSTMENT / buttons to select “MEMORY
SELECT.” Then press the ENTER button to change the
image.
4
The screen shown on the left will appear.
5
Press the ADJUSTMENT button once to move to the
following screen.
6
Using the ADJUSTMENT / buttons, select memory
no. “1” and then press the ENTER button. Then,
repeating the same procedure for each number
separately, enter “7,” “0,” “1,” “0,” and “0.”
7
The lamp usage time will be displayed at the On-
Screen display for approximately 30 seconds.
Functions on the Projector
R G B 1 A D J .
R G B I N P U T A D J .
I M A G E A D J .
A U D I O
S Y S T E M S E T U P
L A N G U A G E
: S E L .
: N E X T
ENTER
: E N D
MENU
M E M O R Y S E L E C T
S E T T I N G
: S E L .
: B A C K
ENTER
: E N D
MENU
0
1
2
3
4
5
6
7
➞
R G B 1 A D J .
B R I G H T
R E D
B L U E
R E S E T
M E M O R Y S E L E C T
+
0
0
0
0
: S E L .
: N E X T
ENTER
: E N D
MENU
-
+
-
+
-
+
-
P I C T U R E
LAMP
0000H
M E M O R Y S E L E C T
: S E L .
: A D J .
ENTER
: E N D
MENU
0
1
2
3
4
5
6
7
R E S O L U T I O N
H O R F R E Q
V E R T F R E Q
S E T T I N G
: E N T E R
Hz
KHz
3 8
6 0
8 0 0
× 6 0 0
➞
➞
➞
12
3
56
4
7
S Y S T E M S E T U P
R E S O L U T I O N
H O R F R E Q
V E R T F R E Q
R E M O T E M O U S E
: S E L .
: E N D
MENU
8 0 0 ¥ 6 0 0
[
A T
]
D C 5 V O U T P U T
M . P W R
: A D J .
6 0 Hz
3 7 . 9 KHz
S Y S T E M S E T U P
R E S O L U T I O N
H O R F R E Q
V E R T F R E Q
R E M O T E M O U S E
: S E L .
: E N D
MENU
8 0 0 ¥ 6 0 0
[
A T
]
D C 5 V O U T P U T
M . P W R
: A D J .
6 0 Hz
3 7 . 9 KHz
S Y S T E M S E T U P
R E S O L U T I O N
H O R F R E Q
V E R T F R E Q
R E M O T E M O U S E
: S E L .
: E N D
MENU
8 0 0 ¥ 6 0 0
[
A T
]
D C 5 V O U T P U T
M . P W R
: A D J .
6 0 Hz
3 7 . 9 KHz
On-Screen Display


