E-23
On-Screen Display
L A N G U A G E
: S E L .
: E N T E R
ENTER
: E N D
MENU
N E D E R L A N D S
E S P A Ñ O L
D E U T S C H
E N G L I S H
S V E N S K A
I T A L I A N O
F R A N Ç A I S
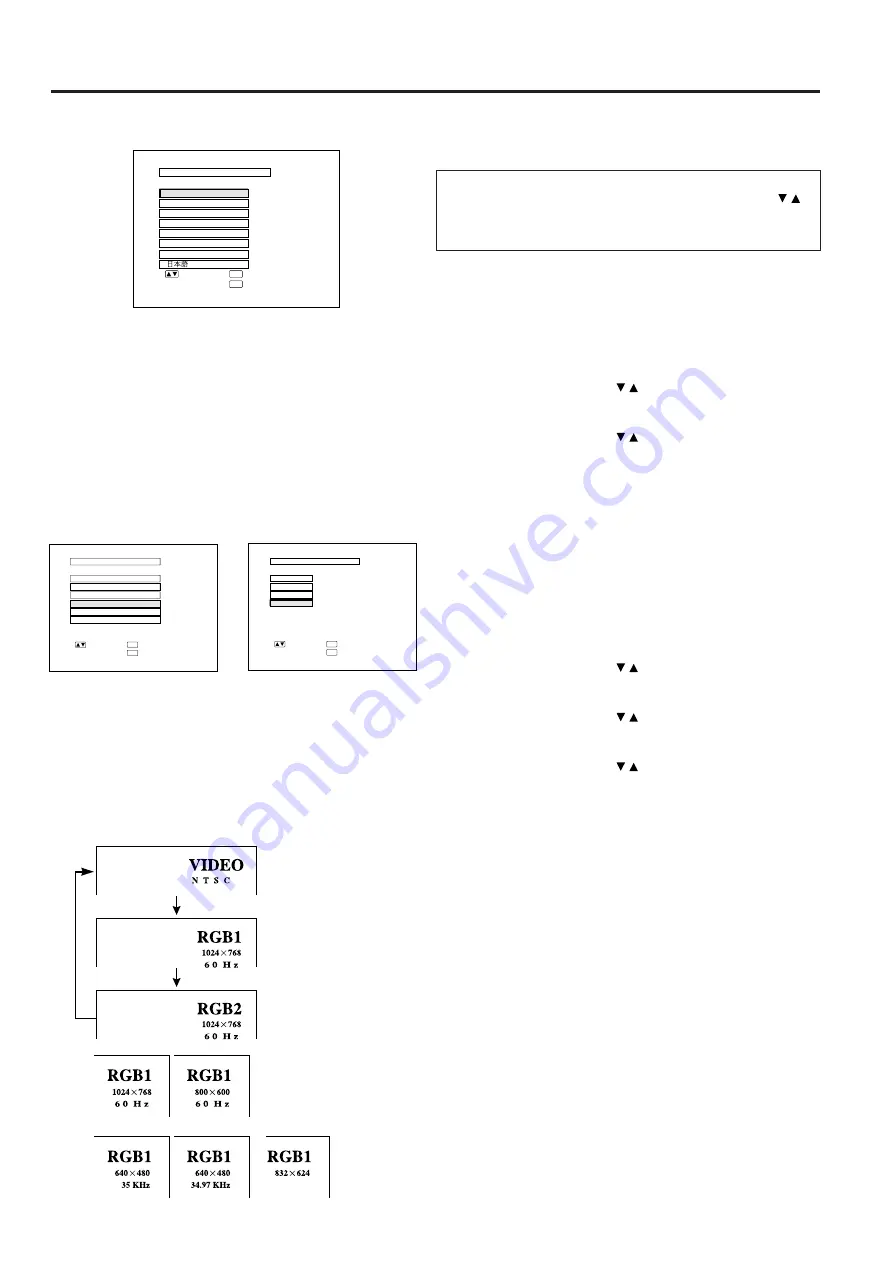
5. Select one of eight ON-SCREEN DISPLAY
languages.
You can return to the previous screen by selecting the
uppermost item (turquoise) with the ADJUSTMENT /
buttons (in this case, LANGUAGE) and then pressing
the ENTER button.
The on-screen display is set to English at the factory. The
language for the unit’s ON-SCREEN DISPLAY can be set
to English, German, Spanish, Dutch, French, Italian,
Swedish or Japanese.
Setting the ON-SCREEN DISPLAY language
1)
Press the MENU button. The menu will appear on the
screen.
2)
Press the ADJUSTMENT / buttons to highlight the
LANGUAGE item yellow. Then press the ENTER button to
display the language menu.
3)
Press the ADJUSTMENT / buttons to highlight the
desired language yellow. Then press the ENTER button to
set the language. The ON-SCREEN DISPLAY is now
programmed to display in the language chosen.
6. Change the system mode.
The video input system mode is set to AUTO at the
factory, but it can be changed to a different mode if the
selected system mode is not compatible with the con-
nected audiovisual equipment (when a color image
appears in black and white, etc.).
1)
Press the MENU button. The menu will appear on the
screen.
2)
Press the ADJUSTMENT / buttons to highlight the
“IMAGE ADJ.” yellow. Then press the ENTER button to
display the IMAGE ADJ.
3)
Press the ADJUSTMENT / buttons to highlight SYSTEM
yellow. Then press the ENTER button to display the
SYSTEM.
4)
Press the ADJUSTMENT / buttons to highlight yellow the
video system desired yellow. Then press the ENTER button
to set the system.
Notes:
•
In AUTO mode, “PAL,” “SECAM,” or “NTSC” is displayed on the screen for a few
seconds when the mode is changed with the INPUT SELECT button.
•
When the system mode is set to AUTO, you may not receive a clear picture due
to signal differences. If this happens, switch to the color system you are viewing.
7. Select input.
Press the INPUT SELECT button on the projector to
switch the picture input. When you press the button, the
current input mode is displayed for about 4 seconds. If
you press the button again while the input mode is
displayed, the mode changes as shown on the left.
Confirm the selected input terminal and press the INPUT
SELECT button.
Notes:
•
This can be selected directly using the VIDEO, DATA1 and DATA2 buttons
on the remote control.
•
In VIDEO mode, the system being received will be indicated below the
“VIDEO” display.
•
When selecting RGB mode, the resolution being displayed will be indicated
under “RGB,” as shown on the left. (Refer to the second example when
connecting to Mac display.)
•
When no signals are being received, “NO SIGNAL” will be displayed. When
receiving a signal the projector is not preset to receive, “NOT REG.” will be
displayed. (This display function does not operate in Video mode.)
Mac
COMPUTER
RGB2
For viewing the picture
from a video source
connected to: VIDEO
INPUT or S-VIDEO INPUT
COMPUTER
RGB1
On-Screen Display
: S E L .
: N E X T
ENTER
: E N D
MENU
B L U E S C R E E N
B L A C K S C R E E N
I M A G E A D J .
R E V E R S E
I N V E R T
I N P U T D I S P L A Y
[ O F F ]
[ O F F ]
[ O F F ]
S Y S T E M
[ O F F ]
[ O N ]
A U T O
S Y S T E M
P A L
S E C A M
: S E L .
: E N T E R
ENTER
: E N D
MENU
N T S C
➞
On-Screen Display


