background image


E-2


ENGLISH


WF-1100W 


1


2008/November/6

WF-1100W_MK2-EN


MK2


General Information


Precautions


General


Do not place anything on top of the unit.


Do not expose the unit to moisture, to temperatures higher than
60˚C (140˚F) or to extremely low temperatures.


If your system does not work properly, disconnect the AC power
lead from the wall socket. Plug the AC power lead back in, and
then turn on your system.


In case of an electrical storm, unplug the unit for safety.


Hold the AC power plug by the head when removing it from the
wall socket, as pulling the lead can damage internal wires.


The AC power plug/AC power input socket is used as a
disconnect device and shall always remain readily operable.


Do not remove the outer cover, as this may result in electric shock.
Refer internal service to your local SHARP service facility.


The ventilation should not be impeded by covering the ventilation
openings with items, such as newspapers, tablecloths, curtains,
etc.


No naked flame sources, such as lighted candles, should be
placed on the apparatus.


Attention should be drawn to the environmental aspects of battery
disposal. The apparatus is designed for used in moderate
climates.


This unit should only be used within the range of 5˚C - 35˚C 
(41˚F - 95˚F).


Warning:


The voltage used must be the same as that specified on this unit.
Using this product with a higher voltage other than that which is
specified is dangerous and may result in a fire or other type of
accident causing damage. SHARP will not be held responsible for
any damage resulting from use of this unit with a voltage other than
that which is specified.


Volume control


The sound level at a given volume setting depends on speaker
efficiency, location and various other factors. It is advisable to avoid
exposure to high volume levels. Do not turn the volume on full at
switch on and listen to music at moderate levels. Excessive sound
pressure from earphones and headphones can cause hearing loss.


Condensation


Sudden temperature changes, storage or operation in an extremely
humid environment may cause condensation inside the cabinet
(tape heads, etc.) or on the transmitter on the remote control.
Condensation can cause the unit to malfunction. If this happens,
leave the power on with no cassette in the unit until normal playback
is possible (about 1 hour). Wipe off any condensation on the
transmitter with a soft cloth before operating the unit.


Please ensure that the equipment is
positioned in a well-ventilated area
and ensure that there is at least 
10 cm (4") of free space along the
sides, top and back of the
equipment.


Use the unit on a firm, level surface free from vibration.


Keep the unit away from direct sunlight, strong magnetic fields,
excessive dust, humidity and electronic/electrical equipment
(home computers, facsimiles, etc.) which generate electrical
noise.

10 cm 

(4")

 10 cm (4")

Summary of Contents for WF-1100W MK2

Page 1: ...porté votre choix sur ce produit SHARP Pour en tirer le meilleur parti veuillez lire ce mode d emploi très attentivement Il vous guidera dans l utilisation de votre produit SHARP Parabéns por comprar este produto SHARP Para obter o melhor desempenho deste produto por favor leia este manual cuidadosamente Ele mostrará como operar seu produto SHARP PORTABLE STEREO MODEL MODÈLE MODELO WF 1100W MK2 CO...

Page 2: ...nced Feature Enhancing your system 12 14 References Troubleshooting chart 14 15 Maintenance 15 Specifications 16 When the FUNCTION switch is set at STAND BY position mains voltage is still present inside the unit This unit contains no user serviceable parts Never remove covers unless qualified to do so This unit contains dangerous voltages always remove mains plug from the socket before any servic...

Page 3: ...with a higher voltage other than that which is specified is dangerous and may result in a fire or other type of accident causing damage SHARP will not be held responsible for any damage resulting from use of this unit with a voltage other than that which is specified Volume control The sound level at a given volume setting depends on speaker efficiency location and various other factors It is advi...

Page 4: ... TAPE 2 Cassette Compartment 9 10 11 13 18 TAPE 1 Record Button 11 12 13 19 TAPE 1 Play Button 8 9 10 11 20 TAPE 1 Rewind Button 8 9 21 TAPE 1 Fast Forward Button 8 9 22 TAPE 1 Stop Eject Button 8 9 10 23 TAPE 1 Pause Button 8 9 10 11 24 TAPE 2 Reverse Mode Button 9 10 25 TAPE 2 Play Button 9 10 11 13 26 TAPE 2 Fast Wind Buttons 9 27 TAPE 2 Stop Eject Button 9 10 28 TAPE 2 Direction Button 9 10 11...

Page 5: ...R terminals as shown Use speakers with an impedance of 6 ohms or more as lower impedance speakers can damage the unit Caution Note The speaker grille is not removable Set the FUNCTION switch to STAND BY before connecting or disconnecting the speakers Connect the black wire to the minus terminal and the red wire to the plus terminal Do not mix the right channel and left channel wiring when connecti...

Page 6: ...sconnects the batteries Never use a power lead other than the one supplied Use of a power lead other than the one supplied may cause an electric shock or fire If a humming noise occurs turn the power plug upside down where it is connected to the AC power input socket on the unit 110 127 220 240 V 50 60 Hz AC 220V 240V AC 110V 127V AC 220V 240V AC 110V 127V 1 2 To AC INPUT To the wall socket VOLTAG...

Page 7: ...tteries nickel cadmium battery etc Batteries battery pack or batteries installed shall not be exposed to excessive heat such as sunshine fire or the like Battery replacement Replace the batteries when they become weak and or recording or playback is impaired This may occur even though radio broadcasts are audible 1 Disconnect the AC power lead and remove the battery compartment cover Connection of...

Page 8: ...quency towards 10 to boost the level for that frequency and towards 10 to lower the level Surround Surround refers to an acoustical effect similar to the ambience of a concert hall where the listener has the feeling of being surrounded by the sound Note The surround effect cannot be obtained from monaural sound signals Volume X BASS Graphic equaliser Surround VOLUME MIN X A M MAX MIN X BASS 400Hz ...

Page 9: ... to FM STEREO The FM STEREO indicator lights up when an FM broadcast is in stereo 5 If the FM reception is weak set the FM MONO FM STEREO switch to FM MONO Although the reception changes to monaural the sound becomes clearer POWER FINE TUNING TUNING FM STEREO BAND SELECTOR FM MONO FM STEREO FUNCTION SW1 SW2 MW SW1 FM Aerial adjustment Before playback For playback use normal or low noise tapes for ...

Page 10: ...will be audible The TAPE 2 DIRECTION indicator refers to the travel direction for TAPE 2 side A 1 or side B 2 It is not related to the movement of TAPE 1 Tape 2 playback both tape sides To change the side of tape Press the DIRECTION switch during playback To listen to side A 1 the TAPE 2 DIRECTION A indicator will be illuminated To listen to side B 2 the TAPE 2 DIRECTION B indicator will be illumi...

Page 11: ...rt playing 6 Select side A 1 or side B 2 on TAPE 2 with the DIRECTION switch When playback begins from side A 1 on TAPE 2 the playback sequence will be as follows TAPE 2 side A 1 side B 2 TAPE 1 side A 1 stop When playback begins from side B 2 on TAPE 2 the playback sequence will be as follows TAPE 2 side B 2 TAPE 1 side A 1 stop Before recording When recording important selections make a prelimin...

Page 12: ... A C B BEAT CANCEL FUNCTION FINE TUNING TUNING DUBBING SPEED BUILT IN MIC TAPE 1 TAPE 2 1 Set the FUNCTION switch to TAPE 2 Set the DUBBING SPEED switch to MIC 3 Load a cassette into the TAPE 1 cassette compartment 4 Press the PAUSE button of TAPE 1 5 Press the RECORD button of TAPE 1 which also engages the PLAY button 6 Press the PAUSE button again to begin recording 1 Set the FUNCTION switch to ...

Page 13: ...t anything to the MIX MIC socket Enhancing your system Set the FUNCTION switch to STAND BY before connecting or disconnecting any component 1 Load the tape to be erased into TAPE 1 cassette compartment 2 Set the FUNCTION switch to TAPE 3 Set the DUBBING SPEED switch to HIGH or NORMAL Check to ensure that TAPE 2 is out of operation 4 Press the RECORD button of TAPE 1 to begin erasing CD player AUX ...

Page 14: ...nit to the AUX IN sockets red right channel white left channel 2 Set the FUNCTION switch to AUX 3 Operate the CD player or other external unit 4 To record the sound from the external unit perform steps 2 5 of the Recording from the radio section on page 11 MIX MIC PLAY RECORD DUBBING SPEED VOLUME FUNCTION 1 To protect the speakers from shock noise and to avoid disturbing noises set the VOLUME cont...

Page 15: ...loss Troubleshooting chart Many potential problems can be resolved by the owner without calling a service technician If something is wrong with this product check the following before calling your authorised SHARP dealer or service centre General Tuner PHONES Symptom Possible cause When a button is pressed the unit does not respond Set the unit to the power stand by mode and then turn it back on N...

Page 16: ... use the deck s heads and capstans may become magnetised causing poor sound Demagnetise these parts once every 30 hours of playing recording time by using a commercial tape head demagnetiser Read the demagnetiser s instructions carefully before use External care Periodically wipe the cabinet with a soft cloth and a diluted soap solution then wipe with dry cloth Do not use chemically treated cleani...

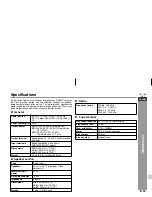
Page 17: ...ation 10 T H D RMS 25 W 12 5 W 12 5 W AC operation 10 T H D Output terminal Headphones 16 50 ohms recommended 32 ohms Input terminals Mixing Microphone 600 ohms AUX IN 350 mV 47 kohms Dimensions Width 300 mm 11 13 16 Height 240 mm 9 29 64 Depth 220 mm 8 11 16 Weight 3 9 kg 8 6 lbs without batteries Type 2 way type Speakers 12 cm 4 3 4 Free edge Piezo Speaker x 2 Maximum input power 25 W Rated inpu...

Page 18: ...2008 Octo MÉMORANDUM MEMORANDO ...

Page 19: ...2008 Octo MÉMORANDUM MEMORANDO ...

Page 20: ...2008 July 24 WF 1100W_MK2_BACK 08E R MW 1 92L87511000101 ...

Reviews: