


13
Basic Operations
Basic Operations
Capturing
Capturing a Still Image
in Auto Mode
In Auto Mode, the camera automatically sets
the best aperture, shutter speed, exposure
value and white balance. Light metering is set
to Center mode.
• Before you start, perform the procedures
described on pages 7 to 12 to prepare your
camera for capturing images.
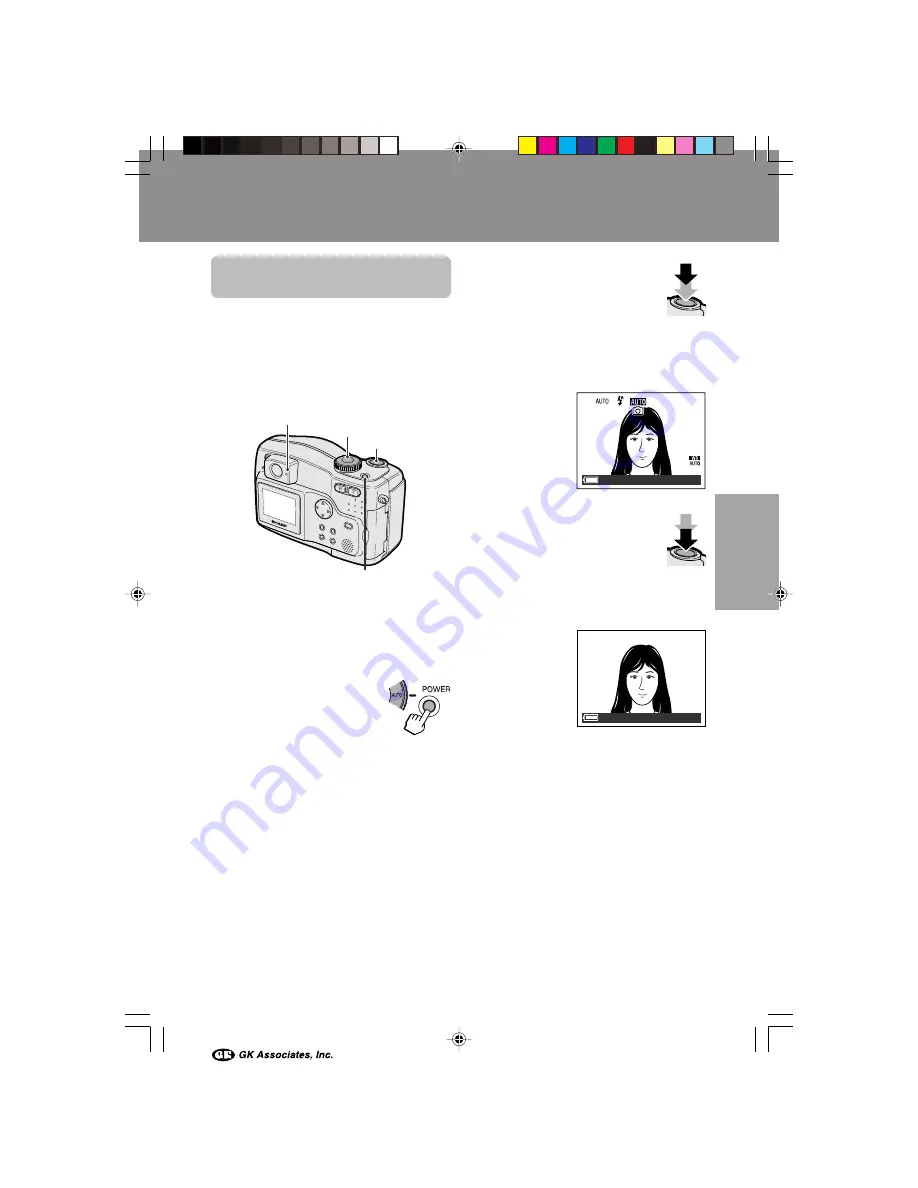
1
Insert a card into the camera (see page
9).
2
Remove the lens cap.
3
Set the Mode Dial to “
[
”.
4
Press the Power button
until the camera turns on.
5
Press the Shutter button half-
way down to focus on the
subject.
• The camera automatically
focuses on the subject. While
focusing, you will see the status
indicator blinks green and
v
blinks
white in the display. When the camera
locks into focus, they stop blinking and
light up.
6
Press the Shutter button fully to
capture the image.
• The status indicator blinks while
data is being recorded on the
card, and stops blinking when
recording completes.
• When the QUICK VIEW menu item is set
to “ON”, the captured image displays on
the LCD screen for a few seconds.
• To capture another image, release the
Shutter button and make sure the status
indicator lights up, then perform steps 5
and 6.
Notes:
• Do not turn the power off while the status
indicator is blinking in step 6.
• Remove the lens cap before powering on the
camera.
0 0
5
/
1
6
.
5
F
0 0
5
/
1
6
.
5
F
2 4 4 8]
F i n e
[
ISO
0 1 0
0
Status indicator
Mode dial
Shutter button
Power button
VE-CG40U-013-016
02.8.27, 7:29 PM
13


