


53
Scan to USB memory device
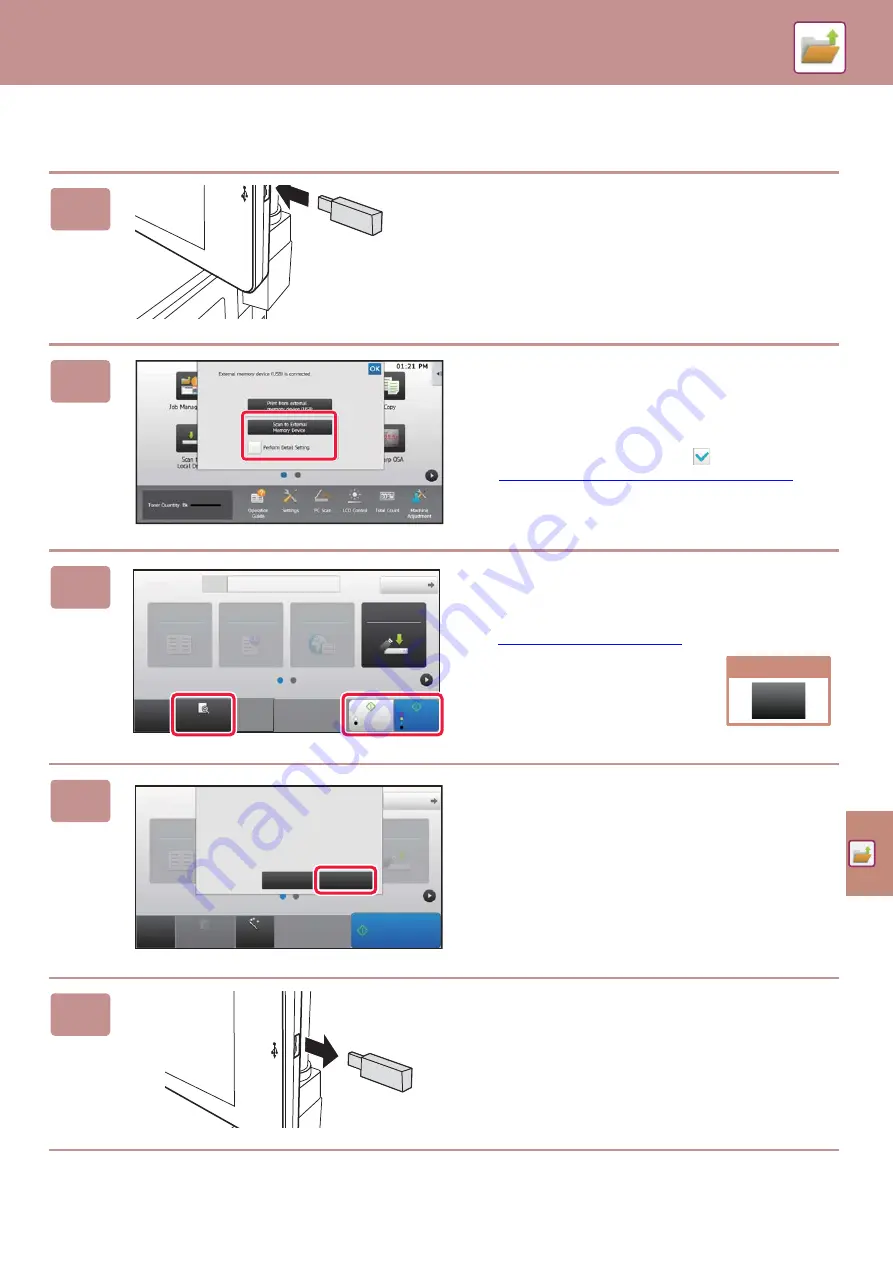
1
Connect the USB memory device to
the machine.
• Use FAT32 or NTFS format for USB memory device.
• When the format of the USB memory device is FAT32,
use a 32 GB or less USB memory device.
2
When a screen for selecting the action
appears, tap [Scan to External Memory
Device].
• To select detailed settings in normal mode, select the
[Perform Detail Setting] checkbox
.
►
BASE SCREEN OF SCANNER MODE (page 48)
• If the machine/device save screen is open, this screen will
not appear.
3
Tap the [Colour Start] key or [B/W
Start] key.
To check a preview of a document, tap the [Preview] key.
►
4
After scanning all originals, tap the
[Read-End] key.
When you scan the original using the automatic document
feeder, this screen does not appear.
5
Check the [Sending data has been
completed.] message, and remove the
USB memory device from the machine.
CA
Preview
Original
A4
Address External Memory Device
Detail
B/W
Start
Colour
Start
Address Book
History
Global
Address Search
Local Drive/
USB
Cancel scanning
Cancel
Scan
Address Book
Scan to USB/
Local Drive
CA
Preview
Auto Set
Original
Detail
B/W
Start
Color
Start
Place next original. (Pg.No.1)
Press [Start].
When finished, press [Read-End].
Change Setting
Read-End
8½x11
Start
Summary of Contents for MX-M1056
Page 39: ...PRINTER 39 4 Click the Print button Printing begins ...
Page 64: ...2020L US1 ...