


46
6
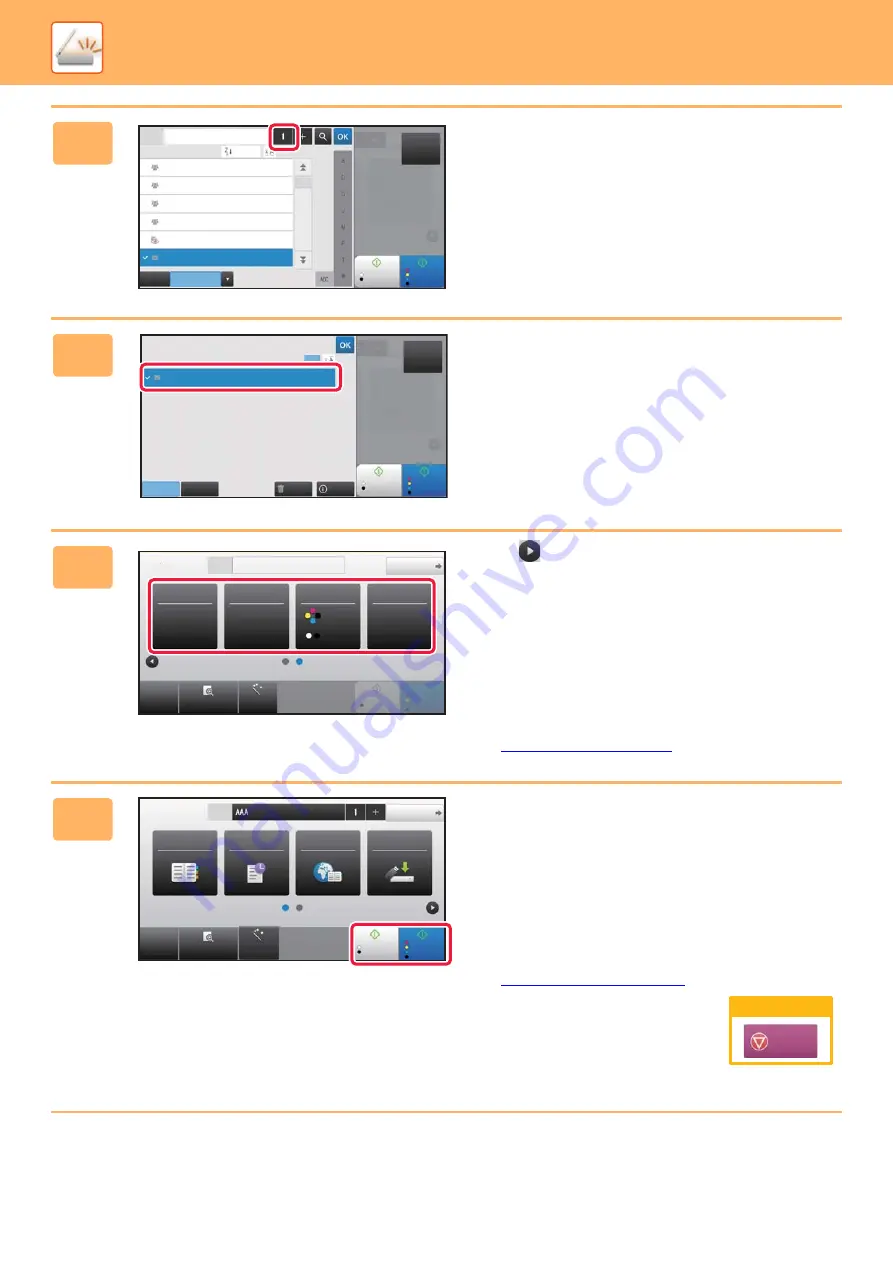
Tap the [All Destinations] key.
A list of the selected destinations appears.
7
Confirm the destination.
If an incorrect destination appears in the list, tap the
destination and then tap the [Delete] key.
8
Tap
to change screens and select
settings.
Change settings as needed.
The functions below can be enabled in easy mode.
• Original
• Resolution
• File Format
• Blank Page Skip
To select more detailed settings, tap the [Detail] key and
select settings in normal mode.
►
9
Tap the [Colour Start] key or [B/W
Start] key.
• In the factory default state, the machine detects whether
the original is black & white or full color when you tap the
[Colour Start] key, and automatically switches between full
color and black & white binary scanning. When you tap
the [B/W Start] key, the machine scans in black & white
binary. For details, see the User's Manual.
• To check a preview of a document, tap the [Preview] key.
CA
Address
123.ne.jp
Sort
AAA AAA
BBB BBB
CCC CCC
DDD DDD
EEE EEE
FFF FFF
Frequent
Use
Category
All
B/W
Start
Color
Start
FFF FFF
1234.ne.jp
Scan to USB/
Local Drive
Delete
Info.
Cc
To
B/W
Start
Color
Start
CA
FFF FFF
All Destinations
1234.ne.jp
1
Scan to USB/
Local Drive
CA
Preview
Auto Set
Original
Address E-mail Address
B/W
Start
Color
Start
Detail
Original
Auto
200x200dpi
Off
Resolution
File Format
Blank Page
Skip
8½x11
Address Book
History
Global
Address Search
Scan to USB/
Local Drive
CA
Preview
Original
Address
Detail
B/W
Start
Colour
Start
8½x11
Auto Set
Cancel scanning
Cancel
Scan
Summary of Contents for MX-M1056
Page 39: ...PRINTER 39 4 Click the Print button Printing begins ...
Page 64: ...2020L US1 ...