


4-80
3
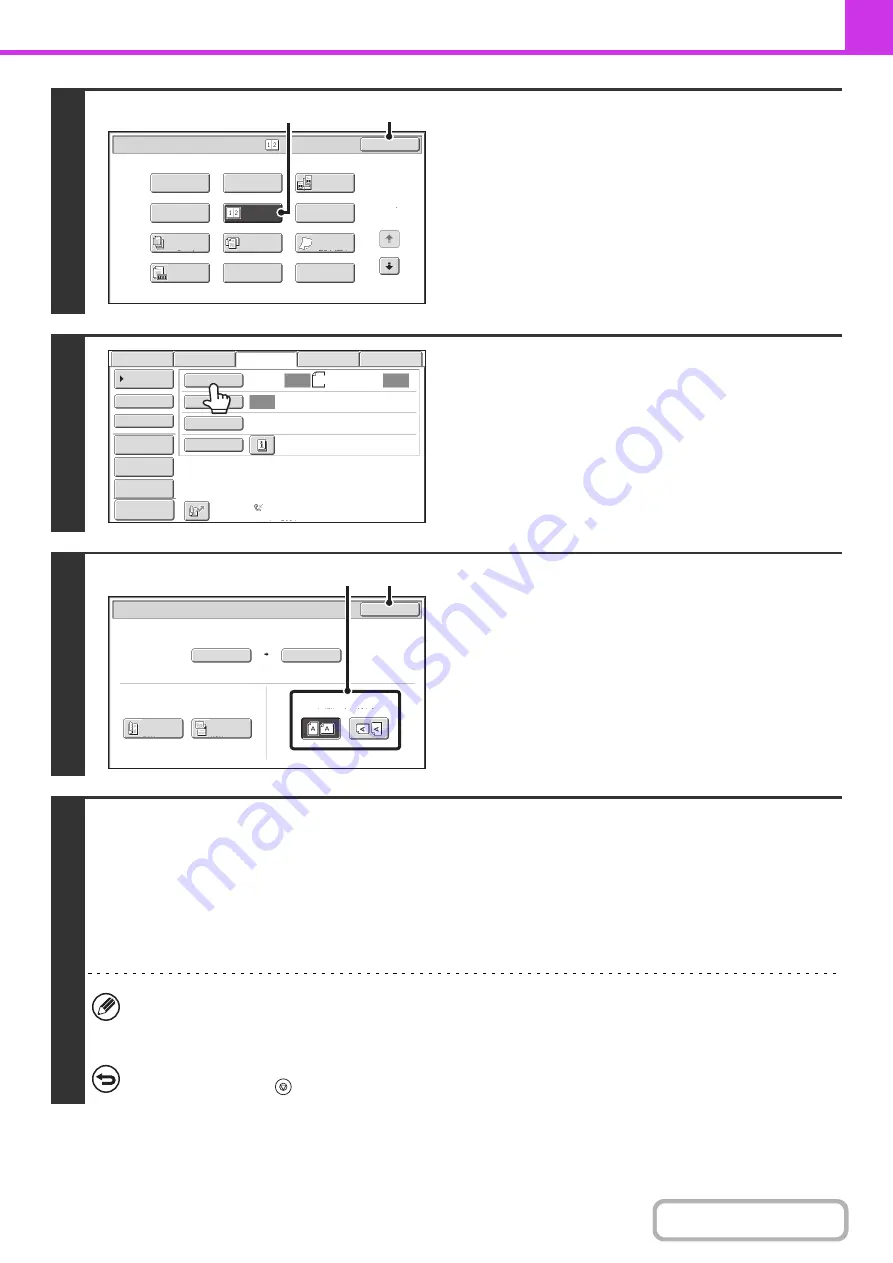
Select 2in1.
(1) Touch the [Special Modes] key.
☞
(2) Touch the [2in1] key so that it is
highlighted.
(3) Touch the [OK] key.
4
Touch the [Original] key.
5
Specify the orientation in which the
original is placed.
(1) Touch the appropriate [Image Orientation]
key.
If this setting is not correct, a suitable image may not be
transmitted.
(2) Touch the [OK] key.
6
Press the [BLACK & WHITE START] key.
Scanning begins.
• If you inserted the original pages in the document feeder tray, all pages are scanned.
A beep will sound to indicate that scanning is finished.
• If you are scanning the original on the document glass, scan each page one page at a time.
When scanning finishes, place the next original and press the [BLACK & WHITE START] key. Repeat until all pages have
been scanned and then touch the [Read-End] key.
A beep will sound to indicate that scanning is finished.
The [Configure] key can be touched in the scan-end confirmation screen to change the exposure, resolution, scan
size, and send size. (However, when scanning each even-numbered page of the original, only the exposure can be
changed.)
To cancel scanning...
Press the [STOP] key (
).
1
2
2in1
Fax/Special Modes
Card Shot
OK
Dual Page
Scan
Slow Scan
Mode
Quick File
Mixed Si
z
e
Original
Erase
Job
Build
File
Program
Timer
Original
Count
(3)
(2)
Auto
Auto
Auto
USB
Mem.
Scan
Fax
Scan
Standard
Auto
Reception
Fax
Memory
:
100
%
Internet
Fax
PC
Scan
Scan
:
Send
:
8
½
x11
File
Quick
File
Address
Review
Direct
TX
Sub
Address
Address
Book
Special
Modes
Resolution
Exposure
Original
Preview
Auto
Auto 8
½
x11
Scan Si
z
e
Send Si
z
e
100
%
Fax/Original
OK
2
-
Sided
Booklet
2
-
Sided
Tablet
Image Orientation
(1)
(2)