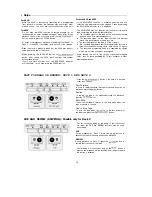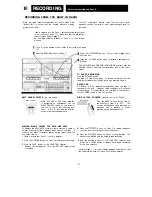
ERASING RECORDED TAPES
Previously recorded materials will be erased automatically
whenever new materials are re-recorded onto the tape. If it
is desired to erase a previously recorded tape without record-
ing over it, follow the instructions below.
• Check to ensure that Deck 1 is out of operation.
• Do not connect any microphones to the EXT MIC sockets.
| Load a tape to be erased into the cassette compartment of
Deck 2.
2 Press the TAPE button of the FUNCTION selector.
3 Press the button. This will automatically
engage the button and begin erasing the tape.
DUBBING FROM DECK 1 TO DECK 2
• Normal speed dubbing as well as high-speed dubbing may
be performed with this unit.
Load a pre-recorded cassette tape into the cassette compart-
ment of Deck 1, and a cassette tape to be recorded into the
cassette compartment of Deck 2.
Set the TAPE selectors of Deck 1 and Deck 2 to their
proper positions (refer to instructions on page 11).
• Do not connect any microphones to the EXT MIC sockets.
Set the CONT PLAY switch to the [1] &/or [2]position.
Press the TAPE button of the FUNCTION selector.
Set the DUBBING SPEED selector to either the
NORMAL or HIGH speed position.
The NORMAL position permits to dub at the normal
speed.
The HIGH position permits to dub at twice the normal
speed.
• Do not change the setting of the DUBBING SPEED
selector during dubbing.
Press the DUBBING START button. The button
of Deck 1, button and button of
Deck 2 are automatically pressed.
For rest of the operations, refer to the recording section on
the previous page.
DUBBING WITH APLD AND APPS FUNCTIONS
Certain selected materials can be dubbed by using the APLD
or APPS function to locate each desired selection.
| Perform steps 1 - 3 of DUBBING FROM DECK 1 TO
DECK 2 to prepare the unit for dubbing.
2 Locate the beginning of the desired selection by using the
APLD (refer to page 13).
3 Set the desired number of selections to be dubbed with
the SET button (refer to instructions for APPS OPERA-
TION on page 13).
4 Press the DUBBING START button.
5 Upon conclusion of dubbing of the preset selections, the
tapes on Deck 1 and Deck 2 will simultaneously stop and
the END PAUSE indicator illuminates.
6 Press the button of Deck 1 and 2.
7 To perform dubbing of subsequent selections, repeat
Steps 1 - 6.
16
Summary of Contents for GF-800Z
Page 1: ......

