10
RECORDING
RECORDING FROM THE BUILT-IN RADIO
• When recording important selections, be sure to make a pre-
liminary test to ensure that the desired material is being
properly recorded.
• The ALC (Automatic Record Level Control) circuit auto-
matically controls the level of input signal strength used for
recording.
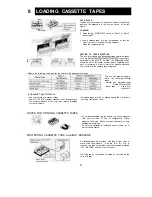
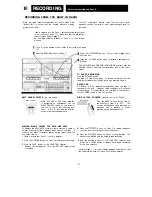
Load a cassette into the Deck 2 cassette compartment (refer
to instructions on page 11). Make sure that the protection
tabs are intact (refer to page 11).
Set the tape selector switches of Deck 2 to their proper
position.
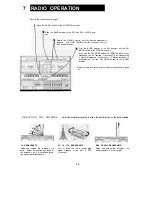
Tune in to the desired station (refer to instructions on page
10.)
Press the
II
PAUSE button of Deck 2.
Press the button. This will also engage the
PLAY button.
Press the II PAUSE button again to release it and begin re-
cording.
• The VOLUME and GRAPHIC EQUALIZER controls may be
adjusted without effecting the recording level of the input
signal.
TO PAUSE RECORDING
Press the
II
PAUSE button.
The tape will stop at this point. To resume recording from the
same point, release the II PAUSE button by pressing it again.
AFTER USE
All buttons will be released automatically when the tape is
reached to the end. However, radio reception will continue,
uninterrupted. If it is desired to turn the radio off at this time,
set the POWER switch to the OFF position.
DIGITAL TAPE COUNTER
(function only with Deck 2)
Press the RESET button at the side of
the counter to reset it to "000". The
counter will advance while recording or
playback, and it provides a useful
eference during these operations.
BEAT CANCEL SWITCH
(on rear panel)
BEAT CANCEL
When AM, SW1 or SW2 radio reception
is hampered by interference, set the
BEAT CANCEL switch on the back of
the unit to one of the following posi-
tions: А, В or С by which the interfer-
ence will be reduced apparently.
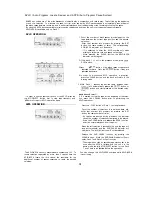
MAKING BLANK SPACES FOR APLD AND APPS
To operate the APLD/APPS correctly, there must be a space of
at least 4-second duration between each item on the tape. In
order to edit blank (non-signal space) on the tape, follow the
instructions below.
• Check to ensure that Deck 1 is out of operation.
1
Press the II PAUSE button on Deck 2 at the end of recording.
2
Press the TAPE button of the FUNCTION selector.
Remove the microphones from the EXT MIC sockets when
connected.
3
Press the button on Deck 2 to release the pause
function, and run the tape for about 5 seconds.
4
Press the button on Deck 2 to stop the tape. The
Space is now edited onto the cassette tape recording.
5
Press the desired button of the FUNCTION selector, and
press the II PAUSE button to release it and begin recording
of the next selection.
• Perform steps 1 — 4 to edit spaces between selections so that
the tape may be used for future APLD/APPS operation.
15
•
Record ing is possible only Deck 2.
Summary of Contents for GF-800Z
Page 1: ......

