


39
w
Monochrome
When set to “On”, images are displayed in monochrome.
w
Range of OPC
The brightness level range of the OPC sensor’s
automatic adjustments can be set according to your
preferences. The adjustment range of the OPC sensor
can be set to a maximum of +16 and a minimum of -16.
Selected item
Description
Max.
-16 t16
Min.
-16 t16
NOTE
• This function is available only when the OPC setting is set
to On or On: Display.
• The maximum setting cannot be set to a smaller number
than the minimum setting.
• The minimum setting cannot be set to a bigger number
than the maximum setting.
• The maximum and minimum settings cannot be set to the
same number.
• Depending on the brightness of the surrounding light, the
OPC sensor might not operate if the adjustment range is
small.
Advanced picture settings (Continued)
Adjusting the image position
For adjusting a picture's horizontal and vertical position.
Press
MENU
and the MENU screen displays.
1
Press
c
/
d
to select “Setup”.
2
Press
a
/
b
to select “Position”, and then
press
ENTER
.
5
Press
a
/
b
to select “H-Pos.” or “V-Pos.”.
6
Press
c
/
d
to adjust the item to your desired
position.
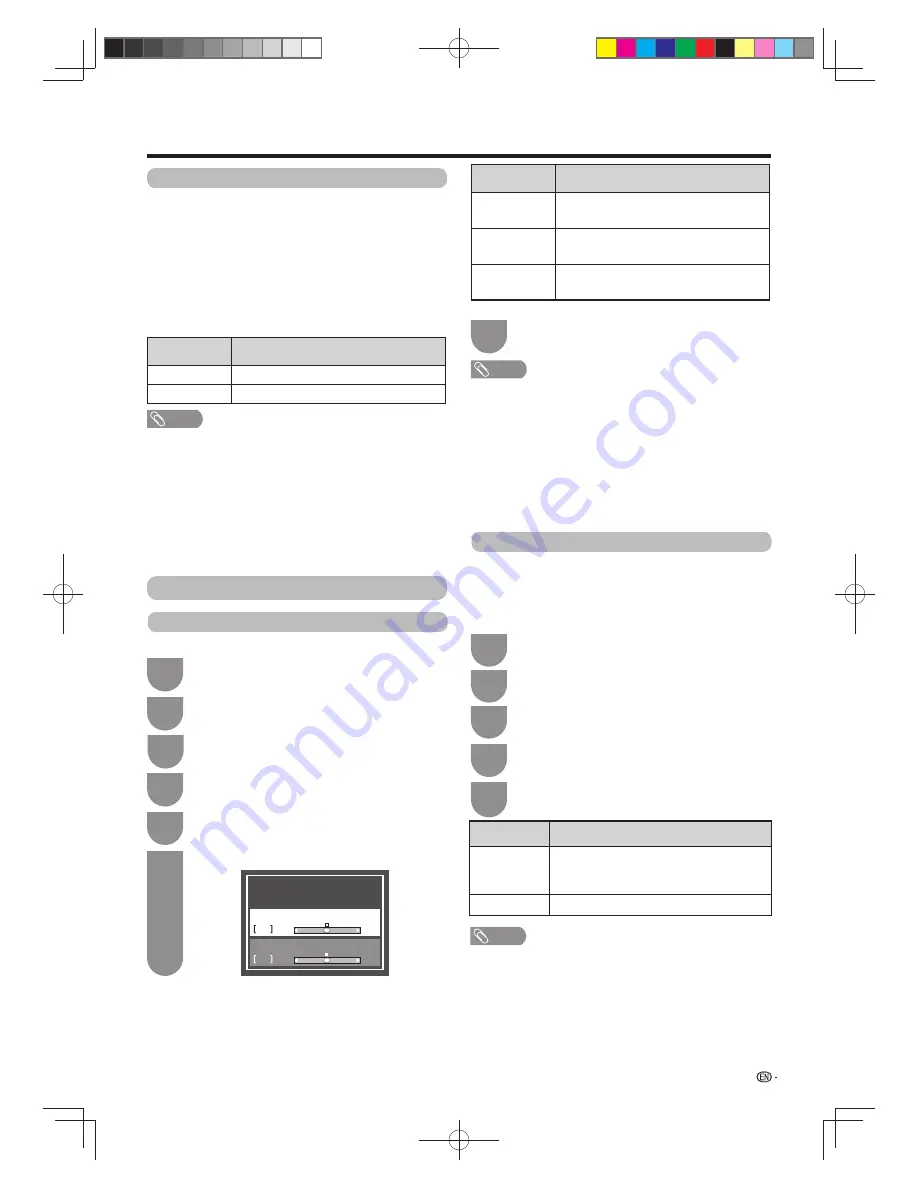
7
Position
Display position adjustment
0
H-Pos.
0
-8
+8
V-Pos.
-8
+8
NOTE
• For resetting all adjustment items to the factory preset
values, press
a
/
b
to select “Reset”, and then press
ENTER
.
•
Adjustments are stored separately according to input
source.
• Images may not be displayed properly depending on the
settings and/or signals.
• This function is available for 3D images converted from 2D
images or normal 2D images.
• This function is not available for DTV broadcasts with
MHEG-5 signals.
Selected item
Description
H-Pos.
Centres the image by moving it to the left
or right.
V-Pos.
Centres the image by moving it up or
down.
Reset
Resets all adjustment items to the factory
preset values.
Game play time
This function displays the elapsed game time so you
do not lose track of the time.
To display the elapsed time, select “GAME” under “AV
mode” for the input mode of the terminal connected to
the game console before starting the game.
Press
MENU
and the MENU screen displays.
1
Press
c
/
d
to select “Setup”.
2
Press
a
/
b
to select “Game play time”.
4
Press
c
/
d
to select “On”.
5
Selected item
Description
On
The elapsed time is displayed every 30
minutes when you switch to GAME mode in
external input mode.
Off
No elapsed time shown.
NOTE
• “Game play time” is displayed in the external input mode.
• “Game play time” is reset after performing the following
operations:
1. When toggling the input.
2. When changing “AV mode”.
Press
b
/
c
/
d
to select “Option”.
3
Press
a
/
b
to select “Screen effect” and then
press
ENTER
.
4
Press
b
/
c
/
d
to select “Option”.
3
Other picture settings
Watching TV
60X50H_en_ID5.indd 39
60X50H_en_ID5.indd 39
2011-6-13 17:20:06
2011-6-13 17:20:06


