15
5. Fit LCD screen to Remote control, attach battery and neaten cables
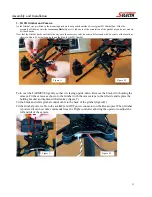
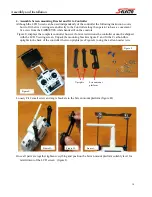
Fit the screen to the mounting point with as shown with the fitting screw from the kit (figure J).
Cable-Tie the black cable to the handle located on the back of the controller (figure K.)
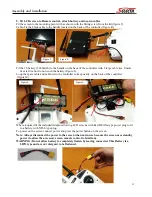
Fit the 3S battery (2200mAh) to the handle on the back of the controller with 2 large cable ties. Ensure
ties are firm but do not crush the battery (figure L).
Loop the spare cable and cable-tie to the controller to keep neatly on the back of the controller
(figure M).
Where required fit the included Adaptor allowing LCD screens with Red DEANs type power plug to fit
to a battery with XT60 type plug.
To power on the screen connect power and press the power button on the screen.
Note: Always disconnect the power to the screen when not in use because the screen uses standby
power (to allow the accessory screen remote control to function).
WARNING: Do not allow battery to completely flatten by leaving connected. This Battery is a
LIPO type and are not designed to be flattened.
Figure J.
Figure K.
Figure L.
Figure L.
Assembly and Installation

