


14 Rev. 1.2 13/01/2021
B4) CLOSING HAMMER:
The control unit is supplied by the manufacturer with the
Closing Hammer Function disabled. If you want to enable
the Closing Hammer function at maximum power, proceed
as follows: set SEL and SET to display
B4
then press SET
to select the function. At the same time
DOT 1
will start to
flash, press SET to change the function,
DOT 2
will
remain permanently lit and the operation will be complete.
If, however, you want to enable the W ater Hammer
function with the force set via trimmer VR2, proceed as
follows: set SEL and SET to display
B3
then press SET to
select the function. At the same time
DOT 1
will start to
flash, press SET and at the same time
DOT 1
will start to
flash quickly, press SET to change the function,
DOT 2
will remain permanently lit and the operation will be
complete.
Repeat the operation to restore the initial configuration.
Accordingly
the
control
unit,
if
functioning
with
Deceleration during closing, will reach (after having
completed the deceleration closing phase) a time of 1
second with power relative to the choice selected in order
to overcome the gate installed.
B5) FOLLOW ME :
The control unit is supplied by the manufacturer with the
Follow Me function disabled. If you want to enabl e the
function, proceed as follows: set SEL and SET to display
B5
then press SET to select the function. At the same
time
DOT 1
will start to flash, press SET to change the
function,
DOT 2
will remain permanently lit and the
operation will be complete. This way, the control unit will
close the gate immediately instead of respecting the
operating logic set, if it detects transit via activation of the
photocell connected to the DS input during the Opening,
Pause and Closing phases.
Repeat
the
procedure
to
restore
the
previous
configuration.
B6) Remote programming of radio control :
The control unit allows the transmission code to be
programmed,
without
using
the
SEL
and
SET
programming buttons directly on the control unit, but
remotely.
The Radio-control can be remotely programmed as
follows: continuously sending a previously-memorised
radio-control code for more than 10 seconds. At this point
the control unit switches to programming mode, as
described above for the TX CODE in the
A4
menu.
The control unit is supplied by the manufacturer with the
remote transmission code programming disabled. If you
want to enable the function, proceed as follows: set SEL
and SET to display
B6
then press SET to select the
function. At the same time
DOT 1
will start to flash, press
SET to change the function,
DOT 2
will remain
permanently lit and the operation will be complete.
Repeat
the
procedure
to
restore
the
previous
configuration.
B7) ELECTRONIC BRAKE :
The control unit is supplied by the manufacturer with the
electronic brake function disabled. If you want to enable
the function, proceed as follows: set SEL and SET to
display
B7
then press SET to select the function. At the
same time
DOT 1
will start to flash, press SET to change
the function,
DOT 2
will remain permanently lit and the
operation will be complete.
Accordingly,
the
control
unit
slows
down
gate
advancement by inertia, when there is a stop or command
to change the direction of motion. Repeat the procedure
to restore the previous configuration.
B8) SOFT START :
The control unit is supplied by the manufacturer with the
Soft Start function disabled. If you want to enable the
function, proceed as follows: set SEL and SET to display
B8
then press SET to select the function. At the same
time
DOT 1
will start to flash, press SET to change the
function,
DOT 2
will remain permanently lit and the
operation will be complete. Accordingly, every time the
gate starts motion the control unit will control motor start -
up, increasing the power gradually from minimum to
maximum in the first two seconds of operation. Repeat the
procedure to restore the previous configuration.
B9) SOFT STOP :
The control unit is supplied by the manufacturer with the
Soft Stop function disabled. If you want to enable the
function, proceed as follows: set SEL and SET to display
B9
then press SET to select the function. At the same
time
DOT 1
will start to flash, press SET to change the
function,
DOT 2
will remain permanently lit and the
operation will be complete. This way, at the end of
movement, the control unit will gradually bring the force
down to zero within 2 seconds.
Repeat the procedure to restore the previous configuration.
CONFIGURATIONS MENU “ C ”
The control unit is supplied by the manufacturer with the
possibility of selecting a number of important functions.
-----------------
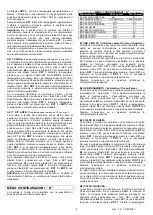
CONFIGURATIONS MENU “ C ” --------------
Digit Reference DOT 2 Off DOT 2 On
C1) BL Input = DS2 NO YES
C2) FC Inputs ( 1-4 ) = DS ( 1-4 ) NO YES
C3) PUL = OPEN / PED = CLOSED NO YES
C4) PRE-FLASHING NO YES
C5) COURTESY LIGHT NO YES
C6) PAUSE LAMP NO YES
C7) DECELERATION NO YES
C8) DS1 PHOTOCELLS TEST NO YES
C9) DS2 PHOTOCELLS TEST NO YES
C1) BL Input Selection:
The default settings of the control unit have BL input
operation for connection of a Block button (NC). If you
want to select BL input operating mode as DS2, proceed
as follows: set SEL and SET to display
C1
then press SET
to select the function. At the same time
DOT 1
will start to
flash, press SET to change the function,
DOT 2
will
remain permanently lit and the operation will be complete.
Repeat
the
procedure
to
restore
the
previous
configuration.
C2) 4 x FC Inputs Selection:
The default settings of the control unit have operation of
limit switch inputs FA1, FC1, FA2, FC2 for connection of
the limit switches (NC) for the two motors connected. If
you want to select Limit Switch operation as Safety
Devices, proceed as follows: set SEL and SET to display
C2
then press SET to select the function. At the same
time
DOT 1
will start to flash, press SET to change the
function,
DOT 2
will remain permanently lit and the
operation will be complete.
Repeat
the
procedure
to
restore
the
previous
configuration.
This way, the control unit changes operation of the 4 Limit
switch inputs in 4 Safety Devices inputs with the following
operation:
FC AP1 ( Safe opening ) :
If the device trips during closing, it is ignored. If it trips
during opening, it Stops + gate motion is reversed for 2
sec.


