4.9.8 Fit VS4987 to the VVT Unit and rotate the Unit
anti-clockwise
to the
fully retarded position
. Then fit VS4984 Holding Tool to
the EXHAUST camshaft gear and apply force in an
anti-
clockwise
direction in order to ensure slack on the secondary
chain on the tensioner plunger side.
4.9.9 Whilst continuing to apply this force, tighten the INLET camshaft
gear bolt.
4.9.10 Repeat this procedure on the left-hand bank.
IMPORTANT:
Remove all tools.
4.10
LATER ENGINES
Primary chain tensioners
These primary chain tensioners have a ratchet system on the
tensioner plunger.
WARNING: When compressing the plunger DO NOT release
the ratchet until the plunger has fully retracted into its bore
or damage to the ratchet system will result.
The plunger is compressed using a vice, and retained in this
position using VS4975T8 Locking Pin, from Kit VS4980.
4.10.1 Slowly compress the tensioner plunger using minimal force, and
insert VS4975T8 Locking Pin to retain the retracted plunger
position.
4.10.2 Fit the tensioner to the engine.
4.10.3 Pull out VS4975T8 Pin to actuate the plunger onto the chain rail.
Tightening camshaft gear bolts:-
4.10.4 Work on the right-hand bank.
IMPORTANT: On later engines, Jaguar and Land Rover
instruct that the INLET camshaft gear bolt is tightened first,
followed by the EXHAUST gear bolt.
WARNING: On these engines the INLET camshaft gear bolt
MUST BE tightened before the EXHAUST camshaft gear
bolt. Failure to tighten the INLET camshaft gear bolts first,
will result in engine damage.
4.10.5 Fit VS4984 to the EXHAUST camshaft gear and apply force, in
an
anti-clockwise
direction, to tension the primary chain on its
drive side, allowing the tensioner plunger to fully extend
outwards.
4.10.6 Whilst applying force with VS4984 Holding Tool, tighten the
INLET gear bolt first, and then tighten EXHAUST gear bolt
4.10.7 Repeat procedure on the left-hand bank.
01284 757500
www.sealey.co.uk
01284 703534
Web
NOTE: It is our policy to continually improve products and as such we reserve the right to alter data, specifications and component parts without prior notice.
IMPORTANT:
No liability is accepted for incorrect use of this equipment.
WARRANTY:
Guarantee is 12 months from purchase date, proof of which will be required for any claim.
.
4.9.4 Tighten the EXHAUST camshaft gear bolt (fig.44).
4.9.5 Fit VS4984 Holding Tool to the EXHAUST gear and apply force
to the Tool, in an
anti-clockwise
direction, in order to ensure
slack on the secondary chain on the tensioner plunger side.
4.9.6 Whilst applying this force, tighten the EXHAUST camshaft gear
bolt.
4.9.7 If engine does not have VVT, continue to apply force with
VS4984 and tighten the INLET camshaft gear bolt (fig.45).
VS4987 VVT Setting Tool
Some early engines, are fitted with VTT, and it is necessary to
use VS4987 Setting Tool before tightening the INLET camshaft
gear bolt.
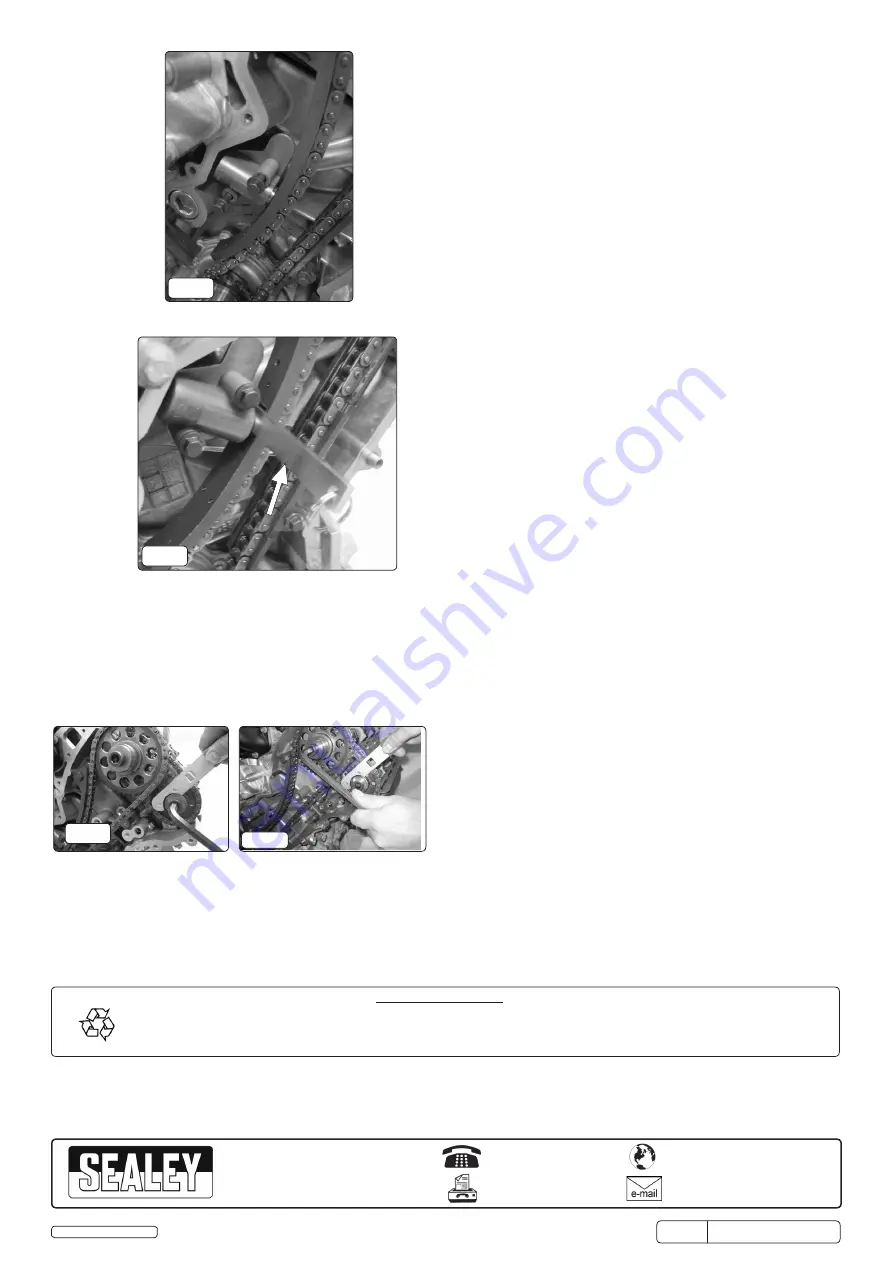
4.9.2 Fit the back plate and tensioner unit to the engine (fig.42).
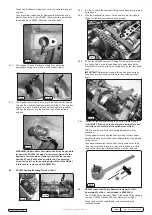
VS4986 Tensioner Wedge Set
4.9.3 Fit the VS4986 Wedge between the tensioner plunger and the
chain rail to fill any gap, removing slack from the chain (fig.43).
NOTE:
VS4986 is a pair of Tensioner Wedges and can be used
as a single Wedge or in a combination of two Wedges,
dependant upon the gap between plunger and rail.
fig.42
fig.43
fig.44
fig.45
Sole UK Distributor, Sealey Group,
Kempson Way, Suffolk Business Park
,
Bury St. Edmunds, Suffolk,
IP32 7AR
Original Language Version
© Jack Sealey Limited
VS4980
Issue No: 3 (SP) 08/07/15
Tightening camshaft gear bolts:-
IMPORTANT: On early engines, Jaguar instruct that the
EXHAUST camshaft gear bolt is tightened first, followed by
the INLET gear bolt.
Environmental Protection
Recycle unwanted materials instead of disposing of them as waste. All tools, accessories and packaging should be sorted, taken to a recycling centre
and disposed of in a manner which is compatible with the environment. When the product becomes completely unserviceable dispose of it according to
local regulations.


