5. Installation
5.3.2
Installation at the PC side:
Many modern laptop computers are already equipped with Bluetooth. In this case there is no
further installation required. All the others need to purchase a “Bluetooth stick” which is
plugged into a free USB connector.
Bluetooth Sticks of various brands are available from computer stores. The installation should
be done in accordance with the instructions of the Bluetooth Stick vendor (driver and software,
etc.).
SCS
does not supply Bluetooth stick software on the
SCS
-CD. Please use the CD from
the Bluetooth Stick manufacturer for the installation!
After installation (or after the first connection with the
P4
dragon
), a virtual COM port is
generated (just like with USB) which can be accessed by any terminal or PACTOR specific
program.
5.3.3
Installation at the
P4
dragon
side:
You can order the
P4
dragon
with Bluetooth option already installed, or you can install the
Bluetooth transceiver module inside the
P4
dragon
by yourself. For the prices for both versions
please refer to the price list or ask your dealer. Bluetooth transceiver module is sitting in a
socket and is fixed on the main board of the modem with three standoffs.
Getting started:
Disconnect the
P4
dragon
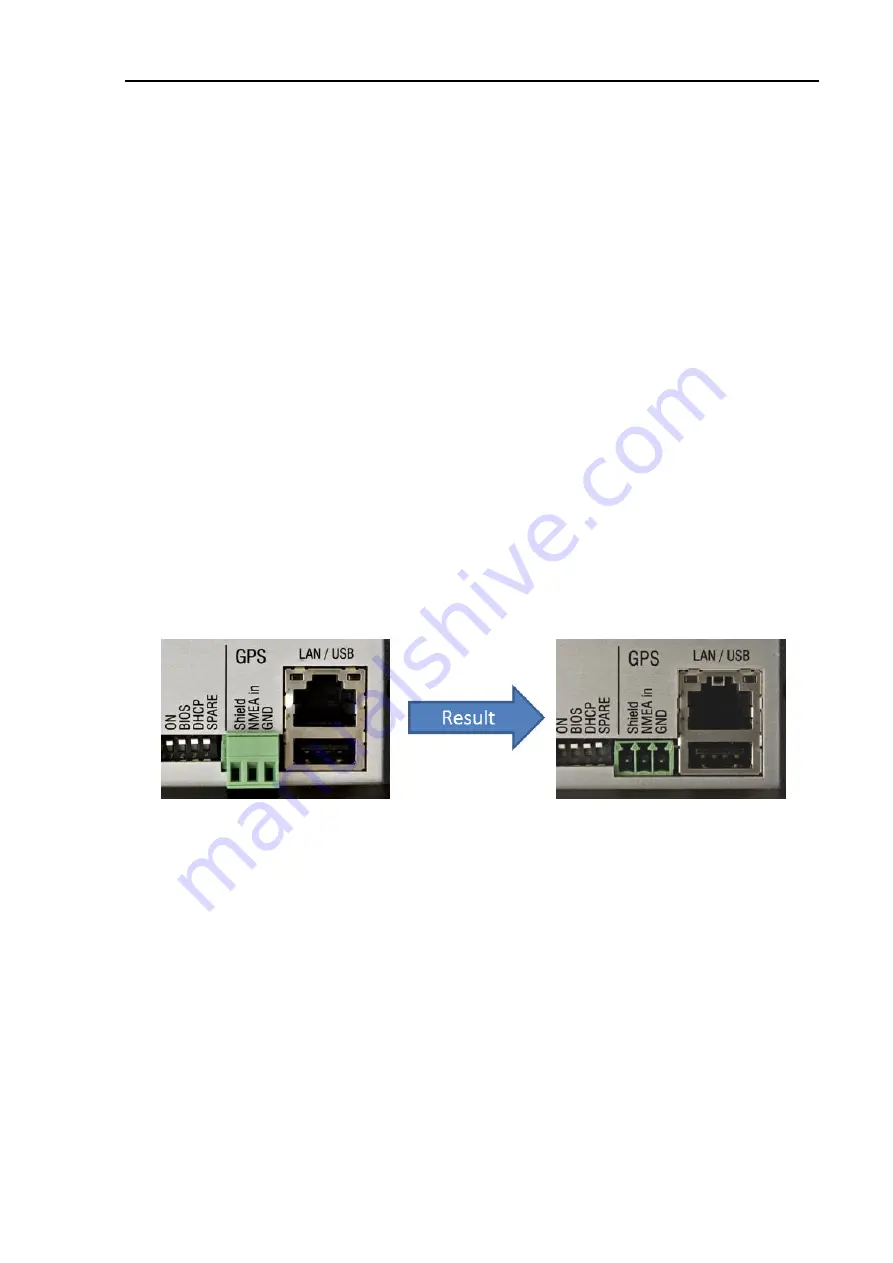
from all cables that may be attached to it. Remove the two green
screw terminals “DC-in” and “GPS” by pulling them out of their socket. They should look like
this now:
Figure 2: Removing the screw terminal
Opening the
P4
dragon
:
Remove the two black TORX screws in the plastic frame on the front side of the modem. (Do
not try to open the modem from the back side.) Remove the plastic frame and flap down the
front panel. The front panel contains the display and hangs on a flat print cable. Be careful and
do not pull on the front panel.
59
Summary of Contents for P4dragon DR-7800
Page 4: ...Deutsch Seite 1 English Page 47...
Page 5: ......
Page 15: ...4 Support 10...
Page 45: ...8 Display und LEDs 40...
Page 47: ...9 Konfigurations Schalter 42...
Page 51: ...11 Technical Data 46...
Page 61: ...4 Support 56...
Page 73: ...5 Installation Figure 15 SER2NET integrated in Airmail 68...
Page 81: ...6 Connectors 76...
Page 91: ...8 Display and LEDs 86...


