EN
EN
::: 64
1. For each camera,
attach the camera
b r a c k e t t o t h e
mounting screw. You
can attach the stand
to the top or the
bottom of the camera
as needed. Tighten it
a few turns, then turn
the camera to face the
direction you want.
2
3
4
Attach the camera to
the mounting screw
and turn it to the
desired direction.
1
T i g h t e n t h e
brace against
the camera to
secure it in
place.
Adjust the post
to the correct
a n g l e , t h e n
t i g h t e n t h e
wingnut to lock
the post into
place.
Loosen the wingnut
t o u n l o c k t h e
mounting post.
Attach the antenna
to the rear of the
camera.
Notes
:
The clearest line-of-sight between the
camera and Outdoor phone is best.
Optimized motion detection range is 6-18
feet for the camera.
Rainfall, pool water ripples/reflections,
tree/shrub leaves blowing in the wind - and
the shadows they create - can generate
motion detection false alarms.
Installation Instruction
Attaching the Camera
12
64
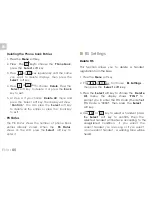
Editing the Phone book Entries
Phonebook
Select
Select
Edit
Select
Erase
Save
Save
soft
3. Press
repeatedly until the entry
you want to edit displays, press the
soft
key to confirm.
4. Press
to choose
menu. Press
the
soft key.
5. If necessary, press the
soft key to clear
the digit(s) then enter the desired name and
number, press the
soft key to save.
6. Use
to select the ring you like to
associate with the number, press the
soft
key to confirm.
1. Press the
soft key.
2. Press
to choose the
,
press the
key.
Menu
the
key
or
key
the
key
or
key
Viewing the detail of Phone book
Entries
Phonebook
Select
Select
View
Select
soft
3. Press
repeatedly until the entry
you want to view displays, press the
soft key to confirm.
4. Press
to choose
menu. Press
the
soft key.
1. Press the
soft key.
2. Press
to choose the
,
press the
key.
Menu
the
key
or
key
the
key
Dialing a Number from Phone book
Find out the number you want to dial. Refer to
"Viewing the Phone book Entries". Then press the
key or
soft key.
Dial
Summary of Contents for CL-3645
Page 10: ...FR 1 re partie portier vid o et cam ra de vid o surveillance...
Page 13: ...FR FR 6 Bouton marche arr t Emplacement carte micro SD Vue de c t Vue de haut 6...
Page 46: ...FR 2 me partie T l phone DECT...
Page 85: ...FR FR 77...
Page 87: ...S V 06 2014 Ind A EN KIT EVOLUTIF Wireless Video intercom CCTV DECT phone User s manual...
Page 95: ...EN PART 1 Doorbell...
Page 98: ...EN 6 EN Power on off key micro SD card slot Side view Top view 6...
Page 131: ...EN Part2 Dect Phone...

