


IMPORTANT
The pre-installed wall plate must be removed before assembly to the wall. The
plate is hinged at the bottom. It slides down a little as it tilts from the top. If the
wall plate does not tilt easily, check that the screws have not been pre-installed.
Remove the left and right side caps, which will need to remain removed before
wall mounting the unit. There are two small slots at the top of the caps where a
slotted screwdriver may be inserted and twisted to remove them.
If there are screws present beneath the caps, remove them. The wall plate
should easily tilt away from the reader. To re-install the caps after the unit is
mounted on the wall, first engage the lower rear tab and then snap the caps
over the top.
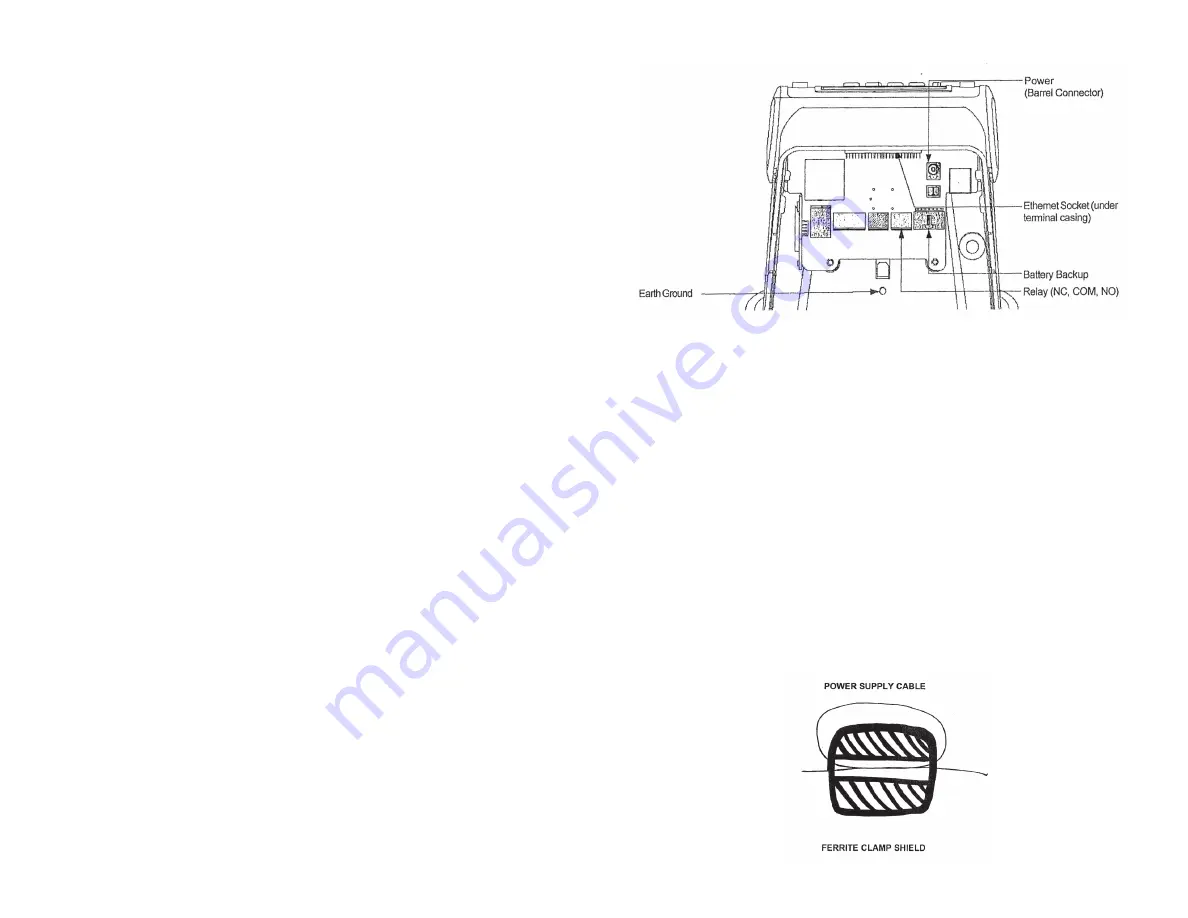
In the installation kit, optional tamper-resistant screws and a special wrench
have been included if higher security is needed. For FCC compliance, the clamp
ferrite shield must be installed on the power supply cable approximately 5”
from the power supply. Loop the cable as shown below.
network setup
Your FlexClock automatically sets itself up on your network, as long as your
network supports this capability. Most small business networks do.
If your network requires a manual or “static” configuration, your company’s IT
department should be able to tell you whether you need to set up a “Static IP
address”. Usually, you do not need to do this. If you do, you can reach a hidden
Network Configuration menu. To access this menu, press SPACE twice and enter
the following password: 2663.
For firewall administrators only: FlexClock will make outgoing connections on
TCP ports 8288 and 8289. By default, most firewalls allow this sort of outgoing
connection without any additional setup. FlexClock only makes outgoing
connections, so it does not need any setup for inbound connections.
initial setup
All of the clock settings are retrieved from the timekeeping server. This includes
settings like the time and date, time zone, Daylight Savings Time settings, etc.
Once the clock is connected to the network, you can press the 9 key to force it
to communicate.
If you receive the message “UNKNOWN SERIAL #”, it means your clock has not
been set up online. Note that it can take up to 10 minutes after the clock has
been added to the site for it to actually become active.
Once your clock is set up, it will periodically transmit automatically. There is no
need to force it to transmit with the 9 key, although you can do this at any time.
3
10


