background image

25 


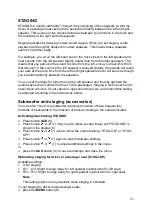
Storing stations 

Storing stations manually 

  Select the desired memory bank and waveband. 

  Tune into the station. 

  Press one of the station buttons 

1

 - 

6

 (10) to assign the station to that button. 

Hold for more than two seconds. 

The beep signal will sound. The station is now stored on the selected station button.  

Storing stations automatically  
(Travel-STORE, only FM) 

You can automatically store the six strongest FM stations in the region. The stations 
will be stored in the FMT memory bank. 

Note 

Stations previously stored on the FMT level will be replaced by the new stations. 

  Select desired waveband. 

  Press and hold down the 

BND

 (2) button for more than two seconds. 

The storing process will begin. "T-STORE" will be shown in the display (5). When the 
process has completed, the station will play on memory location 1 of the FMT 
memory bank. 

Retrieving stored stations 

  Select the memory bank and waveband. 

  Press the station button 

1

 - 

6

 (10) where the desired station is stored. 

Scanning stored stations (PRSTSCAN) 

The PRSTSCAN function allows you to scan all stations stored on a storage level. 
Each station will play for approximately 10 seconds. 

Starting scan 

  Select memory bank. 

  Press and hold down the 

 or 

 (7) button for more than two seconds. 

The display will briefly show "PRSTSCAN" and will then flash "P" while scanning. The 
radio will scan stations stored on the current memory bank for about 10 seconds 
each. The frequency and station name will be displayed at the same time.  

Cancelling scan 

  Press button 

 or 

 (7). 

The current station will continue to play. 

Summary of Contents for Radio Medium

Page 1: ...1 Manual Radio Medium with Bluetooth Complete manual for the Scania Radio Medium This manual can be downloaded at www scania com manuals...

Page 2: ...h active answer the phone or make a call Long press 3 Eject CD Start Travelstore function 4 CD compartment 5 Display 6 MENU Open main menu Bluetooth active reject or end a call 7 Right multi function...

Page 3: ...3 12 SRC Select audio choice radio AUX or CD when CD is inserted MP3 when MP3 CD is inserted and USB when USB device is connected Long press Bluetooth active Open phone...

Page 4: ...ching the Radio Medium on and off by inserting a CD 10 Setting auto shut off timer 11 Setting the volume 12 Pausing audio MUTE 12 Using the MENU button 13 Radio medium menu contents 14 Use a handsfree...

Page 5: ...ments 29 CD mode 30 Starting CD mode 30 Selecting a track 30 Fast searching audible 31 Random track play RND 31 Scanning tracks SCAN 31 Repeating tracks RPT 31 Pausing playback PAUSE 31 Ejecting a CD...

Page 6: ...is available for downloading at www scania com manuals A summary of the most important functions is provided in the Driver s Manual for the vehicle Warning notices The manual contains the following i...

Page 7: ...hnological developments and in compliance of applicable technical safety regulations Failure to observe the safety instructions in this manual could lead to damage or injury Caution The Radio Medium c...

Page 8: ...the second digit in your code number appears in the display 5 Press the station button 3 10 may need to press several times until the third digit in your code number appears in the display 5 Press th...

Page 9: ...pts to enter the code After a third incorrect attempt to enter the code the Radio Medium will lock down for an entire hour During this hour WAIT 1H will be shown in the display 5 If you switch on the...

Page 10: ...wheel buttons You can control the Radio Medium with the steering wheel buttons 1 and 3 Change station or CD track 2 and 4 Increase or decrease volume SRC Change audio source Switching the Radio Mediu...

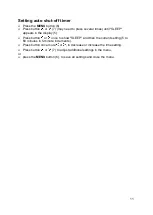
Page 11: ...pears in the display 5 Press button or once to show SLEEP and then the current setting 5 to 60 minutes in 5 minute increments Press button once more or to decrease or increase the time setting Press b...

Page 12: ...volume control 1 to the right To decrease system volume turn the volume control 1 to the left Pausing audio MUTE You can turn off system sound completely by pressing MUTE Press and release the left m...

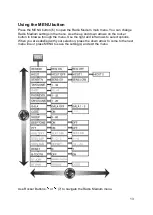
Page 13: ...u Use the up and down arrows on the rocker button to browse through the menu Use the right and left arrows to select options When you are satisfied with your selection press the down arrow to come to...

Page 14: ...RDS is activated STAG LSP Improve stereo sound STAG SUB Improve base reproduction RESET B TOOTH OFF ON Activate deactivate Bluetooth function BT JOIN PAIRED PHONE Connect mobile phone BT PAIR VISIBLE...

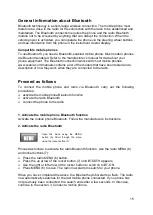
Page 15: ...nnected to the radio Proceed as follows To connect the mobile phone and radio via Bluetooth carry out the following procedures activate the mobile phone Bluetooth function activate the radio Bluetooth...

Page 16: ...connect one phone at a time Proceed as follows to connect a phone 1 Press the radio MENU 6 button 2 Use the radio rocker button and scroll to BT PAIR VISIBLE then appears on the display The radio now...

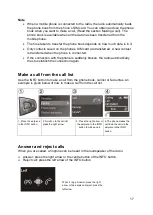
Page 17: ...tically tries to establish the connection again Make a call from the call list Use the INFO button to make a call from the phone book call list or favourites An example is given below of how to make a...

Page 18: ...d when Press and hold down a station button to store a station The maximum temperature in the CD player is exceeded A faulty CD is detected No station broadcasting traffic information is in reach when...

Page 19: ...riving speed and accompanying truck sounds For example the volume is increased automatically at increased speeds to compensate for the increase in noise e g from headwind or engine GALA only functions...

Page 20: ...UD button 8 to save all settings and close the menu Volume balance left right BALANCE Press button AUD 8 Press button or 7 may need to press several times until BALANCE is shown in the display 5 Press...

Page 21: ...left speaker and thereby optimize the audio experience for either the driver or the passenger Staging is factory set for left hand driven vehicles If your vehicle is right hand driven we recommend th...

Page 22: ...y installed subwoofer Available settings 9 till 9 0 No subwoofer offset 1 till 9 Virtual forward offset of subwoofer 1 till 9 Virtual backward offset of subwoofer Note This setting option is only avai...

Page 23: ...o the best receivable frequency for the current station REGION Some stations periodically divide their programmes into regional programmes with different content The activated REGION function prevents...

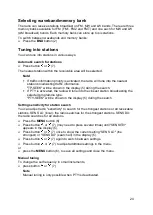
Page 24: ...tune into the closest station broadcasting the selected programme type PTY SEEK will be shown in the display 5 during the search Setting sensitivity for station search You can adjust radio sensitivit...

Page 25: ...ring process will begin T STORE will be shown in the display 5 When the process has completed the station will play on memory location 1 of the FMT memory bank Retrieving stored stations Select the me...

Page 26: ...can help you select stations broadcasting a particular type of programme When PTY is activated and a PTY search has commenced the radio will automatically switch from the current station or from anot...

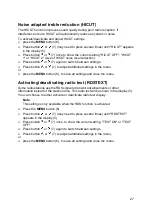
Page 27: ...or press the MENU button 6 to save all settings and close the menu Activating deactivating radio text RDSTEXT Some radio stations use the RDS signal to transmit advertisements or other information ins...

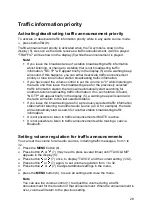
Page 28: ...ation If no such station is found NO TP will appear briefly in the display 5 a warning beep will sound and the radio will return to the last selected station If you leave the broadcasting area for a p...

Page 29: ...ching off traffic announcements To switch off a traffic announcement in progress and return to the audio source you were listening to before press button TA 9 Traffic announcement priority is still ac...

Page 30: ...ly Scania cannot guarantee that the device will function properly when playing copy protected CDs Note If the ambient Radio Medium temperature exceeds 70 degrees Celsius some of the Radio Medium funct...

Page 31: ...n a CD for 10 seconds each press button 4 10 SCAN TRK will be shown briefly in the display CD will blink in the display during scanning The number and playing time of the current track will be shown C...

Page 32: ...switched off or while another audio source is activated Press button 3 to eject the CD The CD is ejected CD EJECT will appear briefly in the display Note Do not touch the Radio Medium whilst the CD i...

Page 33: ...nteed if they have been created with Windows Media Player version 8 Preparing an MP3 CD Preparing an MP3 CD The various combinations of CD burners CD burning software and writable CD products may impa...

Page 34: ...back Do not use mixed CDs combining MP3 files and non MP3 files the Radio Medium will only read MP3 files during playback Do not use mix mode CDs containing CD audio tracks and MP3 tracks If you try t...

Page 35: ...ected by pressing the SRC button 12 USB will appear in the display Information on the current folder and track see section Starting MP3 playback from CD will then be shown Display of track information...

Page 36: ...il RND DIR for MP3 CDs or RND FLD when using USB accessory is shown in the display 5 The RND symbol will appear in the display 5 If you would like to play all of the tracks on the MP3 storage device i...

Page 37: ...37 Cancelling scan To cancel scanning briefly press button 4 10 SCAN OFF will appear briefly in the display 5 The current track will continue to play...

Page 38: ...ess several times until RPT DIR for MP3 CDs or RPT FLD for USB appears in the display 5 The RPT symbol will appear in the display 5 Cancelling REPEAT To cancel repeat mode press button 2 10 may need t...

Page 39: ...s connected AUX mode is not available if a USB device is connected via a USB interface with C n C function Command and Control Setting AUX input level You can adapt the level on the external audio sou...

Page 40: ...s button or 7 may need to press several times until RESET appears in the display 5 Press button or 7 RESET N appears Press button 7 to restore factory settings RESET Y appears The factory settings are...

Page 41: ...4 x 20 Watt at 14 4 V THAD 10 RLP 4 Input sensitivity AUX 2 V 600 Wavebands FM 87 5 108 MHz MW 531 1602 kHz LW 153 279 kHz FM frequency response 30 15 000 Hz CD frequency response 20 20 000 Hz Tempera...

Page 42: ...ont 5 Woofer Left Front 6 Woofer Left Front 7 Tweeter Left Front 8 Tweeter Left Front C1 1 n c 2 n c 3 n c 4 n c 5 n c 6 Phone Mute C2 7 PHONE IN AF 8 PHONE IN AF 9 Subwoofer GND 10 Subwoofer Out 11 n...

Reviews: