43
RT-TGP/RT-BT OWNER’S MANUAL
8
10
11
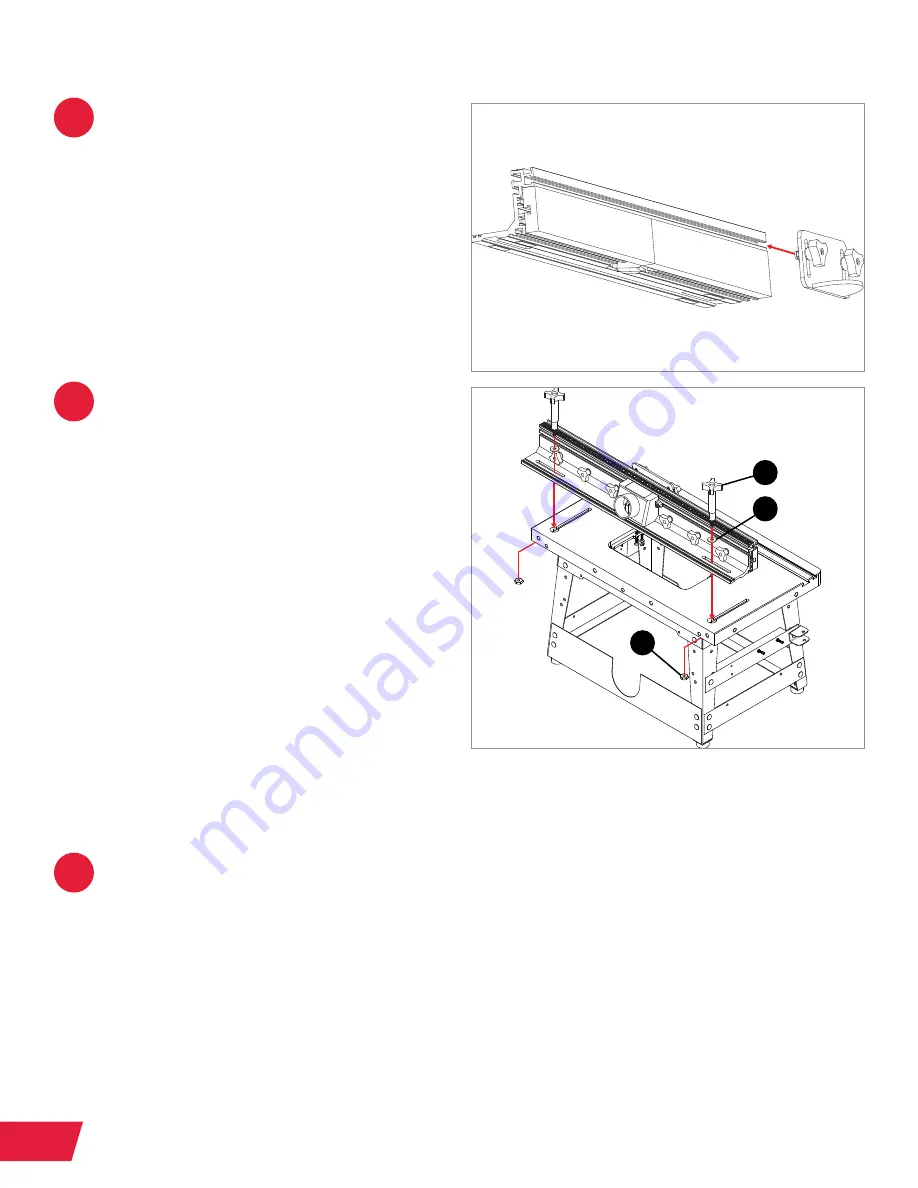
Slide the heads of the T-bolts into the
top T-slot in the front of the vertical
section of the router fence. The
semicircular, bent portion of the router
fence guard should face away from the
router table fence. The height of the
router fence guard relative to the cast
iron table can be adjusted by loosening
the lock knobs, moving the router fence
guard up or down, and re-tightening the
lock knobs.
Attach the router table fence to the
router table: Insert a fence lock knob
(5.2) through one of the two larger
washers (5.3), then through one of the
two elongated holes in the rear of the
router table fence, then through one of
the round ends of the elongated fence
mounting holes in the router table.
Thread a 23mm wide lock knob nut
(5.4) partway onto the end of the fence
lock knob. Repeat this process with
another fence lock knob (5.2), washer
(5.3), and lock knob nut (5.4). Slide the
lock knob nuts into the round ends
of the elongated holes in your router
table, then slide the router table fence
forward. Use the fence lock knobs to
lock the router table fence
in place.
If you have a Downdraft Dust Collection Box (RT-DCB) installed, use the dust
hose and hose clamps that came with the dust box to secure the 2 ½” dust port
in the router table fence to the dust port splitter on the Downdraft Dust Collection
Box. Further information can be found in your Router Lift manual, which includes
information about the Dust Collection Box as well. Copies of your manuals can be
downloaded at
www.sawstop.com
.
If you do NOT have the Dust Collection Box, use a 2 ½” dust hose (not provided)
and two dust hose clamps (not provided) to attach the 2 1/2” dust port directly to
a dust collection system.
5.2
5.3
5.4


