background image


Activity Procedures  

  117 

In the window are displayed the recorded student files, which 
can be copied and saved to your computer or to any medium 
accessible from your computer. 

You can choose whether you want to collect the files in mp3, 
wav, or wma format. To change the file format, select the 
option accordingly. 

8.  In the window, click 

Save

. A window for browsing for a 

folder opens. By default, all the files are selected 
(highlighted). To select only some of the student files, 
click on the display and select the files you want to save. 

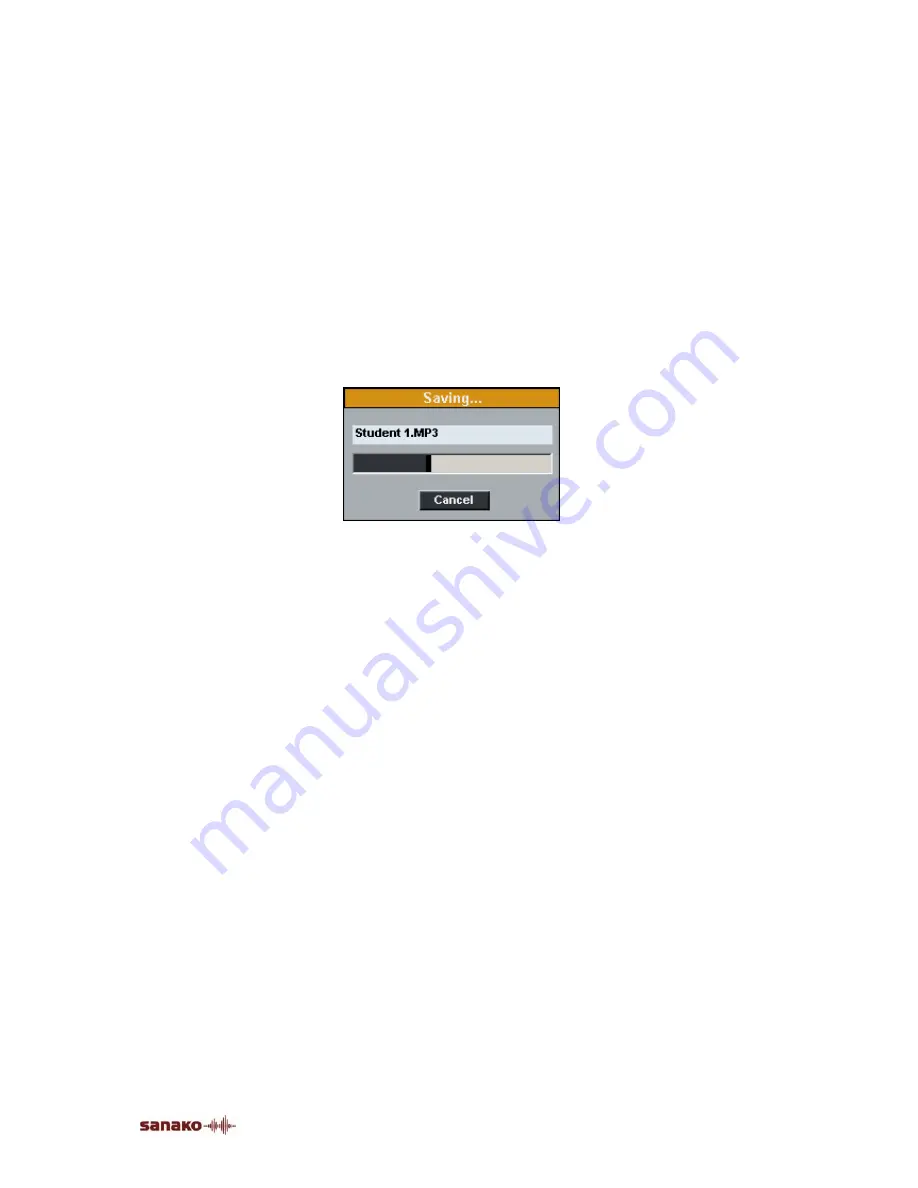
9.  After you have selected a saving location for the files, the 

program starts the saving. A 

Saving…

 window appears, 

where you can view the file that is currently being saved. 


To cancel the saving, click 

Cancel

10. After the saving is completed, click 

Close

 to exit the 

window. 

Summary of Contents for Lab 100

Page 1: ...SANAKO Lab 100 v 7 0 USER GUIDE ...

Page 2: ... systems terrestrial satellite cable and or other distribution channels streaming applications via Internet intranets and or other networks other content distribution systems pay audio or audio on demand applications and the like or on physical media compact discs digital versatile discs semiconductor chips hard drives memory cards and the like An independent license for such use is required For d...

Page 3: ...ns 6 Teacher s Graphical User Interface GUI 7 Components of the Lab 100 main window 7 Toolbar 7 Class view 9 Session Screen 9 Tooltips 10 Session Status Bar 11 User Audio Panel 12 Keys on the User Audio Panel 13 LCD display 15 Symbols on the Lab 100 LCD 15 Clicking on a student icon 17 Student icons 17 Getting Started 21 Starting Lab 100 21 To start Lab 100 21 Lab 100 main window 21 Lab 100 main m...

Page 4: ... CD Audio 60 Student 60 Teacher 60 Teacher PC 61 Line In 61 Video audio 61 Monitor and intercom 62 Monitor 62 Intercom 62 Intercom and Model Student 63 Intercom and Free mode 64 Recorder Controls 64 Automonitor 64 Bookmarks 65 Calls 66 All call 66 Session call 66 Student call 67 Outside call 67 Activity Procedures 68 General procedure 68 Saving podcasting and collecting the tracks 72 Using the Lab...

Page 5: ...mand 129 Proceeding with Audio on Demand 129 Lab 100 Setup 135 Lab 100 installation 135 Hardware installation 135 Lab 100 components 135 Lab 100 connection overview 138 Lab 100 SCU064 installation 139 Dual Channel Program Source Interface 140 Software installation 141 Minimum requirements 141 Installing the Lab 100 program 141 Teacher PC configuration 141 To set the communication mode and IP addre...

Page 6: ......

Page 7: ...tarted section describes the basic functionality of the teacher s Graphical User Interface GUI You will learn how to create a class specific layout and a SANAKO Lab 100 learning session In the latter part of this guide you will learn how to facilitate your work and increase the possibilities to both teach and learn by using the different SANAKO Lab 100 features The Activity Procedures section expl...

Page 8: ...wer questions The difference between the teacher and student audio panel is that you as teacher can lock the recorder controls on the student panels and this way control the class The teacher s user interface includes both the User Audio Panel and the SANAKO Lab 100 Graphical User Interface GUI on the teacher computer THE ESSENTIALS OF SANAKO LAB 100 When your teaching tool is SANAKO Lab 100 you c...

Page 9: ...ticular phase of a program are available at that time PRODUCT COMPONENTS The SANAKO Lab 100 center is comprised of the following components the Graphical User Interface GUI on the teacher PC Program Source Interface PSI Media Storage Unit MSU System Connection Unit SCU and the User Audio Panels UAP The following diagram illustrates the different components and how they are connected with each othe...

Page 10: ...o source is successfully established USER AUDIO PANEL The User Audio Panel UAP is the student user interface located on each student s desk It is also part of your SANAKO Lab 100 user interface On the Audio Panel are controls for working with the audio source adjusting the volume setting or removing bookmarks and answering test questions SANAKO LAB 100 ACTIVITIES AND SESSIONS In SANAKO Lab 100 act...

Page 11: ...n Screen guides you through the balance of the activity procedure For information on how to proceed with the different activities see the descriptions in Activity Procedures later in this guide SANAKO LAB 100 SESSIONS A session is a group of students performing a learning activity You can freely choose the number of participants a session can consist of one single student a number of students or t...

Page 12: ...r independent study The self access group operates outside the sessions in the teacher interface and outside teacher control The teacher can define a list of MSU files to be available for the self access group and students will then be able to study independently using the material The teacher will also be able to call the self access group when needed The self access workstations can be defined i...

Page 13: ...r part of the main window On the toolbar you find the basic functionality of the program create or select a class set up take attendance and create sessions Additionally you gain access to the Lab 100 main menu and online help and comment via All Call with all the students in the class LAB 100 MAIN MENU Click the Menu button to open a drop down menu where you can select to view Lab 100 components ...

Page 14: ...n your microphone is open and the student s can hear you HELP Click the Help button to access the Lab 100 online help ALL CALL Click the All Call button when you want to talk to the whole class Æ For more details see Calls later in this guide RECORDER STATUS Click the Recorder Status button to view the status of the student recorders in the student icons Minimize the main window You may want to us...

Page 15: ...ow is saved automatically This means that the next time you start the program the application window opens in the same position on your screen as it was when you closed the program The window s position is saved also when you are working with two monitors CLASS VIEW Class view is the layout of your class in which your students are displayed as student icons Class view displays the seating plan of ...

Page 16: ...t icons helps you to keep track of the different sessions Each Session Screen view has a color highlighted session tab that indicates which session s controls are on the panel If you have created more than one session the tabs of the hidden panel views are dimmed on the Session Screen You can easily switch between Session Screen views by just clicking on a session tab You can also click on a Sessi...

Page 17: ...information about your sessions status To gain access to other sessions controls click on the desired status bar ACTIVITY Displays the session s activity e g listening comprehension and status The session status is either waiting started or paused Waiting Session is not yet proceeding with an activity Started An activity is initiated for the session Paused Session s activity procedure is paused SO...

Page 18: ... the total time spent on activity min sec LOCK MODE Displays the student recorder status Locked or Free In locked mode the students are able to call the teacher adjust the volume and set bookmarks However they are not able to clear search for or repeat bookmarks or to use recorder functions In free mode students are able to clear search for or repeat bookmarks and record to the student track USER ...

Page 19: ...orrect answer the student can see on the audio panel s display whether his her answer was correct or incorrect In Phone Conversation press these number keys to dial to another UAPs number MODE A key for creating a loop of a selected segment of an audio Æ See the description for Repeat ON and Repeat OFF TRUE FALSE Press to answer a true false Quiz question The LED indicator of the selected answer k...

Page 20: ... clears the last entered number VOLUME CONTROLS Press the volume control keys to set the volume for the audio source and the student Pressing a volume control key once adds removes one block on the volume bar Pressing both of the volume controls increase and decrease simultaneously resets the default volume value RECORDER CONTROLS The recorder controls of the User Audio Panel are under teacher s c...

Page 21: ...UME The volume of the student and master track The volume controls are always free for the student use also when the panels are in the Locked mode CALL TEACHER When the student presses the Call Teacher key a student symbol appears on the display TEACHER CONTROL When the lock symbol is shown on the display it means that the students are able only to adjust the volume and set bookmarks The recorder ...

Page 22: ... dial the number of a fellow student for example 09 by pressing the number keys The number appears on the display If the connection is successfully established between the students the pair discussion symbol is shown on the display If the line is busy the symbol of incorrect answer is lit GROUP DISCUSSION 3 STUDENT SYMBOLS In the Group Discussion mode three student symbols are shown on the display...

Page 23: ... students later in this guide In the Session Call mode left clicking on the student means giving the student an answering turn In a session first pause or stop the activity Then call the session by clicking the Session Call button and click on the selected student s icon A speech bubble appears onto the icon to indicate that the students in the session can hear the answering student Æ For more inf...

Page 24: ...this class Student basic The student is not yet selected into a session Session student The student is a member of a session The Session student is color coded according to the session he or she belongs to Student in monitor The student is being monitored Clicking on classroom breaks the connection to the active student s Self access workstation A self access workstation that students can use for ...

Page 25: ...t in intercom Student is in an intercom connection with you Student recorder status Clicking the Recorder Status button on the Lab 100 toolbar changes the student icons into symbols that display the student recorders status Student calling When students press the Call Teacher key on their audio panels a call symbol appears above their student icon to indicate that they are calling you In case seve...

Page 26: ......

Page 27: ...ck Lab 100 LAB 100 MAIN WINDOW This is the main window of the Lab 100 Graphical User Interface The main functionality of the Lab 100 program resides on the toolbar 1 and Session Screen 2 The arrows indicate how you will proceed with a Lab 100 class On the toolbar you create the class layout and initiate a session On the Session Screen you will then select the activity for the session and proceed w...

Page 28: ... options are explained below Lab 100 main menu COPY FILES TO FROM MSU Click to copy a media file or an entire folder from your computer to the Media Storage Unit or vice versa If you copy an entire folder to the MSU only the audio files in the folder will be copied Selecting this menu option opens the following dialog window Dialog window for copying files and folders to and from the MSU 1 In the ...

Page 29: ...s from the MSU you can select the file to be in MP3 WAV or WMA format Clicking the arrow button starts the copying The following dialog window opens Dialog window for confirming the copy 2 To confirm the copying of files to the selected directory click OK A window appears indicating the status of the file copying Dialog window shown during the file copy When the file copy is completed the dialog w...

Page 30: ...roperties 2 2 Additional settings including the teacher media player and save options for STS interpreting Activity options Edit the list of available activities and activity names Podcast options Define settings related to podcasting audio material Lab 100 properties window EXITING THE PROPERTIES WINDOW To save your choices and exit the Lab 100 Properties window click OK To exit the window withou...

Page 31: ...er selection in the dialog click Clear TO SET A FOLDER FOR MSU REPLICATION All MSU content can be replicated to a shared area when Lab 100 is shut down This makes it possible to use the MSU materials with other systems To select the default saving area for MSU replication click Browse and browse for a suitable folder TO SET A FOLDER FOR QUIZ FILES You can save the settings used in the Quiz activit...

Page 32: ...re the student tracks are recorded and students work with the program material in Free mode enabling this option will allow students to continue recording after the program track has ended This is particularly useful for example in the Model Imitation activity as instructors can play program material without recording gaps on the first listen and then let the students go through the material and r...

Page 33: ...eir workstation numbers TEACHER CALL ORDER Select whether the student icons will display the order in which the students have called the teacher if several students call the teacher at the same time BACKGROUND COLLECTION OF STUDENT RECORDINGS In Background Collection student recordings are automatically saved as audio files to the default folder for student track collection while an activity is ru...

Page 34: ...rm of a bar 5 When you end the activity a saving window opens that displays the path where student recordings are collected and a bar indicating the status of the background collection 6 The Save and Convert buttons are grayed out until background collection has been completed If you want to save the master track click Save If you want to convert student recordings to mp3 format click Convert SELE...

Page 35: ...n enabled only one file will be saved of each pair or group discussion When the option is disabled separate files will be created for each discussion participant however each file will have the entire pair group discussion as the content SAVE DELEGATES TO ONE FILE This option only affects Lab 100 STS When enabled delegate recordings will be collected as a single file in Lab 100 STS interpretation ...

Page 36: ...on allows you to define the length of time in minutes that students will be able to record when their recorders are in Free mode The maximum recording time is 99 minutes SELECT TEACHER MEDIA PLAYER Select the media player application that will be used to play back the Media File and Audio CD audio sources during Lab 100 activities The default selection for teacher media player is Windows Media Pla...

Page 37: ... activities are displayed in the Activity selection list check or uncheck the boxes next to the activity names To restore the original activity settings click on the Restore button PODCAST OPTIONS Podcast options allow you to enable or disable the podcasting feature and to set up a Web server and remote directories for podcasts ...

Page 38: ...in menu 3 Create RSS feeds for the remote directories See Podcast Manager under Lab 100 main menu ENABLING AND DISABLING PODCASTING You can enable or disable the podcasting feature in Lab 100 under Podcast feature When podcasting is enabled you can create a podcast out of the audio material that is transferred to students during Lab 100 activities in which the Master track is recorded When you end...

Page 39: ...ol that corresponds with your Web server The FTP protocol options use different ports to access the Web server and change the port number selection automatically Under Server address enter the name of the Web server that hosts the podcast Web pages The port number changes automatically according to your FTP selection Enter a Login name and Login password that will be used to access the server Unde...

Page 40: ...eb server address webserver com html english english is the Internet subfolder Remote Directory This is the name of the subfolder that will be added to the Web server path for this location e g In the Web server path var www html english english is the Remote Directory Description Enter a descriptive name for this location This name will be displayed in the remote directory list in the Podcast Opt...

Page 41: ...in the Lab 100 Config application For more information see the chapter Setting up self access workstations in the Lab 100 Setup section of this guide To select the MSU files available for self access workstations 1 Tick the boxes next to the files to select them Ticking a folder will select all the files in the folder but not in its subfolders When selected a number appears next to the files accor...

Page 42: ... next to the self access workstations To open a printable list of the files that are available for self access students click on the Report button PODCAST MANAGER The Podcast Manager allows you to manage podcast files and to create new RSS Feeds on the podcast Web pages The Podcast Manager displays all the podcast files in the selected remote directory You can change the remote directory that is v...

Page 43: ...n field enter a description of the file content This description will be displayed on the podcast Web page 4 Enter a Title for the podcast This title will be displayed on the podcast Web page 5 Click OK Once the file has been uploaded a dialog will appear displaying the Web address where the podcast is now available REMOVING PODCAST FILES To remove a podcast file select the file in the Podcast Man...

Page 44: ...o the podcast feed will check if there is new content on the web page Copyright Enter the podcast copyright holder The copyright holder will be written into the podcast Web page xml file Language Enter the language of the Podcast When you have entered all the information for the new feed click OK The feed will now be displayed on the podcast Web page and students are able to subscribe to it RESET ...

Page 45: ...nected to it ABOUT Selecting About opens a window displaying version information on the different Lab 100 components as well as the total and remaining MSU capacity EXIT Selecting Exit closes the Lab 100 interface and exits Lab 100 When exiting you can choose to shut down the student panels leave the student audio panels on or leave the students in Audio On Demand mode ...

Page 46: ...40 SANAKO Lab 100 User Guide Select one of the options and click OK ...

Page 47: ...lan To select a seating plan where the students are not yet named select No names defined To name the students click the Attendance button See the following chapter Attendance Selecting Seating Plan Example opens an example seating plan with fictitious student names Æ For more information about naming the students see the next chapter Giving a new name After you have created and saved a seating pl...

Page 48: ...ng plan file of each French group in the created folder Teacher Mary Smith French 4b The Seating Plan menu with subcategories TO CREATE A SEATING PLAN FOLDER 1 To create a seating plan folder in the Seating Plan menu select Save Seating Plan The following dialog box opens 2 In the dialog click the Create New Folder button A new folder appears in the dialog You can now name the folder OPENING A SEA...

Page 49: ...e 5 To confirm the removal click Yes Note that if the selected folder contains subfolders also the subfolders will be removed ABOUT MODIFYING THE DEFAULT FOLDER The default folder for saving and opening seating plan files is set in the Configuration program To change the default folder in the Configuration program click Set default settings and in the Lab 100 Properties dialog that opens modify th...

Page 50: ...plan select Report in the Seating plan menu This opens a window displaying your current seating plan setup that you can print or save for later reference To view the arrangement of student icons select Classroom layout To view a list of the students in the seating plan select Student names ...

Page 51: ...arked students are not included in the selection Additionally when using the automatic monitoring feature it is useful to have the absent students workstations marked since that way the monitor doesn t make any unnecessary stops at workstations that are not in use but skips them and moves straight to the next active student workstation Æ The automonitoring feature is explained under Automonitor TO...

Page 52: ... student icons will be handled as absent When you start Lab 100 the following message will appear indicating that Student Login is enabled When Student Login is Off all workstations are automatically active at the beginning of the lesson However regardless of whether student login is on or off the All Call function is always active to all student workstations ATTENDANCE REPORT Selecting Report fro...

Page 53: ...ing the disk symbol on the upper left corner of the window you can save the report to your computer or anywhere in the network ZOOMING IN AND OUT THE REPORT VIEW Note that the font size in the printed report is the same as the one seen on your screen To zoom the font size in or out click the symbols on the upper part of the report window If you zoom the report in or out and print it out the font s...

Page 54: ...oolbar does GIVING A NEW NAME 1 On the toolbar click the Attendance button 2 In the menu that appears click on the Edit name button 3 Click then on the icon of the student to whom you want to give a name or whose name you want to change The student s name appears in a field where it can be modified 4 When you have given or modified the name click Close press Enter or click on the next student icon...

Page 55: ...ing the mouse pointer 2 Click the Add Remove button and move the mouse pointer the left mouse button pressed down over the student icons To select all the students that not yet are in a session 3 Click the All Remaining button REMOVING A STUDENT FROM A SESSION You can remove students from a session in the same way you select them for the session 1 Click the Add Remove button and then the icon of t...

Page 56: ...nts practice the stress rhythm and intonation of the foreign language You can use yourself or a student as the model audio for the session You can allow the students to access their recordings and can monitor and comment on their individual work READING PRACTICE In order to practice for instance pronunciation and intonation Students read aloud and listen to their input If allowed students can work...

Page 57: ...ey practice CONSECUTIVE INTERPRETING Consecutive interpreting means that the source is interpreted into another language in sections The speaker stops at the end of every paragraph and the interpreter then interprets what was said You may allow students to rerecord their input individually and monitor them as they practice RECORDED RESPONSE Ideal for training the intercultural communication throug...

Page 58: ...de is an activity that allows you to assign audio files to students for their individual work You can send the same file to every student or a different file for each Even if the students all have the same file they will still be able to work with their copies of it individually After the students have performed the test or another exercise you can save the outcomes for later use AUDIO ON DEMAND T...

Page 59: ...ent track s In the table below you can see the default recording settings for each activity Activity Master Track Student Track Listening Comprehension λ O Model Imitation λ λ Reading Practice O λ Phone Conversation O O Pair Discussion O O Group Discussion O O Simultaneous Interpreting λ λ Consecutive Interpreting λ λ Recorded Response O λ Quiz O O AP Exam O λ GEPT O λ TEM 4 O λ Q A λ λ Library Mo...

Page 60: ... track over and over again For example you can allow students to work with the track individually without having to control it from the teacher console In Session Call and All Call if the recording of the master track is on your voice is not recorded on it while calling the session class Student Call is never recorded Æ For more information about the MSU file see chapter MSU File in the Audio Conn...

Page 61: ...he sound from the master track You can record the source to the master track for later use or for the student s to work with it individually later RECORD STUDENT TRACK Recording the student track saves the student track input While the master track is playing the students can record their own speech on the student track For example the students can repeat after the master track answer questions or...

Page 62: ...nt that one s own voice doesn t mix with the source MIX TARGET Teachers can record their voice during a program transfer with the Mix button in the Activity panel The Mix target options allow you to select whether the teacher s voice will be recorded to the Master or Student track when they use the Mix function SET DEFAULTS Each activity has their own default settings You can return the default se...

Page 63: ...n audio source select the source from the list that opens by clicking on the field The necessary window s and control s appear for the source MEDIA FILE A media file is a digitized audio and or video file for example in WAV AVI MP3 format saved on the hard disk of your computer or server Selecting a media file as the audio source opens the Select Media File window In the window browse for the medi...

Page 64: ...In the window browse for the media file you want to select as the audio source CREATING AN MSU FILE There are two ways to create an MSU file 1 You can copy media files from your computer to the Media Storage Unit MSU and back onto your hard disk Or 2 Make sure the master track of the session is recorded during the activity When exiting the session the program will ask you if you want to save the m...

Page 65: ...e containing the bookmarks you have set 3 To launch the file click the Free button EDITING THE AUDIO SOURCE When your audio source is an MSU file you can edit the source while you and the students are listening to it This means that you can communicate to the students without having to manually pause or stop the audio source and the recordings from a separate player When you edit the source the so...

Page 66: ...D player which is to be controlled manually during the activity To avoid feedback noise the Line In option is automatically muted in the Windows mixer when an Audio CD is used as the program source STUDENT Selecting a student as the audio source for the activity means that the selected student s microphone opens and the student is the source for all the students in the session To select a student ...

Page 67: ... In the graphical user interface of Lab 100 in the Source menu list select the video option In the Source menu list are displayed all the sources that were defined in the Video Sources dialog When the menu item is selected you can view the video on your screen and hear the audio in your headset To display the video source to the students in the session click Start The session students are now able...

Page 68: ... counter value as well as the student s current grade If the student has not been graded you can type in a grade in the Grading field as well as a comment in the Comment field The monitoring panel also allows you to access the intercom and automonitor modes To stop monitoring click the Close button or anywhere on the class view To change the location of the monitoring panel simply click on the tit...

Page 69: ...ishing the connection a In the monitoring panel click the Intercom button b In the monitoring panel click the Recorder Controls button A replication of the student s audio panel opens in the Session Screen In the Session Screen click the Intercom button 3 When the connection is established the student icon changes accordingly and the red highlighted On the Air sign is lit 4 To disconnect click the...

Page 70: ... where all the present workstations are monitored automatically and consecutively You can select the amount of monitoring time The icon of the monitored student reflects which student is being monitored at a time and shows a replication of the monitored student s audio panel on the Session Screen If you have marked the absent students workstations when taking attendance the monitor doesn t make an...

Page 71: ... about the intercom mode see chapter Intercom 3 To stop monitoring click the Stop Automonitor button You can also open the Grading window at any point by clicking on the Grading button Æ For more information about grading students see chapter Grading students 4 To close the student s audio panel view click the Close button BOOKMARKS Bookmarks are for marking passages in the audio material so that ...

Page 72: ... button of the bookmark you want to remove Clicking the Free button in the Session screen activates the bookmarks THE STUDENTS SET THE BOOKMARKS The students set bookmarks by pressing the bookmark keys on their audio panels Æ For more information about setting bookmarks see chapter User Audio Panel CALLS ALL CALL When you want to talk to the whole class click the All Call button on the toolbar Onc...

Page 73: ...e button The student hears you as long as the right mouse button is pressed down but is not able to reply During the Student Call both you and student are disconnected from the source OUTSIDE CALL Outside call allows you to talk to the self access workstations for example to inform them that the system will be rebooted To call the self access workstations open the Lab 100 Menu choose Self access s...

Page 74: ...ING MEMBERS FOR THE SESSION You can select members for the session by either mouse clicking to select an individual or by dragging the mouse over a number of student icons 2 Click on a student icon or drag the mouse over the student icons you want to include in a session 3 If you want to change your selection that is add or remove students click the Add Remove button and select again Note that you...

Page 75: ...0 activity list SELECTING AN AUDIO SOURCE 5 Select audio source from the list that opens by clicking the source field A drop down menu for the Lab 100 audio sources SESSION CONTROLS 6 To give instructions click the Session Call button ...

Page 76: ...start to play a CD click play in the CD player PAUSING THE ACTIVITY You may want to pause the activity for example to ask students questions 8 To pause the activity click Pause Pausing the activity means pausing the recordings and the connection between the students and the source Auxiliary sources are stopped manually 9 To continue the activity click Continue The students are connected to the sou...

Page 77: ...eplay the tracks for the students By doing this you have more time to monitor the students and comment on their work To replay the student tracks click Replay Æ On how to monitor a student see chapter Monitor and intercom earlier in this guide The playback stops automatically when the tracks reach the end You yourself can stop the playback by clicking the button again However if you stop the playb...

Page 78: ...rce material for the activity was on CD audio you can choose to digitize the master track to the Media Storage Unit and use it from there the next time you want to play the exercise The advantage of having the source as an MSU file is that you can let the students work with the source individually right away without having to listen to it together i e save it to the MSU first Æ For more informatio...

Page 79: ...ontents of the file This will be displayed on the podcast Web page where the file can be downloaded Remote Directory Select the location where the podcast will be uploaded and made available to students Once you have entered the information above click OK The podcast will now be uploaded to the selected location When the uploading has finished a dialog will appear displaying the Web address where ...

Page 80: ... selected highlighted To select only some of the student files click on the display and select the files you want to save 3 After you have selected a saving location for the files the program starts the saving A Saving window appears where you can view the file that is currently being saved To cancel the saving click Cancel 4 After the saving is completed click Close to exit the window USING THE L...

Page 81: ...very of student files in the message dialog click OK Note that if you click the Continue button the students work will be lost and the program starts normally 2 Clicking OK opens the Lab 100 Recovery Application The Lab 100 Recovery Application 3 In the application window under Student Tracks on MSU a list of raw data files is displayed 4 If the appropriate files are not displayed in the window yo...

Page 82: ... start the file recovery click Create Selected WAV Files 8 The file creation dialogs that appear in the screen during the recovery indicate that the program is in progress 9 When the recovery is completed close the Lab 100 Recovery Application window GRADING STUDENTS The Grading feature of SANAKO Lab 100 allows you to evaluate students by giving them grades from a chosen grade scale and by adding ...

Page 83: ...for displaying all the students in the lesson These are situated at the top of the view To grade a student click on the desired grade button on the grade scale next to the student s name The grade scale can be changed in Lab 100 Properties The grading window also contains a field for additional notes and comments for each student The grade and comments given to each student can be cleared by click...

Page 84: ... any as well as lists of students without a grade or absent at the time of grading Grading Report window By clicking the appropriate control buttons you are able to save the report on your computer or anywhere in the network and print it out Additionally you can zoom the window in or out to decrease or increase the font size and scale the report to fit the sheet you want to print it on PRINTING TH...

Page 85: ...hanged accordingly ADJUSTING THE REPORT VIEW The print sheet scales automatically on your screen to fit the whole report to the sheet you want to print on you may want to enlarge the report window To change the size of the Grading Report window click on a side or a corner of the window and with the mouse button pressed down drag the side or corner to adjust the window size as appropriate CLOSING T...

Page 86: ... 3 Click the student you want to answer the question A speech bubble appears on the answering student s icon Everybody in the session including you hears the answer To select another student just click on the icon of that student To mute the answering student click anywhere on the class view FREE AND LOCK MODE The Free and locked mode mean the control the students have to the material they are wor...

Page 87: ...th it individually right away without listening to the exercise together first In Free mode if the source the students are working with is other than an MSU file the program prompts you to define the time the students are able to record their output If the Extra recording time in Free mode option has been enabled in the Lab 100 Properties window the students will be able to continue to record them...

Page 88: ...her than an MSU file remember to start also the source player For example to start to play a CD click play in the CD player PAUSING THE SOURCE If you want to give the students time to answer questions pause the audio source If your source is an MSU file click pause in the MSU controls All the other source players you will pause by pressing or clicking pause in the player PAUSING THE ACTIVITY Howev...

Page 89: ... answer To mute the answering student click anywhere on the class view CONTINUING THE ACTIVITY 6 To go on with the activity click Continue The source is connected to the students again and the recording go on If your source is an MSU file the source file continues to play If your source is any other than an MSU file start the source player again Alternatively you can continue asking questions For ...

Page 90: ...MATERIAL In Listening Comprehension the program defaults for recording the master track during the activity This means that at the end of the activity exiting the session opens a window where you can choose to save the recorded material for later use Æ For more information about saving the source material see the chapter Saving podcasting and collecting the tracks ...

Page 91: ...itiate the activity click Start The source is connected to the students and the recording starts If your source is an MSU file the activity starts when you click the Start button If the source is any other than an MSU file remember to start also the source player For example to start to play a CD click play in the CD player PAUSING THE ACTIVITY Note that pausing the activity means not only disconn...

Page 92: ...icking the Advanced button a window for saving the master track or collecting the student tracks appears SAVING THE SOURCE MATERIAL In Model Imitation the program defaults for recording both the master and student tracks during the activity This means that at the end of the activity a window opens where you can choose to save the recorded material for later use and to collect the student tracks fo...

Page 93: ...Activity Procedures 87 MONITORING STUDENTS Æ For more information about the monitoring features see Monitor and intercom and Automonitor EXITING THE SESSION 7 To quit the session click Exit Session ...

Page 94: ... box is checked in Default recording settings you have the possibility to save the source material you have played for the students When you click the End button to disconnect the source from the students the program prompts for saving the source track or file However if you want to let the students practice individually right away you can let them record their output by using the controls on thei...

Page 95: ...Activity Procedures 89 Æ For more information about the monitoring features see Monitor and intercom and Automonitor 4 To quit the session click Exit Session ...

Page 96: ...l The line opens between the students and the phone conversation can begin In Phone Conversation students can see the other pair member s workstation number on the their audio panel s display 1 To initiate the activity click Start A phone symbol is lit on the audio panel s display to indicate that the students are free to dial User Audio Panel s display DIALING A NUMBER Students dial the number of...

Page 97: ...ts one by one 2 To monitor a student click on a student icon A monitoring panel appears Æ For more information about the monitoring features see Monitor and intercom and Automonitor GIVING INSTRUCTIONS WITHOUT BREAKING THE CONNECTION There are three options for communicating with students during the activity without disconnecting them from each other To talk to all the students in the lesson click...

Page 98: ...itor and intercom earlier in this guide DEFAULT RECORDING SETTINGS PROCEEDING WITH PAIR DISCUSSION PAIRING METHOD By default the selecting of the Pair Discussion activity forms pairs automatically so that the adjacent sitting students form a pair If you don t want to change the pairing method you can initiate the activity right away without having to pair the students However if you want the progr...

Page 99: ...ember s workstation number on their audio panel s display The pair member s number can be seen on the display during the activity when no recordings are being made In free mode however no pair numbers are displayed While your students are working in pairs you can observe their progress and make comments if appropriate You can choose to monitor students in random order or you can start the automoni...

Page 100: ...source is other than an MSU file remember to pause or stop also the source player 4 If you want to pair the students again select a pairing method click the button accordingly If you pair the students again manually after clicking the Manual button click on the icons of the students you want to form a pair 5 To start the activity for the new pairs click Continue or Start depending on whether the a...

Page 101: ...the activity right away without having to group the students first However if you want the program to form groups in random order or you yourself want to group the students manually select the grouping method accordingly Panel for selecting the grouping method Before selecting the grouping method you can define the number of members you want to include in a group by entering the desired number in ...

Page 102: ... forms the group Under the group members icons appears the group s name for example Group 1 Group 2 etc WHAT IF THE NUMBER OF STUDENTS DOESN T MATCH If one student was left over from the grouping he or she is included as an additional member in one of the groups If two or more students were left over the remaining students form a group with each other You can also pair yourself with an extra stude...

Page 103: ...t up new groups when the activity is paused or ended 5 To pause or end the activity click Pause or End If your source is an MSU file clicking the Pause or End button pauses or stops also the MSU player If your source is other than an MSU file remember to pause or stop also the source player 6 If you want to group the students again select a grouping method click the button accordingly If you group...

Page 104: ...ay the source material once in order to initiate the activity to connect the source to the students and to start recordings After that you can free the students to listen to and re record their output again 1 To initiate the activity click Start The source is connected to the students and the recording start If your source is an MSU file the activity starts when you click the Start button If the s...

Page 105: ...rce material and collecting the student tracks see Saving podcasting and collecting the tracks ALLOWING STUDENT S ACCESS TO THEIR RECORDERS 3 To free the students to practice individually click Free The students are now able to work with their track individually MONITORING STUDENTS While your students are working individually you can listen to them by using the monitoring feature 4 To monitor a st...

Page 106: ...rce individually right away without having to listen to the source together first i e starting the activity If you want to give your students instructions before they start to interpret click Session Call WHEN THE AUDIO SOURCE IS OTHER THAN AN MSU FILE If your source is other than an MSU file you will first play the source material once in order to initiate the activity to connect the source to th...

Page 107: ...t the student tracks for evaluation Æ For more information about saving the source material and collecting the student tracks see Saving podcasting and collecting the tracks ALLOWING STUDENT S ACCESS TO THEIR RECORDERS 3 To free the students practice individually click Free The students are now able to work with their track individually MONITORING STUDENTS While your students are working individua...

Page 108: ...y a CD click play in the CD player If your source already has proper gaps for the student output you can let the activity go on without clicking any buttons Note that in this activity both the program and student output are recorded to the student track If the source doesn t have proper gaps pause the source using the controls in the source device The controls for an MSU file are on the Session Sc...

Page 109: ...omment on their work To replay the student tracks click Replay Æ On how to monitor a student see chapter Monitor and intercom earlier in this guide The playback stops automatically when the tracks reach the end You yourself can stop the playback by clicking the button again However if you stop the playback and click the button again to restart the playback the track is played from the beginning 3 ...

Page 110: ...now whether they answered correctly or not with the True and False keys on your GUI You can also save your quiz settings as a ready to use quiz file This way there is no need to manually reselect the settings every time you use the Quiz activity DEFAULT RECORDING SETTINGS PROCEEDING WITH QUIZ SELECTING THE ANSWERING MODE 1 Before starting the quiz select the answering mode according to the quiz ty...

Page 111: ...r example to start to play a CD click play in the CD player Clicking the Question button also opens a Quiz Graph that indicates the distribution of student answers The graph as no answers are given yet At this stage of the Quiz the students have not yet given their answers so the only block seen in the diagram is that of NA No Answers 3 To let students answer the question click Start If your sourc...

Page 112: ...ext to the keys switch off You can now either repeat the steps 2 3 and 4 to ask play the next question or you can give the right answer To give the right answer do as follows GIVING THE CORRECT ANSWER 5 Click on the correct answer s button A symbol correct or incorrect on the students audio panel s display tells the students whether they answered the question correctly or not In the diagram the bl...

Page 113: ...pears PRINTING THE QUIZ REPORTS You can print the report by clicking the printer symbol on the upper left corner of the report window The report is printed to the Windows default printer SAVING THE REPORT By clicking the disk symbol on the upper left corner of the window you can save the report to your computer or anywhere in the network ZOOMING IN AND OUT THE REPORT VIEW ...

Page 114: ...corner of the window and the mouse button pressed down drag the side or corner to adjust the window size as appropriate CLOSING THE REPORT WINDOW To close the report window click on the symbol in the upper right corner of the window REPORT WINDOW TOOLTIPS In the Quiz report window when you move the mouse pointer over a control button a tooltip text appears telling you what each button on the toolb...

Page 115: ...ORDING SETTINGS PROCEEDING WITH THE AP EXAM Before initiating the actual test the students perform a test recording and give their exam number code BEFORE THE TEST Put the exam tape in the tape deck and test your audio source s audibility 1 Click Session Call to give your students instructions as described in the Lab 100 Resource Book Note that by using the Session Call connection you can give you...

Page 116: ...e you end the entering mode before all the session students have given their codes the following message appears A message prompting for missing student Ids Also if two students have given the same PIN code the program prompts for a new code entering 4 In the message panel click OK to restart the entering mode for the missing student codes STUDENT VOLUME CHECK AND TEST RECORDING Give your students...

Page 117: ... to the students 7 To replay the recordings click Replay To stop the replay click Stop If a new volume adjustment or test recording is needed repeat steps from 5 to 7 You will now ask if the students have any questions Your microphone is open so you can communicate to the students without clicking anything more You can thus answer all questions regarding procedure and initiate the exam INITIATING ...

Page 118: ...cted from the students and the recordings stop You can now call the students again 10 If you want to continue the exam click Continue In the end of the exam you will collect the student tracks for later evaluation 11 To collect the student tracks click Collect The window for saving the files opens Panel for saving the master track and collecting the student tracks COLLECTING THE STUDENT TRACKS You...

Page 119: ...ve A window for browsing for a folder opens By default all the files are selected highlighted To select only some of the student files click on the display and select the files you want to save To select more than one file press and hold down the Ctrl key and then click on the names of the files you want to select 14 After you have selected a location for saving the files the program starts the sa...

Page 120: ...114 SANAKO Lab 100 User Guide The program is saving the student tracks 15 After the saving is completed click Close to exit the window 16 To quit the session click Exit Session ...

Page 121: ...to work with their copies of it individually After the students have performed the test or another exercise you can save the outcomes for later use PROCEEDING WITH LIBRARY MODE 1 To give instructions click Session Call To end the call click the button again 2 Selecting Library Mode from the activities menu list opens a list of available MSU files 3 Select the file that you want the students to wor...

Page 122: ... student click on a student icon A monitoring panel appears Æ On how to monitor a student see chapter Monitor and intercom earlier in this guide EXITING THE SESSION 6 To quit the session click Exit Session A window for collecting the student tracks opens COLLECTING THE STUDENT TRACKS You can choose to collect the student tracks for later evaluation 7 To collect the student tracks click Collect The...

Page 123: ...accordingly 8 In the window click Save A window for browsing for a folder opens By default all the files are selected highlighted To select only some of the student files click on the display and select the files you want to save 9 After you have selected a saving location for the files the program starts the saving A Saving window appears where you can view the file that is currently being saved ...

Page 124: ...TERING EXAM CODE 1 Once you have selected the GEPT activity a dialog will appear asking for the exam code Enter the seven digit exam batch code and click OK The code is now displayed in the activity window The student positions are numbered automatically and each student in the session is automatically given a three digit ID number INSERTING USB DEVICE FOR SAVING STUDENT RECORDINGS 2 Next before s...

Page 125: ...ctions Note that by using the Session Call connection you can give your students instructions at any point before the actual exam However during the exam no calls are possible Clicking the button again ends the call mode ADDING AND REMOVING STUDENTS For up to ten minutes after the start of the GEPT activity you can add extra students to the exam and remove missing students from the layout If there...

Page 126: ...t all students were able to make a recording When proceeding with the test recording only the function that needs to be used next is available and the others are grayed out SELECTING AUDIO SOURCE FOR EXAM 8 Next select the Audio Source for the GEPT exam In a GEPT exam the audio source is always an external analog device such as a cassette recorder or a CD player PROCEEDING WITH THE EXAM When proce...

Page 127: ...lick Collect in the activity view and then click the Collect button in the dialog that opens to collect the student recordings to the USB drive that was set as the student collection folder READING THE FILE NAMES OF COLLECTED RECORDINGS The audio files containing student recordings are named using the exam batch code that was entered at the beginning of the GEPT exam The first 7 digits of the file...

Page 128: ...o students The teacher is able to monitor the students during the exam both individually and with the automonitor function PROCEEDING WITH THE TEM 4 EXAM BEFORE THE TEST 1 Click Session Call to give your students instructions Note that by using the Session Call connection you can give your students instructions at any point before the actual exam However during the exam no calls are possible Click...

Page 129: ...s will now have time to switch to another one When proceeding with the test recording only the function that needs to be used next is available and the others are grayed out RECORDING STUDENT INFORMATION To record student information 7 Click the Start button The students are now automatically recorded and tell their name and other student information if required 8 Click Stop when all the students ...

Page 130: ...ial is recorded onto the student UAPs during the first playback Click Stop when the material is finished Repeat the procedure to play the material for students a second time After the students have heard the audio material twice their recorders are automatically paused for three minutes while the students have time to prepare 12 When the three minutes have passed click Continue The students are no...

Page 131: ...terial for the second section to the students The material is recorded on the student recorders during the playback Click Stop when the material is finished After hearing the audio material student recorders are automatically paused for three minutes while the students have time to prepare 16 When the three minutes have passed click Continue The students are now automatically recorded for three mi...

Page 132: ...n the students into groups with either the Fixed or Manual function Fixed the students will be automatically divided into groups in order according to their student numbers Manual you can select the groups manually by clicking on student icons to select them to the active group Once the groups have been selected the students have three minutes to prepare 20 When the three minutes have passed click...

Page 133: ...recordings 21 Click Collect and browse for a suitable location where the recordings will be saved READING THE FILE NAMES OF COLLECTED RECORDINGS The audio files containing student recordings are named using the exam batch code that was entered at the beginning of the GEPT exam The first 7 digits of the file name are the exam batch code zzz yyyy The 8 9th digits indicate the number of the session x...

Page 134: ...tion again ENDING THE ACTIVITY 4 To end the activity click End This opens a window asking whether you want to collect the student tracks 5 To collect the student tracks click Collect and select a file format for the collection SAVING Q A SEQUENCES When you are finished with a Q A exercise you can save the question and answer sequence that you went through as a file This allows you to run the same ...

Page 135: ...ects audio for the students individual working Teacher hands out a Source list report for students to inform them about the available media Students access the media the teacher has selected for them by entering a number code in their audio panels PROCEEDING WITH AUDIO ON DEMAND 1 To give instructions click Session Call To end the call click the button again Selecting Audio on Demand from the acti...

Page 136: ...termingle for example CD audio file and media file However it is possible to play a media file residing on your computer and simultaneously use an external source device for example an audio tape in a cassette recorder TO SELECT MSU FILES Note that in case of MSU files you can select multiple files at a time a Check the box next to the MSU folder to open a list of MSU files By default all MSU file...

Page 137: ... open the same audio sources again for the students This way you don t have to select the media again when you want the students to work with it To save a file click the Save button and in the dialog that opens browse for a saving location give the file a name and click Save To open the saved file list again click the Open button and in the dialog that opens browse for the file or folder The selec...

Page 138: ... can be copied and saved to your computer or to any medium accessible from your computer You can choose whether you want to collect the files in mp3 wav or wma format To change the file format select the option accordingly In the window click Save A window for browsing for a folder opens By default all the files are selected highlighted To select only some of the student files click on the display...

Page 139: ...back or press record for playback and recording In other cases the playback of the file starts automatically when the file number is entered CHANGING FILES AS A STUDENT To change the file the student first presses the Call Teacher button and then the appropriate number keys FILE LIST REPORT By handing out the printed report to students or by projecting the report for them to view you can inform th...

Page 140: ...seen on your screen To zoom the font size in or out click the symbols on the upper part of the report window If you zoom the report in or out and print it out the font size of the print is changed accordingly ADJUSTING THE REPORT VIEW The print sheet scales automatically on your screen to fit the whole report to the sheet you want to print on you may want to enlarge the report window To change the...

Page 141: ...orage Unit MSU System Connection Unit SCU User Audio Panel UAP Teacher PC HARDWARE INSTALLATION LAB 100 COMPONENTS System Connection Unit 032 SCU032 6001020 connects User Audio Panels both teacher s and students with audio sources and the Teacher PC This model contains 32 ports for User Audio Panels System Connection Unit 064 SCU064 6001021 This model contains 64 ports for User Audio Panels ...

Page 142: ...his model is 240 hours of program files User Audio Panel UAP036 Mounted with metal plate 6001036 at each student position is the tool that students use to participate in a Lab 100 class The teacher also has a User Audio Panel The model that is mounted with a metal plate is firmly attached to the student table by making a hole in the table W x L 99 x 145mm and tightening the screw from under the ta...

Page 143: ...ection Mounted with metal plate 6001037 or Desktop model 6001039 These UAP models have an additional cable for a PC connection It can be used to make a connection to the student PC s soundcard or any other program source System Serial Interface SSI100 6001060 is needed if the system doesn t include a Media Storage Unit AA Lab The Serial Interface connects the teacher PC to the System Connection Un...

Page 144: ... MSU SCU064 2 x Cat 5 STP cross over SCU Student UAPs Cat 5 UTP SCU Teacher UAP Cat 5 UTP SCU Source Interface Cat 5 UTP Program Source Interface PSI046 3831246 source Stereo cable RCA connectors Teacher PC Teacher UAP 3 3 5 mm stereo cable Note Cat 5 cables are standard cables used typically for network connections For the connections SCU MSU and MSU Teacher required a cross over cable The SCU UA...

Page 145: ...ish the connection according to the port name not according to its placement CONNECTING UNITS Before connection make sure both units are switched off Connect units from SCU port A to MSU port A and from SCU port B to MSU port B See the drawing below CABLE TYPE The cable type is CAT 5 Cross Over MSU642 contains 2 of these cables when delivered VERIFYING CONNECTIONS Between the User Audio Panels and...

Page 146: ... Source Interface and external source is not included Note about the batteries in MSU If the backup battery is incorrectly replaced there is danger of explosion Replace only with a battery of the same type Do not put the battery pack in trash that is disposed of in landfills When disposing of the battery comply with local ordinances or regulations and your company s safety standards DUAL CHANNEL P...

Page 147: ...B 100 PROGRAM 1 Insert the Lab 100 CD ROM into your computer s CD ROM drive The installation wizard starts If not open Windows Explorer select the CD ROM drive and double click the Setup exe file 2 Select a path for the destination directory 3 When the installation is completed click OK It is not necessary to boot the PC TEACHER PC CONFIGURATION TO SET THE COMMUNICATION MODE AND IP ADDRESS WINDOWS...

Page 148: ...K The following settings are needed only when a 3Com Etherlink XL 10 network card is used 1 In the Local Area Connection Properties sheet the General tab click Configure 2 Select the Advanced tab 3 In the sheet that opens in the Property window select Duplex Mode In the value field make sure Half Duplex is selected 4 In the Property window select Media Type Make sure the value set is 100Base Tx 5 ...

Page 149: ...NG TO SET THE CD PLAYER LEVEL Play a CD and listen to the level from the teacher headset Adjust if necessary TO SET THE WAVE LEVEL Play a media file and listen to the level from the teacher headset Adjust to meet the CD player level TO SET THE MAIN VOLUME Play a media file or CD and adjust the volume TO ADJUST THE AUDIO LEVEL IN THE SOURCE INTERFACE The input level for the Source Interface is 150m...

Page 150: ...settings 2 find workstations and 3 set audio sources When you configure the Lab 100 software for the first time follow the given order However if you want to modify an already existing configuration you can apply these steps in free order to match the task you want to accomplish To proceed with the class view configuration make sure the User Audio Panels are connected to the System Connection Unit...

Page 151: ...r computer The default setting is 1024x768 If you choose the higher resolution 1600x1200 then you can also adjust the size of the Lab 100 desktop icon with the Icon size selection DEFAULT LANGUAGE Select a language for the user interface from the drop down menu SELECT SEATING PLAN FOLDER Browse to select the folder where seating plan files will be saved MAXIMUM RECORDING TIME You can set a maximum...

Page 152: ... IP 172 24 1 2 Port 3333 If you have a system with multiple MSUs check the box above the TCP IP and Port fields to enter the information for each additional MSU The last number in the TCP IP address changes for each MSU but the port number remains the same AA Lab no MSU An AA Lab does not have an MSU for file storage and is used simply as an audio delivery system In an AA Lab setup you need to sel...

Page 153: ...tton pressed down drag the mouse pointer over those students icons you want to align Color code on the selected students icon turns to white indicating that by clicking the right mouse button you can now select to align the icons to left right top or bottom TO FIND WORKSTATIONS To find workstations proceed as follows 1 Click the Find Workstations button The student icons appear on the class view i...

Page 154: ...e SANAKO Video Distributor system TO SET VIDEO SOURCES 1 Click the Set Video Sources button The following dialog opens 2 In the Video Sources dialog enter the title of the video sources for example camera or video that are connected to the VD1 inputs 3 Select the appropriate serial port number e g COM1 COM2 COM3 ...

Page 155: ...h and you can customize the audio source settings as appropriate In audio source configuration you name the sources you want to use in your Lab 100 classes and define where they are connected in the system When the configuration is completed you can view the selected audio sources in the Audio Source list in the Lab 100 application AUDIO SOURCE WINDOW Click Set Audio Sources The following dialog o...

Page 156: ...rces allow you to edit the source name that will be displayed in the list of available audio sources in the Lab 100 teacher interface CONFIGURING ADDITIONAL AUDIO SOURCES The lower part of the window allows you to configure any other audio sources that are connected to the Lab 100 system For each source you need to select a suitable source type give them a name to be displayed in the Lab 100 audio...

Page 157: ...onnected to a student UAP External Source Audio source connected to an older single channel PSI e g recorder or CD player Dual Channel PSI Two external audio sources connected to one SCU port Forwarding port The Forwarding port option is only used in systems with multiple MSUs and it is not used to add an audio source In a multi MSU system you need to select Forwarding port and then define the SCU...

Page 158: ...pplication Giving audio sources commonly known names help the user in recognizing the sources when instructing with Lab 100 PORT NUMBER In the Port Number field select the SCU port to which the source is connected If the audio source is connected to the teacher s UAP select M as the port number The port number selection is grayed out for the Student Line In audio source as it does not require a po...

Page 159: ... Source drop down list SAVING AUDIO SOURCE SETTINGS AND EXITING THE WINDOW To save the audio source settings and close the audio source panel click OK To discard the changes and close the panel click Cancel SET VIDEO CONNECTIONS Note Using video sources requires the installation of a separate SANAKO Video Distributor system TO SET VIDEO CONNECTIONS 1 Click Set Video Connections The following dialo...

Page 160: ...tions can be located anywhere in the network and can be accessed by students for independent study The self access group operates outside the sessions in the teacher interface and outside teacher control The teacher can set a list of MSU files to be available for the self access group and students will then be able to study independently using the material The teacher will also be able to call the...

Page 161: ...The self access workstations will have white session indicators on the teacher interface and will be without student numbers Self access workstations can be added and removed only in the Lab 100 Configuration application ...

Page 162: ...g the connector between the System Connection Unit and User Audio Panel AUDIO CAN T BE HEARD Make sure Lab 100 is not in Demo mode CD AUDIO OR MEDIA FILE AUDIO CAN T BE HEARD BY TEACHER OR STUDENTS Cable from the teacher PC to the teacher s User Audio Panel is not connected properly Windows Mixer Settings are incorrect Wrong sound card selected for Windows MSU DOESN T COMMUNICATE The LAN adapter s...

Page 163: ...er a question Some students or all the students hear the answering student ATTENDANCE Clicking the Attendance button opens a menu for marking the absent students naming and renaming the students AUDIO SOURCE In the Lab 100 sessions you can use various audio and video devices such as tape recorders video recorders CD players sound cards etc You can also choose digitized video and audio material AVI...

Page 164: ...udio source is an MSU file you can edit the source while you and the students are listening to it This means that you can communicate to the students without having to manually pause or stop the audio source and the recordings from a separate player FIXED In the Pair and Group Discussion activity a method to form pairs or groups of the adjacent sitting students INTERCOM Intercom is an interactive ...

Page 165: ...the master or student track in order to give instructions or comments while the audio source is being played MONITOR Monitoring a student means listening to a selected student s work In the Group Pair and Phone Conversation monitoring a student means monitoring the whole group both of the members of the pair MSU FILE The Media Storage Unit MSU file is a file saved in the MSU which means that it ca...

Page 166: ...of students or the whole class Altogether you can have up to three sessions SESSION CALL In the Session Screen an ON OFF button for giving instructions for the students in the session SESSION SCREEN On the right hand side of the Lab 100 window the part of the Lab 100 window where you proceed with the session In the Session Screen you will select students an activity and audio source for the sessio...

Page 167: ...enu create a new class view or retrieve one mark students absent re name students and create sessions TOOLTIPS On the lower part of the Lab 100 window between the class view and Session Status Bar a bar that guides you throughout your class The tooltip texts on the right hand side of the bar tell you what you can do in different parts of the Lab 100 window On the left hand side of the Status bar i...

Page 168: ......

Page 169: ... 46 Audio Connections 53 Audio source 56 CD Audio 60 editing 59 Line In 61 media file 57 MSU File 58 selecting 69 setting 149 student pair group 26 60 teacher 60 teacher PC 61 video audio 61 Audio on Demand 52 129 for a student 133 saving file lists 131 selecting files for students 130 Automonitor 64 B Background collection 27 Bookmarks 65 remove 14 search 14 set 13 setting for students 66 student...

Page 170: ...1 Intercom 62 free mode 64 model student 63 L Lab 100 STS saving delegate recordings 29 Language 26 default language 145 LCD display 15 symbols 15 Left mouse button 17 Library Mode 52 115 Line In 61 Listening Comprehension 50 82 Lock mode 12 Lock Mode 80 Login student 46 Long filenames 30 M Main menu 7 22 copy files to from MSU 22 exit 39 properties 24 properties 1 2 25 properties 2 2 29 Main wind...

Page 171: ...rders 70 free 70 recording time in free mode 26 Recording both tracks 56 Recording the master track 54 Recording the student track 54 Recording time students 30 Recording time for students 145 Recordings 53 changing the default options 54 Master track 54 Student track 54 Recovery Application 74 Removing a seating plan folder 43 Removing a student from a session 49 Removing individual seating plans...

Page 172: ...orkstation out of order 18 Student login 13 46 Student recordings collection folder 25 default file format 28 Student track 53 collecting 73 116 132 recording 54 System Connection Unit 4 135 System Serial Interface 137 T Teacher call order 27 Teacher media player 30 Teacher PC configuration 141 Teacher s Graphical User Interface 7 TEM 4 52 122 Toolbar 7 All Call 8 Attendance 8 Help 8 main menu 7 N...

Reviews: