Samsung Electronics
3-1
Disassembly & Reassembly
3. Disassembly & Reassembly
3-1 Overall Disassembly & Reassembly
- Please follow the disassemble sequence describes below. Otherwise, the product may be
damaged.
- Be sure to carefully read and understand the safety instructions describes at the start of this
manual before performing any work on the IC chips on the PCB.
- To assemble, follow the below instructions in reverse order.
No.
Description
Description Photo
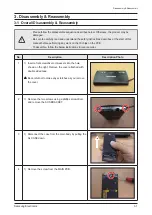
1
1) Insert a flat screwdriver or tweezers into the hole
shown on the right. Remove the cover attached with
double sided tape.
Be careful not to make any scratches as you remove
the cover.
2
1) Remove the two screws using a phillips screwdriver,
and remove the SUS BRACKET.
3
1) Disconnect the case from the main body by pulling the
AL CASE down.
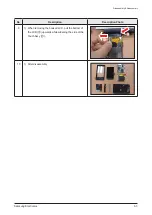
4
1) Remove the screw from the MAIN PCB.
Summary of Contents for YP-R1
Page 15: ...3 4 Samsung Electronics MEMO ...
Page 44: ...Samsung Electronics 4 29 Troubleshooting Install completed Check device manager ...
Page 48: ...MEMO Samsung Electronics 4 33 ...
Page 53: ...5 5 Samsung Electronics MEMO ...
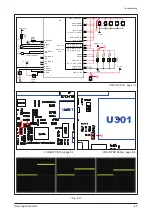
Page 58: ...Samsung Electronics 6 5 PCB Diagram 6 2 2 Test Point Wave Form TP2 TP3 TP4 TP7 TP6 ...
Page 59: ...6 6 Samsung Electronics MEMO ...
Page 69: ...7 10 Samsung Electronics MEMO ...

