


setup screen
50_ setup screen
6.
Configure the event motion schedule and event motion conditions.
`
For more information about <
Event activation time
> and <
Event action settings
>, refer to “
Alarm input
”. (page 45)
7.
When done, click [
apply
].
J
`
In <
Video & Audio
> - <
Audio setup
>, it is recommended to set the audio input gain to a value ranging from 4 to 6.
`
In <
Video & Audio
> - <
Audio setup
>, if you set the audio input source to an external microphone, the recommended
microphone specifications are as follows.
-
Frequency range: 40 to 16,000Hz
-
Impedance: 1,500Ω
-
Sensitivity: -40±3 dB (7.1~14.1 mV)
`
In the following cases, sound source classification performance may be impaired or malfunction.
-
Gunshot sounds are generated consecutively, such as the sound made by a machine gun rather than a one-shot sound.
-
Noise is too loud to distinguish from the target sound source.
-
2 or more sound sources are input simultaneously.
-
Sound source classification is applied in a quiet environment using the noise removal function
-
Sound of applause or scream is heard from a close distance (within 1m) from the camera
-
A loud sound source that does not belong to any of the sound source categories such as aircraft sound or siren sound is
suddenly generated
-
The external microphone does not conform to the recommended specifications
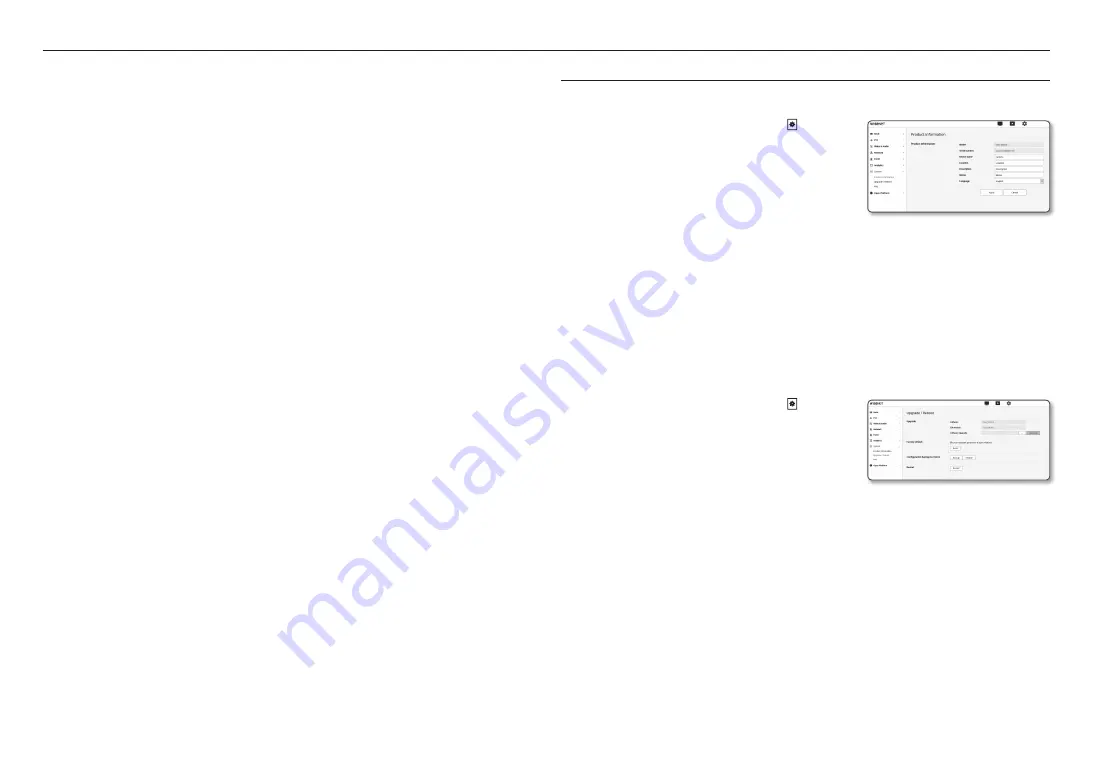
SyStem Setup
product information
1.
From the Setup menu, select the <
System ( )
> tab.
2.
Click <
product information
>.
3.
Check the camera information, or provide details according
to your network environment.
•
Model : Model name of the product.
•
Serial number : Product serial number.
•
Device name : Provide a device name that will be displayed
on the Live screen.
•
Location : Specify the location where the camera is installed.
•
Description : Provide detailed information about the camera location.
•
Memo : Provide an explanation about the camera for better understanding.
•
Language : Select a preferred language for the Web Viewer OSD.
M
`
The default language is set to <
English
>.
4.
When done, click [
apply
].
upgrade / reboot
1.
From the Setup menu, select the <
System ( )
> tab.
2.
Click <
upgrade / reboot
>.
3.
Select a desired item and set it appropriately.
•
Upgrade : Performs upgrading the system.
When reconnecting, the web viewer will not run normally if
the browser cache is not completely clear.
•
Factory default : Initializes all setting information including the camera settings to the factory reset state.
(however, logs are not initialized)
- Select the <
except network parameter & open platform
> check box and settings other than
network settings and open platform settings will be reset.
`
The IP addressing system will be defaulted to DHCP if you reset the camera. If no DHCP server is found, the previous settings
will be restored automatically.
•
Configuration backup & Restore : Backs up the current system settings before performing the
restoration process. The system is automatically restarts after backup or restoration.
•
Restart : Restarts the system.


