setup screen
44_ setup screen
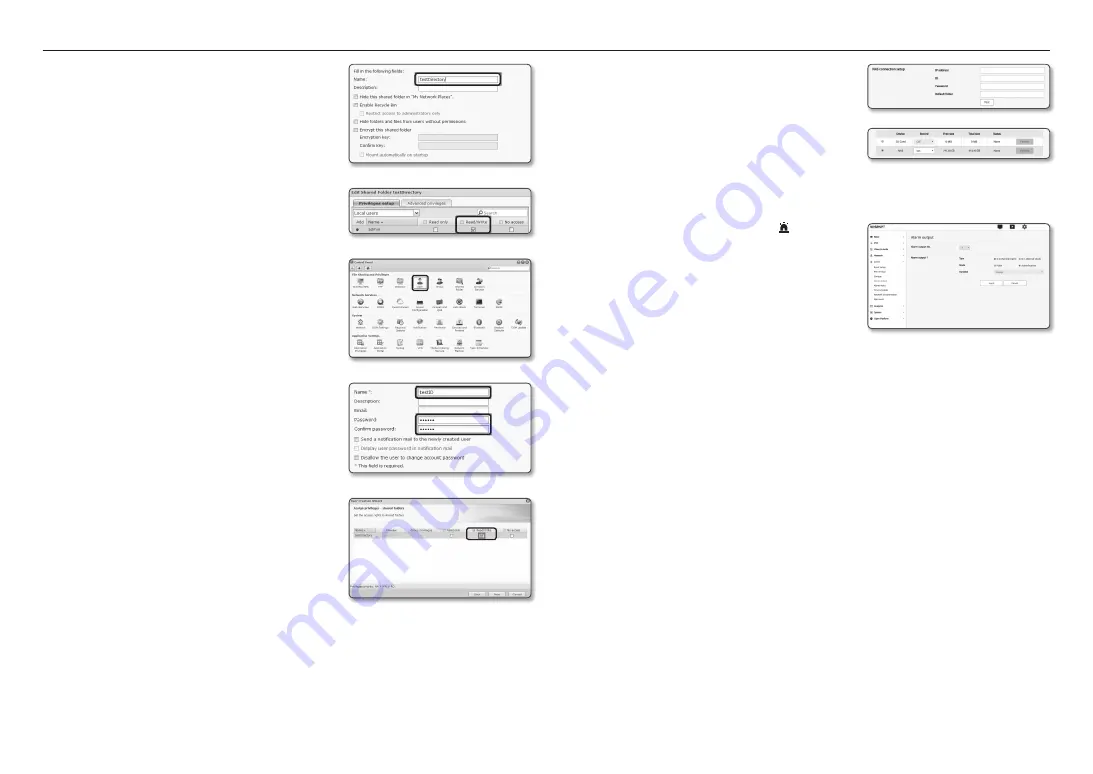
4.
Click the [
create
] button.
5.
After entering the shared folder name(ID), click the [
oK
]
button to create a shared folder.
In this example, the shared folder name is [
testDirectory
].
6.
In Windows, for NAS access, set the privilege for the shared
folder as follows.
Check the admin’s [
read/write
].
7.
Click on the <
user
> in the file sharing and privilege menu.
8.
After clicking the [
create
] button, enter name(ID) and
password.
In this example, name(ID) is set to [
testiD
] and password is
also set to [
testiD
].
9.
In Windows, set the privilege for NAS access.
For the shared folder created in step 4 called “testDirectory”
check [
read/write
].
10.
Basic setting in the NAS is completed.
Connect your camera to the actual NAS.
As shown below, enter the NAS connection setting items.
11.
After entering item 10, check <
on
>.
12.
Click the [
apply
] button.
Finish saving by using the NAS.
alarm output
1.
From the Setup menu, select the <
event ( )
> tab.
2.
Click <
alarm output
>.
3.
Configure the camera alarm output settings.
`
If you change the alarm output type, the alarm out button on the
monitoring page and alarm output type displayed on Event Setup page
will be changed accordingly.
•
Type
- N.O. (Normal Open) : Considers “Open circuit” status
of the sensor or alarm input device as normal, and triggers alarm event if becomes “Closed circuit”
status.
- N.C. (Normal Close) : Considers “Closed circuit” status of the sensor or alarm input device as normal,
and triggers alarm event if becomes “Open circuit” status.
•
Mode : Sets the alarm output method.
`
There is difference between operations when clicked alarm output button while disabled.
- Pulse : It is activated during the time period specified by the duration (switching interval) and then
becomes inactive automatically.
- Active/Inactive : It maintains as activated until the user clicks the button again to make it inactive.
•
Duration : Set the alarm duration that maintains activated if the mode is set to pulse, from 1 to 15
seconds.
4.
When done, click [
apply
].