3.Replacemen
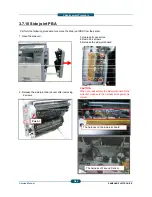
3.14 LSU (Laser Scanning Unit)
[A]
[B]
[C]
[H]
Service Manual
3-6
nt Procedure
1. Open the front cover.
2. Remove the waste toner container [A].
3. Open the side door.
4. Remove the toner cartridge [B] and the imaging
unit [C]
unit [C].
CAUTION
Be careful not to scratch the surface of the imaging
unit.
5 Remove 2 screws and 2 pins [H]
To prevent damage, do not expose the imaging unit
to light for more than a few minutes. Cover it with a
piece of paper to protect it if necessary.
5. Remove 2 screws and 2 pins [H].
6. Remove the front cover.
SAMSUNG ELECTRONICS
60
Summary of Contents for SCX-82x0 series
Page 13: ...10 2 Abbreviations 10 4 ...
Page 112: ...2 Product Description SAMSUNG ELECTRONICS Service Manual 2 94 ...
Page 379: ...8 System 8 2 Engine 2 8 2 Engine 2 Service Manual 8 Diagram SAMSUNG ELECTRONICS 2 ...
Page 380: ...8 System 8 3 Engine 3 8 3 Engine 3 Service Manual 8 Diagram SAMSUNG ELECTRONICS 3 ...
Page 381: ...8 System 8 4 Scan DADF 8 4 Scan DADF Service Manual 8 Diagram SAMSUNG ELECTRONICS 4 ...
Page 382: ...8 System 8 5 Heater Fuse 8 5 Heater Fuse Service Manual 8 Diagram SAMSUNG ELECTRONICS 5 ...


