background image

English - 

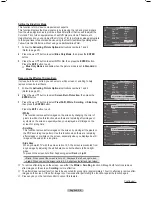
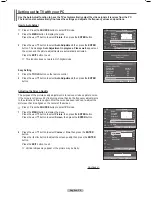
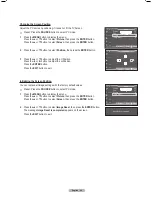
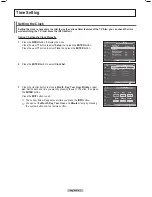
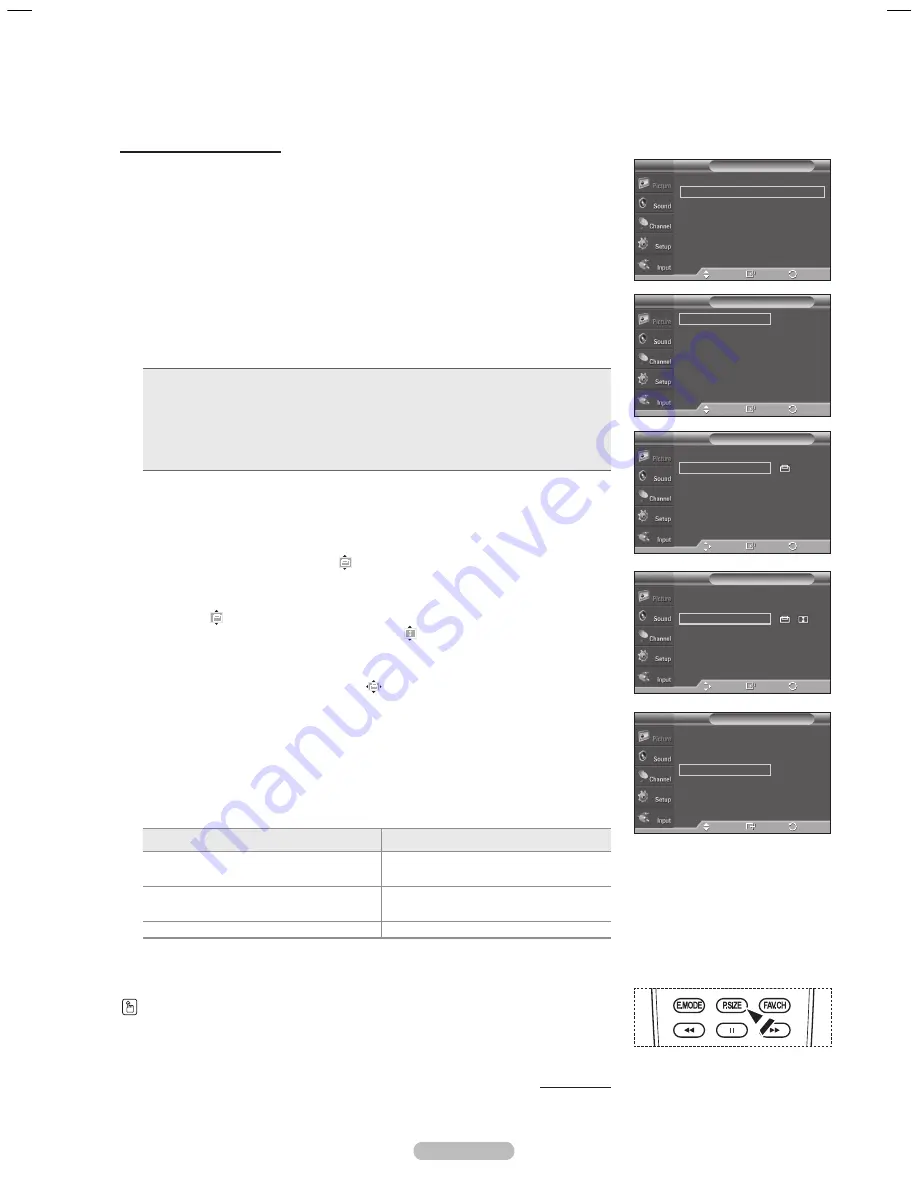
Changing the Screen Size

Occasionally, you may want to change the size of the image on your screen. Your

TV comes with screen size options, each designed to work best with specific

types of video input. Your cable box or satellite receiver may have its own set of

screen sizes as well. In general, though, you should view the TV in 16:9 mode as 

much as possible.

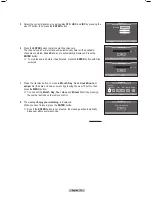
1

  Follow the 

Activating Picture Options

 instructions numbers 1 and 2. 

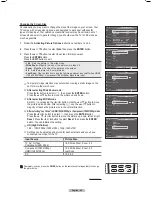
  Press the ▲ or ▼ button to select 

Size

, then press the 

ENTER

 button.

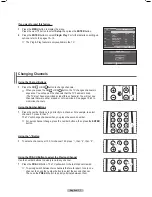
  Press the ▲ or ▼ button to select the screen format you want.

  Press the 

ENTER

 button.

  Press the 

EXIT

 button to exit.

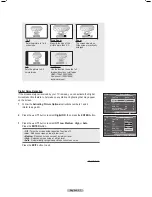
• 

1:

 : Sets the picture to 16:9 wide mode.

• 

Wide Zoom

 : Magnify the size of the picture more than 4:3.

• 

Zoom

 : Magnifies the size of the picture on the screen.

• 

4:

 : Sets the picture to 4:3 normal mode.

•  

Just Scan

 : Use the function to see the full image without any cutoff when HDMI 

(720p/1080i/1080p), Component (1080i/1080p) signals are input.

  ➢

   Temporary image retention may occur when viewing a static image on the 

set for more than two hours.


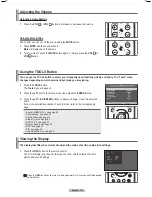
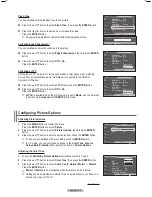
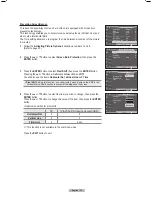
After selecting Wide Zoom mode :

    Press the ► button to select (

),  then press the 

ENTER

 button. 

  Press the ▲ or ▼ button to move the picture up and down.

  ➢


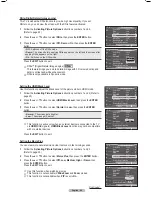
After selecting ZOOM mode

:

     Select (

) by pressing the ◄ or ► button. Use the ▲ or ▼ button to move 

the picture up and down. After selecting (

), use the ▲ or ▼ button to 

magnify or reduce the picture size in the vertical direction.

  ➢


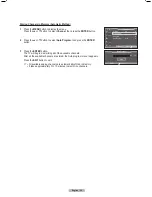
After selecting “Just Scan” in HDMI (100i/100p) or Component (100i/100p) mode

 Press the ◄ or ► button to select 

, then press the 

ENTER

 button.  

Press the ▲, ▼, ◄ or ► button to move the picture up, down, left and right.


Reset

: Press the ◄ or ► button to select 

Reset

, then press the 

ENTER


button. You can initialize the setting.

  ➢


HD (High Definition)

    16:9 - 1080i/1080p (1920x1080), 720p (1280x720)
 

   Settings can be adjusted and stored for each external device you have 

connected to an input of the TV.


Input Source

Picture Size

TV, AV, S-Video,

Component (480i, 480p)

16:9, Wide Zoom, Zoom, 4:3

Component (1080i/1080p),

HDMI (1080i/1080p)

16:9, Wide Zoom, Zoom, 4:3,

Just Scan

PC

16:9, 4:3

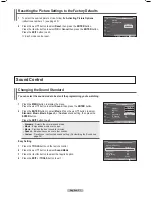
Alternately, you can press the 

P.SIZE

 button on the remote control repeatedly to change 

the picture size.


Continued...

16:9

Wide Zoom

Zoom

4:3

Just Scan

Size

T  V

Enter

Adjust

Return

Color Tone 

: Warm1 

Size 

: 16:9 

Digital NR 

: Auto 

DNle 

: Off 

HDMI Black Level  : Normal 

Movie Plus 

: Low 

Blue Only Mode  : Off 

Screen Burn Protection 

Picture Options

T  V

Enter

Move

Return

16:9

Wide Zoom

Zoom

4:3

Just Scan

Size

T  V

Enter

Return

Adjust

16:9

Wide Zoom

Zoom

4:3

Just Scan

Size

T  V

Enter

Return

Adjust

16:9

Wide Zoom

Zoom

4:3

Just Scan

Size

T  V

Enter

Return

Adjust

BN68-01613-00-Eng.indb   26

27/05/2008   13:40:33

Summary of Contents for PL50A610T1R

Page 1: ...0800 333 3733 www samsung com ar BRAZIL 0800 124 421 4004 0000 www samsung com CHILE 800 SAMSUNG 726 7864 www samsung com cl COLOMBIA 01 8000112112 www samsung com co COSTA RICA 0 800 507 7267 www samsung com latin ECUADOR 1 800 10 7267 www samsung com latin EL SALVADOR 800 6225 www samsung com latin GUATEMALA 1 800 299 0013 www samsung com latin HONDURAS 800 7919267 JAMAICA 1 800 234 7267 www sam...

Page 2: ...y images and text such as stock market reports video game displays station logos web sites or computer graphics and patterns should be limited as described above for all televisions Displaying stationary images that exceed the above guidelines can cause uneven aging of PDP Displays that leave subtle but permanent burned in ghost images in the PDP picture To avoid this vary the programming and imag...

Page 3: ...as temperature or humidity This is normal and not a defect of the unit Cell Defects The PDP uses a panel consisting of 1 230 000 SD level to 3 150 000 HD level pixels which require sophisticated technology to produce However there may be a few bright or dark pixels on the screen These pixels will have no impact on the performance of the product Avoid operating the TV at temperatures below 5 C 41 F...

Page 4: ...round XT 32 Choosing a Multi Channel Sound MTS Track Analog 33 Automatic Volume Control 33 Setting the TV Speakers On Off 34 Listening to the Sound of the Sub PIP Picture 34 Connecting Headphones Sold separately 34 Channel Control Adding and Erasing Channels 35 Activating the Child Lock 36 Fine Tuning Analog Channels 37 Setting the Color System 37 PC Display Using Your TV as a Computer PC Display ...

Page 5: ...r dealer Remote Control Batteries AAA x 2 Not available in all locations Power Cord Owner s Instructions Cover Bottom Screws 2ea Refer to page 67 Warranty Card Safety Guide Manual Not available in all locations Cloth Clean Ferrite Core for S Video The following parts are sold separately and are available at most electronics stores If you do not use a good quality cable some noise may appear on the...

Page 6: ...l 2 MENU Press to see an on screen menu of your TV s features 3 VOL Press to increase or decrease the volume In the on screen menu use the VOL buttons as you would use the and buttons on the remote control 4 CH Press to change channels In the on screen menu use the CH buttons as you would use the and buttons on the remote control 5 Power Indicator Blinks and turns off when the power is on and ligh...

Page 7: ...ts An optional HDMI DVI cable will be necessary to make this connection When using an optional HDMI DVI adapter the DVI analog audio inputs on your TV allow you to receive left and right audio from your DVI device 6 ANT IN Uses a 75Ω Coaxial connector for an Air Cable Network 7 SERVICE For service only 8 AUDIO OUT R L Audio outputs to external devices 9 COMPONENT IN 1 2 Connects Component video au...

Page 8: ... BUTTONS Use these buttons in the Channel list CC Controls the caption decoder E MODE Press to select the preset display and sound modes for sports cinema and games Use these buttons in the DMA and Anynet modes This remote can be used to control recording on Samsung recorders with the Anynet feature SOURCE Press to display all of the available video sources PRE CH Tunes to the previous channel CH ...

Page 9: ... antennas to the TV This procedure requires an optional combiner adaptor available at most electronics shops 1 Connect both antenna leads to the combiner 2 Plug the combiner into the ANT IN terminal on the bottom of the back panel Installing Batteries in the Remote Control 1 Lift the cover at the back of the remote control upward as shown in the figure 2 Install two AAA size batteries Make sure to...

Page 10: ...T IN terminal on your cable box This terminal might be labeled ANT IN VHF IN or simply IN 2 Connect this cable to a two way splitter 3 Connect an Antenna cable between an OUTPUT terminal on the splitter and the IN terminal on the cable box 4 Connect an Antenna cable between the ANT OUT terminal on the cable box and the B IN terminal on the RF A B switch 5 Connect another cable between the other OU...

Page 11: ... audio cables to the DVI IN HDMI2 R AUDIO L jacks on the back of the TV If this happens contact the company that provided the DVD Player or Cable Box Satellite receiver to confirm the HDMI version then request an upgrade HDMI cables that are not 1 3 may cause annoying flicker or no screen display Connecting a DVD Player or Cable Box Satellite receiver Set Top Box via DVI This connection can only b...

Page 12: ...r 2 Y PB PR jacks on the TV and the COMPONENT Y PB PR jacks on the DVD Player or Cable Box Satellite receiver Set Top Box Connect Audio Cables between the COMPONENT IN 1 or 2 R AUDIO L jacks on the TV and the AUDIO OUT jacks on the DVD Player or Cable Box Satellite receiver Set Top Box Component video separates the video into Y Luminance brightness PB Blue and PR Red for enhanced video quality Be ...

Page 13: ...tween the ANT OUT terminal on the VCR and the ANT IN terminal on the TV 4 Connect a Video Cable between the VIDEO OUT jack on the VCR and the AV IN 1 or AV IN 2 VIDEO jack on the TV 5 Connect Audio Cables between the AUDIO OUT jacks on the VCR and the AV IN 1 or AV IN 2 R AUDIO L jacks on the TV S Video Connection Your Samsung TV can be connected to an S Video jack on a VCR This connection deliver...

Page 14: ...N PC jack on the TV and the PC output jack on your computer Connect a PC Audio Cable between PC IN AUDIO jack on the TV and the Audio Out jack of the sound card on your computer Using the HDMI DVI Cable 1 Connect a HDMI DVI cable between the HDMI IN 2 jack on the TV and the PC output jack on your computer Connect a 3 5mm Stereo plug 2RCA cable between the DVI IN HDMI 2 R AUDIO L jack on the TV and...

Page 15: ... Use then press the ENTER button We recommend setting the TV to Home Use mode for the best picture in your home environment Store Demo mode is only intended for use in retail environments If the unit is accidentally set to Store Demo mode and you want to return to Home Use Standard Press the Volume button While the volume OSD is displayed press and hold the MENU button for 5 seconds The Screen Sav...

Page 16: ...Month Day Year Hour Minute or am pm Set the date and time you want by pressing the or button then press the MENU button You can set the Month Day Year Hour and Minute directly by pressing the number buttons on the remote control 8 The message Enjoy your watching is displayed When you have finished press the ENTER button Even if the ENTER button is not pressed the message will automatically disappe...

Page 17: ...ber Buttons 1 Press the number buttons to go directly to a channel For example to select channel 27 press 2 then 7 The TV will change channels when you press the second number For quick channel change press the number buttons then press the ENTER button Using the Button 1 To select a channel over 100 for channel 122 press then 2 then 2 Using the PRE CH Button to select the Previous Channel Use the...

Page 18: ...o display change or use the selected items For a more detailed description of each function refer to the corresponding page Anynet HDMI CEC see page 60 Picture Mode see page 22 Sound Mode see page 31 Sleep Timer see page 42 SRS TS XT see page 32 Energy Saving see page 47 MTS see page 33 PIP see page 48 Auto Adjustment see page 39 Viewing the Display The display identifies the current channel and t...

Page 19: ...ecting the Video Signal source Before your television can begin memorizing the available channels you must specify the type of signal source that is connected to the TV i e an Air or a Cable system 1 Press the MENU button to display the menu Press the or button to select Channel then press the ENTER button 2 Press the ENTER button select Air Cable Press the or to select Air STD HRC and IRC then pr...

Page 20: ...s the ENTER button The TV will begin memorizing all of the available channels After all the available channels are stored the Auto program menu reappears Press the EXIT button to exit All available analog channels are automatically stored in memory It takes approximately 3 to 10 minutes to memorize channels Antenna Air Auto Program Channel Manager Fine Tune Color System Auto Channel T V Enter Move...

Page 21: ...Press the or button to select Edit Name then press the ENTER button 2 Press the or button to select AV1 AV2 S Video Component1 Component2 PC HDMI1 HDMI2 HDMI3 or HDMI4 input jack then press the ENTER button 3 Press the or button to select VCR DVD Cable STB Satellite STB PVR STB AV Receiver Game Camcorder PC TV IPTV Blu Ray HD DVD or DMA input source then press the ENTER button Press the EXIT butto...

Page 22: ... Press the ENTER button Press the EXIT button to exit When you make changes to Cell Light Contrast Brightness Sharpness Color or Tint G R the OSD will be adjusted accordingly When in PC mode Tint G R Sharpness and Color are not available Each adjusted setting will be stored separately according to its input mode In TV AV S Video modes of the PAL system you can not use the Tint Function Cell Light ...

Page 23: ...n to select Dynamic Contrast then press the ENTER button 7 Press the or button to select Off Low Medium or High Press the ENTER button Off Turns off the dynamic contrast adjustment function Low Sets the dynamic contrast to low Medium Sets the dynamic contrast to medium High Sets the dynamic contrast to high Activating Gamma You can adjust the Primary Color Red Green Blue Intensity 3 3 8 Press the ...

Page 24: ...R button Color is available when Color Space is set to Custom 14 Press the or button to select Red Green Blue Yellow Cyan or Magenta Press the ENTER button 15 Press the or button to select Red Green or Blue to change it Press the ENTER button 16 Press the or button to decrease or increase the value of a particular item Press the ENTER button In Color you can adjust the RGB values for the selected ...

Page 25: ...t You can emphasize object boundaries in the picture 22 Press the or button to select Edge Enhancement then press the ENTER button 23 Press the or button to select Off or On Press the ENTER button Activating xvYCC Setting the xvYCC mode to On increases detail and color space when watching movies from an external device ie DVD player connected to the HDMI or Component IN jacks 24 Press the or butto...

Page 26: ... After selecting ZOOM mode Select by pressing the or button Use the or button to move the picture up and down After selecting use the or button to magnify or reduce the picture size in the vertical direction After selecting Just Scan in HDMI 1080i 1080p or Component 1080i 1080p mode Press the or button to select then press the ENTER button Press the or button to move the picture up down left and r...

Page 27: ... at a high level Auto Automatically recognizes and reduces screen noise Press the EXIT button to exit Continued Zoom The screen size when Wide screen is vertically enlarged 4 3 Sets the picture to 4 3 normal mode Wide Zoom Magnify the size of the picture more than 4 3 Just Scan Use the function to see the full image without any cutoff when HDMI 720p 1080i 1080p Component 1080i 1080p signals are in...

Page 28: ...xit Setting the Movie Plus You can view more natural skin and clear text even in fast moving scenes 1 Follow the Activating Picture Options instructions numbers 1 and 2 Refer to page 25 2 Press the or button to select Moive Plus then press the ENTER button 3 Press the or button to select Off Low Medium High or Demo then press the ENTER button Press the EXIT button to exit Use this function when wa...

Page 29: ...ecially when you displayed a still image on the screen for a long time Scrolling This function removes after images on the screen by moving all the pixels on the PDP according to a pattern Use this function when there are remaining after images or symbols on the screen especially when you displayed a still image on the screen for a long time Side Gray When you watch TV with the screen ratio of 4 3...

Page 30: ...re Options instructions numbers 1 and 2 Refer to page 25 2 Press the or button to select Screen Burn Protection then press the ENTER button 3 Press the ENTER button to select Pixel Shift then press the ENTER button Pressing the or button will alternate between On and Off You will also see the items Horizontal Dot Vertical Line and Time Pixel Shift Using this function you can minutely move pixels o...

Page 31: ...ie Speech or Custom sound setting then press the ENTER button Press the EXIT button to exit Standard Selects the normal sound mode Music Emphasizes music over voices Movie Provides the best sound for movies Speech Emphasizes voice over other sounds Custom Recalls your customized sound setting Customizing the Sound see page 32 Easy Setting 1 Press the TOOLS button on the remote control 2 Press the ...

Page 32: ... any two speaker playback system including internal television speakers It is fully compatible with all multi channel formats 1 Press the MENU button to display the menu Press the or button to select Sound then press the ENTER button 2 Press the or button to select SRS TS XT then press the ENTER button 3 Press the or button to select Off or On then press the ENTER button Press the EXIT button to e...

Page 33: ...r SAP Choosing a Multi Channel Sound MTS Track Analog Depending on the particular program being broadcast you can listen to Mono Stereo or SAP 1 Press the MENU button to display the menu Press the or button to select Sound then press the ENTER button 2 Press the or button to select Auto Volume then press the ENTER button 3 Press the or button to select Off or On then press the ENTER button Press t...

Page 34: ...omponent PC HDMI TV AV S Video Component PC HDMI TV Speaker On Speaker Output Speaker Output Speaker Output Sound Output Sound Output Sound Output TV Speaker Off Mute Mute Mute Sound Output Sound Output Sound Output Video No Signal Mute Mute Mute Mute Mute Mute Listening to the Sound of the Sub PIP Picture When the PIP feature is activated you can listen to the sound of the sub PIP picture 1 Press...

Page 35: ...e desired channel If you press the ENTER button again the symbol next to the channel disappears and the channel is not added 5 Repeat steps 5 for each channel to be selected or canceled Press the EXIT button to exit is active when Child Lock is selected to On Press the CH LIST button on the remote control to display a list of channels Channel List Child Lock Off Channel Manager T V Enter Move Retu...

Page 36: ...button to select Channel List then press the ENTER button 6 Press the buttons to move to the field Press the ENTER button to lock the desired channel If you press the ENTER button again the symbol next to the channel disappears and the channel lock is canceled 7 Repeat steps 7 for each channel to be locked or unlocked Press the EXIT button to exit Select On or Off in Child Lock to easily turn the ...

Page 37: ...n 2 Press the or button to select Color System then press the ENTER button 3 Press the or button to select the desired color standard Auto PAL M PAL N or NTSC then press the ENTER button Press the EXIT button to exit Setting the Color System Normally the TV can receive image and sound with good quality in Auto mode This mode detects the color signal sources automatically If the color implementatio...

Page 38: ...ode the screen is adjusted automatically If the signal from the system doesn t equal the standard signal mode adjust the mode by referring to your videocard user guide otherwise there may be no video For the display modes listed below the screen image has been optimized during manufacture D Sub Input Mode Resolution Horizontal Frequency kHz Vertical Frequency Hz Pixel Clock Frequency MHz Sync Pola...

Page 39: ...e then do the frequency adjustments to the utmost and fine tune again After the noise has been reduced re adjust the picture so that it is aligned on the center of the screen Preset Press the SOURCE button to select PC mode 1 Press the MENU button to display the menu Press the or button to select Picture then press the ENTER button Press the or button to select Screen then press the ENTER button 2...

Page 40: ...utton Press the EXIT button to exit Initializing the Screen Position You can replace all image settings with the factory default values Preset Press the SOURCE button to select PC mode 1 Press the MENU button to display the menu Press the or button to select Picture then press the ENTER button Press the or button to select Screen then press the ENTER button 2 Press the or button to select Image Re...

Page 41: ...move to Month Day Year Hour Minute or am pm Set the date and time you want by pressing the or button then press the ENTER button Press the EXIT button to exit The current time will appear every time you press the INFO button You can set the Month Day Year Hour and Minute directly by pressing the number buttons on the remote control Clock Set am Sleep Timer Off Timer 1 Inactivated Timer 2 Inactivat...

Page 42: ...s the EXIT button to exit Easy Setting 1 Press the TOOLS button on the remote control 2 Press the or button to select Sleep Timer 3 Press the or button to select the required option 4 Press the EXIT or TOOLS button to exit Clock Set 12 00 am Sleep Timer Off Timer 1 Inactivated Timer 2 Inactivated Timer 3 Inactivated Time T V Enter Move Return Plug Play Language English Time Caption External Settin...

Page 43: ...ated To activate timer with the setting satisfied set to Activated Volume Select the required volume level Channel Select the required channel Repeat Select Once Everyday Mon Fri Mon Sat or Sat Sun You can set the Month Day Year Hour and Minute directly by pressing the number buttons on the remote control Auto Power Off When you set the timer On the TV will eventually turn off if no controls are o...

Page 44: ...d on the tape s packaging 1 Press the MENU button to display the menu Press the or button to select Setup then press the ENTER button Press the or button to select Caption then press the ENTER button 2 Press the ENTER button to select Caption Press the or button to select On then press the ENTER button 3 Press the or button to select Mode then press the ENTER button Press the or button to select C...

Page 45: ... HDMI modes Different channels and fields display different information Field 2 carries additional information that supplements the information in Field 1 For example Channel 1 may have subtitles in English while Channel 2 has subtitles in Spanish The availability of captions depends on the program being broadcast You can also press the CC button on the remote control to select Captions On or Off ...

Page 46: ...f Switches the Entertainment function off Sports Provides the optimal picture and sound quality for sports Cinema Provides the optimal picture and sound quality for movie watching You can experience a richer picture and enhanced sound Game Provides the optimal picture and sound quality for games This mode accelerates the playing speed when using an external game console connected to the TV Press t...

Page 47: ...ctory select the AV Color System Mode to PAL M PAL N or NTSC 1 Press the MENU button to display the menu Press the or button to select Setup then press the ENTER button 2 Press the or button to select AV Color System then press the ENTER button Select the required option Auto PAL M PAL N NTSC by pressing or button Press the ENTER button Press the EXIT button to exit This function is available only...

Page 48: ... the or button to select Source then press the ENTER button Select the source of the sub picture PIP by pressing the or button and press the ENTER button The sub picture can serve different source selections based on what the main picture is set to Changing the Size of the PIP Window 4 Press the or button to select Size then press the ENTER button Press the or button to select the required option ...

Page 49: ...active when the sub picture is set to TV Easy Setting 1 Press the TOOLS button on the remote control 2 Press the or button to select PIP then press the ENTER button 3 Press the or button to select a particular item 4 Press the or button to select the required option 5 Press the EXIT or TOOLS button to exit PIP On Source TV Size Position Channel Air 4 Setup T V Enter Move Return PIP On Source TV Si...

Page 50: ...e Class Bulk Only Transport device Examples of MSC are Thumb drives and Flash Card Readers Both USB HDD and HUB are not supported Before connecting your device to the TV please back up your files to prevent them from damage or loss of data SAMSUNG is not responsible for any data file damage or data loss Recommended image resolution for Wiselink is 6 mega pixels Please connect directly to the USB p...

Page 51: ...K Menu 1 Press the MENU button Press the or button to select Input then press the ENTER button 2 Press the or button to select WISELINK then press the ENTER button 3 Press the or button to select the corresponding USB Memory Device then press the ENTER button The WISELINK menu differs depending on the USB Memory Device connected to TV Some devices may not be supported due to compatibility problems...

Page 52: ...I Standard Transcoding Interface File Extention Container Resolution Max frame sec avi AVI XviD MPEG1 MPEG2 MPEG 4 SP MPEG 4 ASP 720x480 30 mp4 MP4 MPEG 4 SP MPEG 4 ASP mpg mpeg vro vob PS MPEG1 Program Stream MPEG2 Program Stream MPEG2 VOB MPEG2 VRO same as MPEG Supported Audio Formats File Format Audio Codec PCM MP3 MPEG 1 2 AC3 LPCM ADPCM MP3 MPEG1 Layer1 2 AC3 Using the Option Menu in the movi...

Page 53: ...out or rotate the photo on the screen While a full screen is displayed or button will let you see another photo image in the same folder Press the PLAY PAUSE button when a Photo icon is selected to start a Slide Show Photos without EXIT information may not be displayed as thumbnail images in the PHOTO LIST depending on the picture quality and resolution Viewing a Slide Show 4 Press the INFO button...

Page 54: ...e Background Music Settings have been set up the background music will not be played List The file information is displayed as a folder or JPEG file To exit WISELINK mode press the W LINK button on the remote control When selecting a photo file the photo file information is displayed on the left side of the TV screen such as the resolution the date modified and the order of the file in the current...

Page 55: ...e x2 Zoom in to a photo x2 x4 Zoom in to a photo x4 To pan up down left right in the zoomed in photo press the INFO button to remove option menu then press the and buttons The Rotate Start Slide Show option is disabled when the Zoom option is selected Rotate Press the or button to select Rotate then press the ENTER button Each time the or button is pressed the photo rotates repeatedly 0º This rota...

Page 56: ...e top with its playing time To adjust the music volume press the VOL or VOL button on the remote control To mute the sound press the MUTE button on the remote control Press FF or REW buttons to change pages Repeat Music Select to repeatedly play MP3 files in the current folder You can select On or Off Music function information icon Icon Function When all music files in the folder or the selected ...

Page 57: ...d Music Select to determine whether to play an MP3 file during a slide show You can select Music Off or Music On Background Music Setting While a slide show is in progress use the Background Music Setting to select a music file to listen to Select a MP3 file as the background music Continued Slide Show Speed Normal Background Music On Background Music Setting Repeat Music On Repeat Movie Off Scree...

Page 58: ...saver appears The screensaver will appear when no button is pressed for 1 5 or 10 minutes Move Enter Return Slide Show Speed Fast Background Music On Background Music Setting Repeat Music On Repeat Movie Off Screen Saver 5 min Off On Move Enter Return Slide Show Speed Fast Background Music On Background Music Setting Repeat Music On Repeat Movie Off Screen Saver 5 min 1min 5min 10min Move Enter Re...

Page 59: ...OUT jack of the corresponding Anynet device using the HDMI cable Connect only one Home Theater You can connect an Anynet device using the HDMI 1 3 Cable Some HDMI cables may not support Anynet functions Anynet works when the AV device supporting Anynet is in the Standby or On status Anynet supports up to 12 AV devices in total Note that you can connect up to 3 devices of the same type TV TV Anynet...

Page 60: ...to turn off function is enabled If you select No the Auto turn off function is canceled Press the EXIT button to exit The Select Device setting of the TV remote control is to be set to TV to use the Anynet function If you set Auto Turn Off to Yes connected external devices are also turned off when the TV is turned off However if the device is recording it may not be turned off Switching to the sel...

Page 61: ...ons ENTER buttons Color buttons EXIT button After switching to the device while playing a file Backward search Forward search Stop Play Pause Device with built in Tuner After switching to the device when you are watching a TV program CH button Audio Device When Receiver is activated VOL button MUTE button The Anynet function only works when the remote control is set to TV The REC button works only...

Page 62: ... or removing the HDMI cable please make sure to search devices again or turn your TV off and on again Check if the Anynet Function of Anynet device is set on I want to start Anynet Check if the Anynet device is properly connected to the TV and check if the Anynet HDMI CEC is set to On in the Anynet Setup menu Press the TV button on the TV remote control to switch to TV Then press the TOOLS button ...

Page 63: ... has been converted to digital The visual quality is of an SD Standard Definition grade Screen is black and power indicator light blinks steadily On your computer check the Power and Signal Cable The TV is using its power management system Move the computer s mouse or press any key on the keyboard On your equipment check STB DVD etc Power and Signal Cable The TV is using its power management syste...

Page 64: ... OSD is displayed on the TV screen the Adjustment screen appears Press the INFO button to reset Press the or button to select Yes then press the ENTER button The position is initialized to the default setting 3 Press the Blue button Press the and buttons to select a save mode from either Position 1 Position 2 or Position 3 in order to save the current position To not save the current position pres...

Page 65: ...e to consult a specialized installation company This installation manual is to be used when attaching the wall mount to a wall When attaching to other building materials please contact your nearest dealer The auto wall mount will not work when Anynet is operating 42 inches model is not compatible with the older wall mount model WMN5090A Preparing before installing Wall Mount on the wall 1 Install ...

Page 66: ...ge to the inside of the TV set For wall mounts that do not comply with the VESA standard screw specifications the length of the screws may differ depending on their specifications Do not use screws that do not comply with the VESA standard screw specifications Do not use fasten the screws too strongly this may damage the product or cause the product to fall leading to personal injury Samsung is no...

Page 67: ...sing two screws Model Name PL50A610T1R Screen Size Diagonal 50 inch PC Resolution 1920 x 1080 60Hz Sound Output 10W 10W Dimension W x H x D Body With stand 48 8 x 30 2 x 3 8 inches 1240 x 765 5 x 96 0 mm 48 8 x 32 9 x 12 6 inches 1240 x 835 5 x 320 0 mm Weight Body With stand 86 5 lbs 39 2 Kg 95 9 lbs 43 5 Kg Environmental Considerations Operating Temperature Operating Humidity Storage Temperature...

Page 68: ...This page is intentionally left blank ...

Page 69: ... valores displays de video game logotipos de estação sites ou gráficos e padrões de computadores devem ser limitados em todos os aparelhos de TV conforme descrito acima A exibição de imagens paradas que ultrapasse as orientações acima pode causar um desgaste irregular dos monitores de plasma que resulta em imagens fantasmas permanentes na tela Para evitar que isso ocorra varie a programação e as i...

Page 70: ...els que requerem uma tecnologia sofisticada para produção Entretanto pode haver poucos pixels luminosos ou escuros na tela Esses pixels não causarão nenhum impacto no desempenho do produto Evite operar a TV em temperaturas abaixo de 5 C 41 F Uma imagem estática exibida por muito tempo pode causar dano permanente no Painel PDP Assistir à TV de plasma no formato 4 3 por um período prolongado pode de...

Page 71: ...utomático de volume 33 Configurando o alto falante da TV para Ligar desligar34 Como ouvir o som da sub imagem PIP 34 Conexão de fones de ouvido vendidos separadamente 34 CONTROLE DE CANAL Configurando o Gerenciador de Canais 35 Ativando o bloqueio para crianças 36 Sintonização fina dos canais analógicos 37 Usando o recurso de sistema de cor 37 EXIBIÇÃO DO PC Utilizando o televisor como monitor PC ...

Page 72: ...tante Controle remoto pilhas AAA Cabo de alimentação Manual do Usuário Tampa da parte inferior Consulte a página 60 Certificado de Garantia Guia de Segurança Não está disponível em todos os locais Pano de Limpeza Núcleo de ferrita para S Video As peças a seguir são vendidas separadamente e estão disponíveis na maioria das lojas de eletrônica Se cabos de boa qualidade não forem utilizados podem apa...

Page 73: ...DMI4 No menu de tela use este botão da mesma forma que o botão ENTER no controle remoto 2 MENU Pressione este botão este botão para ver um menu das funções do televisor 3 VOL Pressione este botão para aumentar ou diminuir o volume No menu de tela use os botões VOL para substituir os botões e no controle remoto 4 CH Pressione para mudar de canal No menu de tela use os botões CH para substituir os o...

Page 74: ...Será necessário um cabo HDMI DVI opcional para fazer essa conexão Ao usar o adaptador HDMI DVI opcional as entradas de áudio analógicas DVI da TV permitem receber áudio esquerdo e direito do dispositivo DVI 6 ANT IN Conecta uma antena ou um sistema de TV a cabo 7 SERVICE Conector apenas para MANUTENÇÃO 8 AUDIO OUT R L Conecte as saídas de áudio da TV nas entradas no Amplificador Home theater 9 COM...

Page 75: ...OTÕES COLORIDOS Use estes botões na lista de canais CC Controla o decodificador de legenda E MODE Pressione para selecionar a melhor exibição e modos de som em esportes cinema e jogos Use estes botões nos modos DMA e Anynet Este controle remoto pode ser usado para controlar a gravação nos gravadores Samsung que tenham o recurso Anynet SOURCE Pressione para exibir e selecionar todas as fontes de ví...

Page 76: ...es de conectar as antenas ao televisor Este procedimento exige um adaptador combinador opcional disponível na maioria das lojas de eletrônica 1 Ligar ambos os cabos da antena ao adaptador 2 Conecte o adaptador ao terminal ANT IN na parte inferior do painel traseiro Colocando pilhas no controle remoto 1 Levante a tampa localizada na parte traseira do controle remoto conforme mostrado na figura 2 Co...

Page 77: ...ronica 1 Localizar e desligar o cabo conectado ao terminal ANT IN no decodificador Esse terminal pode ser identificado como ANT IN VHF IN ou simplesmente IN 2 Ligar este cabo a um separador de duas vias 3 Conecte um cabo RF entre o terminal OUTPUT saída no divisor e o terminal IN entrada no decodificador 4 Ligar um cabo RF entre o terminal ANT OUT no decodificador e o terminal B IN no alternador R...

Page 78: ...AUDIO L na parte traseira da TV Se isto acontecer entre em contato com a empresa fornecedora do DVD player Cabo receptor de satélite para confirmar a versão HDMI em seguida solicite uma atualização Cabos HDMI diferentes da versão 1 3 podem causar distúrbios de cintilação na imagem ou podem impedir a exibição da imagem Conectando o DVD Player ou receptor decodificador de satélite set Top via DVI Es...

Page 79: ... tomadas COMPONENT Y PB PR no DVD Player ou decodificador de TV a cabo receptor de Satélite Set Top Box Conecte os cabos de áudio entre os conectores COMPONENT IN 1 ou 2 R AUDIO L na TV e os conectores AUDIO OUT no DVD player Decodificador Set Top O Vídeo componente separa o vídeo em Y luminância brilho PB Azul e PR Vermelho para obter uma qualidade de vídeo superior Verifique se as conexões de Co...

Page 80: ...onecte os cabos de áudio entre os conectores AUDIO OUT no VCR e o conector AV IN 1 ou AV IN 2 L AUDIO R na TV Conexão s Video O televisor samsung pode ser conectada a uma tomada s Video em um vídeo cassete Essa conexão proporciona uma imagem melhor do que a padrão do vídeo cassete 1 Para iniciar siga as etapas 1 3 na seção anterior para conectar a antena ou o cabo ao vídeo cassete e à TV Conecte u...

Page 81: ... DVI é necessário utilizar a tomada HDMI IN 2 PC Painel traseiro da TV Cabode áudio de PC não fornecido Cabo D sub não fornecido 1 Usando o cabo D sub Usando o cabo hDmI DVI Painel traseiro da TV PC Cabo hDmI DVI não fornecido 1 Conectando um amplificador DVD home Theater 1 Conecte os cabos de áudio entre os conectores AUDIO OUT R AUDIO L na TV e os conectores AUDIO IN L AUDIO R no Amplificador DV...

Page 82: ...pois pressione o botão ENTER Recomendamos que a TV seja configurada no modo Uso Doméstico para obter a melhor imagem em sua casa Demo Loja é apenas recomendado para uso em ambiente de vendas Se a unidade estiver configurada acidentalmente no modo Demo Loja e você quiser retornar ao Uso Doméstico padrão Pressione o botão do Volume Quando o OSD do volume for exibido pressione e mantenha o botão MENU...

Page 83: ... exibido Pressione o botão ou para mover ente Mês Dia Ano Hora Minuto ou am pm Defina a data e a hora desejadas pressionando o botão ou e depois pressione o botão ENTER Você pode definir o Mês Dia Ano Hora e Minuto diretamente pressionando os botões numéricos no controle remoto 8 Quando concluir pressione o botão ENTER Mesmo se o botão ENTER não for pressionado a mensagem desaparecerá automaticame...

Page 84: ...o canal 122 pressione o botão seguido de 2 e 2 Utilizando o botão PRE CH para selecionar o canal anterior 1 Pressione o botão PRE CH A TV alternará para o último canal visualizado Para alternar rapidamente entre dois canais que estão distanciados sintonize um canal e depois use o botão de número para selecionar o segundo canal Depois use o botão PRE CH para alternar rapidamente entre eles Se você ...

Page 85: ...gina 39 Informações A tela identifica o canal atual e o estado de certas programações de áudio vídeo 1 Pressione o botão INFO no controle remoto O televisor mostra o canal o tipo de som e o estado de certas programações de imagem e som Pressione o botão INFO novamente ou aguarde aproximadamente 10 segundos e a imagem desaparecerá automaticamente Ar 3 Mono Imagem Padrão Som Personalizado MTS Estére...

Page 86: ... HRC ou IRC todos os sistemas de televisão a cabo Pressione o botão ENTER STD HRC e IRC identificam vários tipos de sistema de TV a cabo Entre em contato com a empresa local de TV a cabo para identificar o tipo de sistema a cabo existente em sua área específica Neste ponto a fonte do sinal foi selecionada Pressione o botão ENTER para sair 1 Com o televisor ligado pressione o botão MENU O menu prin...

Page 87: ... começa a memorizar todos os canais disponíveis Após os canais disponíveis estarem armazenados o menu Auto Program aparecerá novamente Pressione o botão ENTER para sair Todos os canais analógicos disponíveis são armazenados automaticamente na memória São necessários de 3 a 10 minutos para memorizar os canais Ar Cabo Ar Prog Auto Gestor canais Sintonia fina Sistema de cor Auto Channel T V Entrar Mo...

Page 88: ...sione o botão ENTER Pressione o botão ou para selecionar Editar nome depois pressione o botão ENTER 2 Pressione o botão ou para selecionar a entrada AV1 AV2 S Video Componente1 Componente2 PC HDMI1 HDMI2 HDMI3 ou HDMI4 e pressione o botão ENTER 3 Pressione o botão ou o para selecionar o sinal entrada VCR DVD Sinal Cabo Sinal Satélite PVR STB AV Receiver Jogo Filmadora PC TV IPTV Blu Ray HD DVD ou ...

Page 89: ...IT para sair Ao efetuar ajustes em Luz da Célula Contraste Brilho Nitidez Cor ou Matiz o OSD será ajustado de maneira correspondente No modo PC você pode efetuar ajustes em Luz da Célula Contraste e Brilho As definições podem ser ajustadas para cada entrada da TV Nos modos TV AV S Video do sistema PAL não pode usar a função Matiz Luz da Célula Ajusta o brilho da Luz da Célula da tela Contraste Aju...

Page 90: ...das Configurações detalhadas Ativação do ajuste de preto Você pode selecionar o nível de preto para ajustar a profundidade da tela 4 Pressione o botão ou para selecionar Ajuste de preto e em seguida pressione o botão ENTER 5 Pressione o botão ou para selecionar Desligado Baixo Médio ou Alto Pressione o botão ENTER Desligado Desliga a função de ajuste de preto Baixa Define a profundidade da cor pre...

Page 91: ...nível quando o Espaço de cores está definido como Personalizado 14 Pressione o botão ou para selecionar Vermelho Verde Azul Amarelo Ciano ou Magenta Pressione o botão ENTER 15 Pressione o botão ou para selecionar Vermelho Verde ou Azul para alterar Pressione o botão ENTER 16 Pressione o botão ou para reduzir ou aumentar o valor de um item específico Pressione ENTER Em Cor você pode ajustar os valo...

Page 92: ...im Margem e em seguida pressione o botão ENTER 23 Pressione o botão ou para selecionar Ligado ou Desligado pressione o botão ENTER Ativando xvYCC Configurar o modo xvYCC para Ligado melhora os detalhes e as cores ao assistir filmes a partir de um dispositivo externo ou seja DVD player conectado aos conectores HDMI ou Componentes IN entrada 24 Pressioneobotão ou para selecionar xvYCC e depois press...

Page 93: ... o modo ZOOM Select pressionando o botão ou Use o botão ou para mover a imagem para cima ou para baixo Após selecionar use o botão ou para ampliar ou reduzir o tamanho da imagem na direção vertical Após selecionar Apenas varrer em modo HDMI 1080i ou Componente 1080i Pressione o botão ou para selecionar depois pressione ENTER Pressione ou para mover a imagem para cima para baixo para a esquerda e p...

Page 94: ...one o botão ou para selecionar Digital NR depois pressione o botão ENTER 3 Pressione o botão ou para selecionar Desligado Baixa Médio Alto ou Auto Pressione o botão ENTER Desligado Desliga a função de redução de ruído da tela Baixa Reduz o ruído da tela em nível baixa Médio Reduz o ruído da tela em nível médio Alto Reduz o ruído da tela em nível alto Auto Reconhece e reduz automaticamente o ruído ...

Page 95: ...ressione o botão EXIT para sair Opções de Imagem T V Tonalidade de cor Frio1 Tamanho 16 9 Digital NR Auto DNle Ligado Nível de preto HDMI Normal Movie Plus Modo Somente Azul Desligado Proteção de tela Entrar Mover Retornar Normal Baixa Opções de Imagem T V Tonalidade de cor Frio1 Tamanho 16 9 Digital NR Auto DNle Ligado Nível de preto HDMI Normal Movie Plus Modo Somente Azul Desligado Proteção de ...

Page 96: ... quando uma imagem estática tiver permanecido na tela por um longo período Rolagem Esta função remove pós imagens na tela movendo todos os pixels no monitor PDP segundo um padrão Utilize essa função quando houver retenção de imagens ou símbolos remanescentes na tela especialmente quando uma imagem estática tiver permanecido na tela por um longo período Cinza lateral Ao assistir à TV com a relação ...

Page 97: ...os 1 e 2 consulte a página 25 2 Pressione o botão ou para selecionar Proteção contra queima de tela e em seguida o botão ENTER 3 Pressione o botão ENTER para selecionar Desloc de Pixel e pressione o botão ENTER Pressione o botão ou para alternar entre Ligado e Desligado Você também verá os itens Ponto horizontal Linha vertical e Hora Desloc de Pixel Ao utilizar esta função você pode mover pixels n...

Page 98: ...go ou Personalizado depois pressione o botão ENTER Pressione o botão EXIT para sair Padrão Seleciona o modo de som normal Música Destaca a música sobre as vozes Filme Proporciona o melhor som para filmes Diálogo Destaca as vozes em relação a outros sons Personalizado Retorna às configurações de som personalizadas Consulte Personalizando o som consulte a página 32 Configuração fácil 1 Pressione o b...

Page 99: ...omático ligado Alto falante da TV ligado Seleção do Som Principal Som Entrar Mover Retornar Desligado Ligado Mover Anynet HDMI CEC Modo de Imagem Dinâmico Modo Som Personalizado Sleep Timer Desligado SRS TS XT Desligado Economia energia Desligado MTS Estéreo Ferramentas Ajustar Sair Personalizando o som Você pode ajustar as definições de som de acordo com a sua preferência 1 Pressione o botão MENU...

Page 100: ...o ou Ligado e em seguida o botão ENTER Pressione o botão EXIT para sair Controle automático de volume Reduz as diferenças de nível de volume entre emissoras Configuração fácil 1 Pressione o botão TOOLS no controle remoto 2 Pressione o botão ou para selecionar o MTS 3 Pressione o botão ou para selecionar Estéreo Mono ou SAP 4 Pressione o botão EXIT ou TOOLS para sair Pressione o botão MTS no contro...

Page 101: ... o botão ou para selecionar Principal ou Sub Tela em seguida pressione ENTER Pressione o botão EXIT para sair Principal Usado para ouvir o som da imagem principal Sub Tela Usado para ouvir o som da sub imagem Você pode selecionar esta opção quando PIP está Ligado Modo Personalizado Equalizador SRS TS XT Desligado MTS Estéreo Volume Automático Desligado Alto falante da TV ligado Seleção do Som Prin...

Page 102: ...o ENTER para adicionar o canal desejado Se você pressionar o botão ENTER novamente o símbolo próximo ao canal desaparece e o canal não é adicionado 5 Repita as etapas de 3 a 5 para cada canal a ser adicionado ou apagado Pressione o botão EXIT para sair fica ativado quando Bloqueio de canais está selecionado como Ligado Pressione o botão CH LIST no controle remoto para acessar as listas de canais A...

Page 103: ...ou para selecionar Lista de canais depois pressione ENTER 6 Pressione os botões para mover para a coluna Pressione o botão ENTER para bloquear o canal desejado Se você pressionar o botão ENTER novamente o símbolo próximo ao canal desaparece e o bloqueio de canal é cancelado 7 Repita a etapa 7 para cada canal a ser bloqueado ou desbloqueado Pressione o botão EXIT para sair Selecione Ligado ou Desli...

Page 104: ...te o sistema de cores do sinal Em caso de recepção de sinal com cores insatisfatórias selecione o Modo de sistema de cor como PAL M PAL N ou NTSC 1 Pressione o botão MENU para exibir o menu Pressione o botão ou o para selecionar Canal em seguida pressione o botão ENTER 2 Pressione o botão ou para selecionar Sistema de cor e em seguida o botão ENTER 3 Pressione o botão ou para selecionar o padrão d...

Page 105: ...álogo de ajustes da tela o valor correto é 60 ou 60 Hz Do contrário clique em OK e saia da caixa de diálogo Modos de visualização Se o sinal do sistema for igual ao modo de sinal padrão a tela se ajusta automaticamente Se o sinal do sistema não for igual ao modo de sinal padrão ajuste o modo consultando o guia do usuário da placa de vídeo do contrário poderá não haver vídeo Para os modos de visual...

Page 106: ...r reduzido a interferência ajuste novamente a imagem de modo que ela fique centralizada na tela Predefinição Pressione o botão SOURCE para selecionar o modo PC 1 Pressione o botão MENU para exibir o menu Pressione o botão ou para selecionar Imagem e em seguida pressione o botão ENTER Pressione o botão ou para selecionar Tela e em seguida depois pressione o botão ENTER 2 Pressione o botão ou para s...

Page 107: ...XIT para sair Inicializar as configurações na tela ou cores É possível retornar todos os ajustes de imagem aos valores definidos de fábrica Predefinição Pressione o botão SOURCE para selecionar o modo PC 1 Pressione o botão MENU para exibir o menu Pressione o botão ou para selecionar Imagem depois pressione o botão ENTER Pressione o botão ou para selecionar Tela em seguida pressione o botão ENTER ...

Page 108: ...ver entre Mês Dia Ano Hora Minuto ou am pm Auste a data e a hora desejadas pressionando o botão ou depois pressione o botão ENTER Pressione o botão EXIT para sair A hora aparecerá sempre que você pressionar o botão INFO Defina diretamente Mês Dia Ano Hora e Minuto pressionando os botões com números no controle remoto Config Relógio am Sleep Timer Desligado Temporizador 1 desativado Temporizador 2 ...

Page 109: ...efinição 1 Pressione o botão TOOLS no controle remoto 2 Pressione o botão ou para selecionar Sleep Timer 3 Pressione o botão ou para selecionar o minuto 4 Pressione o botão EXIT ou TOOLS para sair Config Relógio 12 00 am Sleep Timer Off Temporizador 1 Off Temporizador 2 Off Temporizador 3 Off Hora T V Entrar Mover Retornar Desligado 30 60 90 120 150 180 Config Relógio 12 00 am Sleep Timer Desligad...

Page 110: ...o Hora e Minuto pressionando as teclas numéricas do controle remoto Desligamento automático Ao ajustar o temporizador para Ligado sua TV será desligada se você não operar o controle remoto durante as próximas 3 horas após o temporizador tê la ligado Essa função só está disponível com o modo temporizador Ligado e evita o superaquecimento que pode ocorrer se a TV permanecer ligada por muito tempo Aj...

Page 111: ... para deficientes auditivos ou traduções em idiomas estrangeiros Todos os VCRs gravam o sinal closed caption de programas de TV assim as fitas de vídeo gravadas também fornecem closed captions A maioria das fitas de vídeo comerciais também fornece closed captions Verifique o símbolo closed caption na lista de sua TV e na embalagem da fita 1 Pressione o botão MENU para exibir o menu Pressione o bot...

Page 112: ...e PC HDMI Os diferentes canais e campos exibem informações distintas O Campo 2 oferece informações que suplementam as do Campo 1 Por exemplo O canal 1 pode ter legendas em inglês ao passo que o canal 2 tem legendas em espanhol A disponibilidade das legendas depende do programa que está sendo transmitido Pressione o botão CC no controle remoto para selecionar Ligado ou Desligado Closed Caption Liga...

Page 113: ...2 Pressione o botão ou para selecionar Entretenimento depois pressione o botão ENTER 3 Pressione o botão ou para selecionar Desligado Esportes Cinema ou Jogo depois pressione o botão ENTER Desligado Desliga a função Entretenimento Esportes Fornece excelente imagem e qualidade de som para os programas de esportes Cinema Fornece excelente imagem e qualidade de som para filmes Uma experiência com ima...

Page 114: ...onomia energia Desligada Sistema de cor AV Auto PIP Configuração T V Mover Retornar Entrar Ferramentas Anynet HDMI CEC Menu de Fotos Padrão Mode Som Personalizado Sleep Timer Desligado SRS TS XT Desligado Economia energia Desligado MTS Estéreo Mover Ajustar Sair Desligado Baixa Médio Alto Configurando o Sistema de cor AV É possível configurar os padrões de codificação de cores para entradas extern...

Page 115: ... PIP para ver simultaneamente duas fontes de vídeo Consulte a página 34 para selecionar o som de imagem PIP Este produto tem um sintonizador interno que não permite que o PIP funcione no mesmo modo Consulte Ajustes PIP abaixo para obter mais detalhes Alterando o tamanho da janela PIP 4 Pressione o botão ou para selecionar Tamanho depois pressione o botão ENTER Pressione o botão ou para selecionar ...

Page 116: ...upla e Largura dupla Posição não está disponível Alterando o canal PIP 6 Pressione o botão ou para selecionar Canal depois pressione o botão ENTER Pressione o botão ou para selecionar o canal desejado para a janela PIP Pressione o botão ENTER O canal poderá estar ativo quando a subimagem estiver definida como TV PIP Ligado Origem TV Tamanho Posição Canal Air 43 PIP T V Mover Retornar Entrar PIP Li...

Page 117: ...ge Class Bulk Only Transport Exemplos de MSC são microunidades Thumb drives e Leitores Flash Card USB HDD e HUB não são compatíveis Antes de conectar o dispositivo á TV faça back up de seus arquivos para evitar danos ou perda de dados A SAMSUNG não é responsável por qualquer dano a arquivos de dados ou perda de dados A resolução de imagem recomendada para o Wiselink é de 6 mega pixels Por favor ef...

Page 118: ...K no controle remoto para exibir um menu WISELINK Mover Entrar Retornar SUM 861MB 994MBFree Filme Foto Música Configuração Filme Mover Entrar Sair Lista de Entradas TV Editar Nome Anynet HDMI CEC WISELINK Entrada T V Entrar Mover Retornar Utilizando o botão do controle remoto no menu WISELINK Botão Operações Move o cursor e seleciona um item Seleciona o item atualmente selecionado Durante uma Apre...

Page 119: ...rquivos de filmes Se você selecionou arquivos MP3 com o botão amarelo aparecerá o item de menu Reproduzir o arquivo selecionado Apenas os arquivos seleccionados serão reproduzidos Este menu só apresenta arquivos com extensão de arquivo de Filme Os arquivos com outra extensão não são exibidos mesmo que sejam salvos no mesmo dispositivo USB Utilizando o botão de reprodução de filme Reproduzir um fil...

Page 120: ...agem de foto na mesma pasta Pressione o botão PLAY PAUSE quando um ícone de Foto está selecionado para iniciar uma Apresentação de slides Fotos sem informações EXIF podem não ser exibidas como imagens em miniatura na Lista de Fotos PHOTO LIST dependendo da qualidade e resolução da imagem Assistindo uma apresentação de slides 4 Pressione o botão INFO para exibir a opção Iniciar apresentação de slid...

Page 121: ...o botão ENTER Música de fundo Selecione para escolher se deseja reproduzir arquivos MP3 durante uma apresentação de slides Pressione o botão ou para selecionar a opção desejada On Ligado Off Desligado em seguida pressione o botão ENTER Ajuste da música de fundo Enquanto a apresentação de slides está em andamento são exibidos os arquivos MP3 e pastas do mesmo diretório Selecione uma pasta usando o ...

Page 122: ...iginal x2 Amplia a foto 2 vezes x4 Amplia a foto 4 vezes Para panoramizar para cima baixa esquerda direita na foto pressione o botão INFO para remover o menu opções depois pressione os botões e The A opção Girar Iniciar apresentação de slides está desativada quando a opção Zoom for selecionada Girar Pressione o botão ou para selecionar Rotate Girar depois pressione o botão ENTER Cada vez que o bot...

Page 123: ... USB O arquivo selecionado é exibido na parte superior da tela com o tempo de reprodução Para ajustar o volume da música pressione o botão VOL ou VOL no controle remoto Para remover o som pressione o botão MUTE no controle remoto Pressione o botão FF ou REW para alterar as páginas Repetir música Selecione para reproduzir continuamente arquivos MP3 na pasta atual Você pode selecionar On Ligado ou O...

Page 124: ...SELINK 1 Etapas completas 1 a 3 em Utilizando o menu WISELINK Consulte a página 51 2 Pressione o botão ou para mover para Setup em seguinda pressione o botão ENTER 3 Pressione o botão ou para selecionar o botão desejado em seguida pressione o botão ENTER Velocidade da apresentação de slides Música de fundo Music Configuração de música de fundo Repetir música Protetor de tela 4 Pressione o botão ou...

Page 125: ...Rápido Música de Fundo Ligado Config música de fundo Repetição da música Ligado Repetição da Filme Desligado Protetor de Tela 5 min Desligado Ligado Configuração Configuração Configuração Repetir música Selecione para determinar a repetição da reprodução da música quando todos os arquivos MP3 na pasta atual forem reproduzidos Repetir filme Selecione para determinar a repetição da reprodução do fil...

Page 126: ... Com o cabo HDMI conecte a entrada HDMI 1 HDMI 2 HDMI 3 ou HDMI 4 da TV à tomada HDMI OUT do dispositivo Anynet 2 Com o cabo HDMI conecte a tomada HDMI IN do home theater à HDMI OUT do dispositivo Anynet correspondente Conecte apenas um Home Theater Você pode conectar um dispositivo Anynet usando o cabo HDMI Existem alguns cabos HDMI que não suportam funções Anynet O Anynet funciona quando o dispo...

Page 127: ...cê selecionar Não a função de desligamento automático é cancelada Pressione o botão EXIT para sair A configuração Selecionar dispositivo do controle remoto do televisor deve estar em TV para usar a função Anynet Se você configurar Desligamento Auto como Sim os dispositivos externos conectados também serão desligados quando a TV for desligada Porém se o dispositivo estiver gravando talvez ele não d...

Page 128: ...rquivo procura para trás Procura para a frente Parar Reproduzir Pausar Dispositivo com sintonizador interno Depois de mudar para o dispositivo quando se está assistindo um programa de TV CH botão Dispositivo de áudio Com o Receiver ativado VOL botão Botão MUTE A função Anynet somente funciona quando o controle remoto está ajustado para TV O REC botão funciona apenas no estado gravável Não é possív...

Page 129: ...r ou remover o cabo HDMI certifique se de procurar os dispositivos novamente ou reiniciar a TV Verifique se a função Anynet do dispositivo Anynet está ligada Quero iniciar o Anynet Verifique se o dispositivo Anynet está conectado à TV e se Anynet HDMI CEC está configurado para Ligado no menu de configuração Anynet Pressione o botão TV no controle remoto da TV para alternar para TV Em seguida press...

Page 130: ...nergia e do sinal A TV está utilizando o sistema de gerenciamento de energia Mova o mouse do computador ou pressione uma tecla do teclado No seu equipamento STB DVD etc verifique a energia e o sinal do cabo A TV está utilizando o sistema de gerenciamento de energia Pressione o botão SOURCE no painel ou no controle remoto Ligue e desligue a TV Apesar de a legenda da TV mostrar HD a qualidade visual...

Page 131: ...quando não há uma exibição de OSD na tela da TV a tela Ajuste é exibida Pressione o botão INFO para redefinir Pressione o botão ou para selecionar Sim depois pressione o botão ENTER A posição é inicializada na configuração padrão 3 Pressione o botão azul Pressione os botões e para selecionar um modo para salvar dentre a Posição 1 Posição 2 ou Posição 3 a fim de salvar a posição atual Para não salv...

Page 132: ...ocê ajustar a posição após mudar para a posição de pré ajuste a exibição da posição desaparecerá Para instalação consulte o Manual de instalação fornecido com o suporte de parede Para instalação do produto e instalação e deslocamento do suporte de parede certifique se de consultar uma empresa de instalação especializada Este manual de instalação deve ser utilizado como orientação ao fixar o suport...

Page 133: ...njunto da TV Para montagens em paredes que não estejam em conformidade com essas especificações VESA de parafuso padrão o comprimento dos parafusos pode ser diferente dependendo das especificações de cada uma delas Não use parafusos que não atendem as especificações de parafuso padrão VESA Não aperte os parafusos com muita força pois isso pode danificar o produto ou ocasionar a queda dele o que po...

Page 134: ...da tela Diagonal 50 polegadas Resolução do PC 1920 x 1080 60Hz Som Saída 10 W 10 W Dimensões L x A x P Corpo Com suporte 48 8 x 30 2 x 3 8 inches 1240 x 765 5 x 96 0 mm 48 8 x 32 9 x 12 6 inches 1240 x 835 5 x 320 0 mm Peso Corpo Com suporte 86 5 lbs 39 2 Kg 95 9 lbs 43 5 Kg Considerações ambientais Temperatura de operação Umidade em operação Temperatura de armazenagem Umidade em armazenamento 50 ...

Page 135: ...Esta página foi deixada em branco ...

Page 136: ...Esta página foi deixada em branco ...

Reviews: