background image

Using Your Printer in Linux

29

5

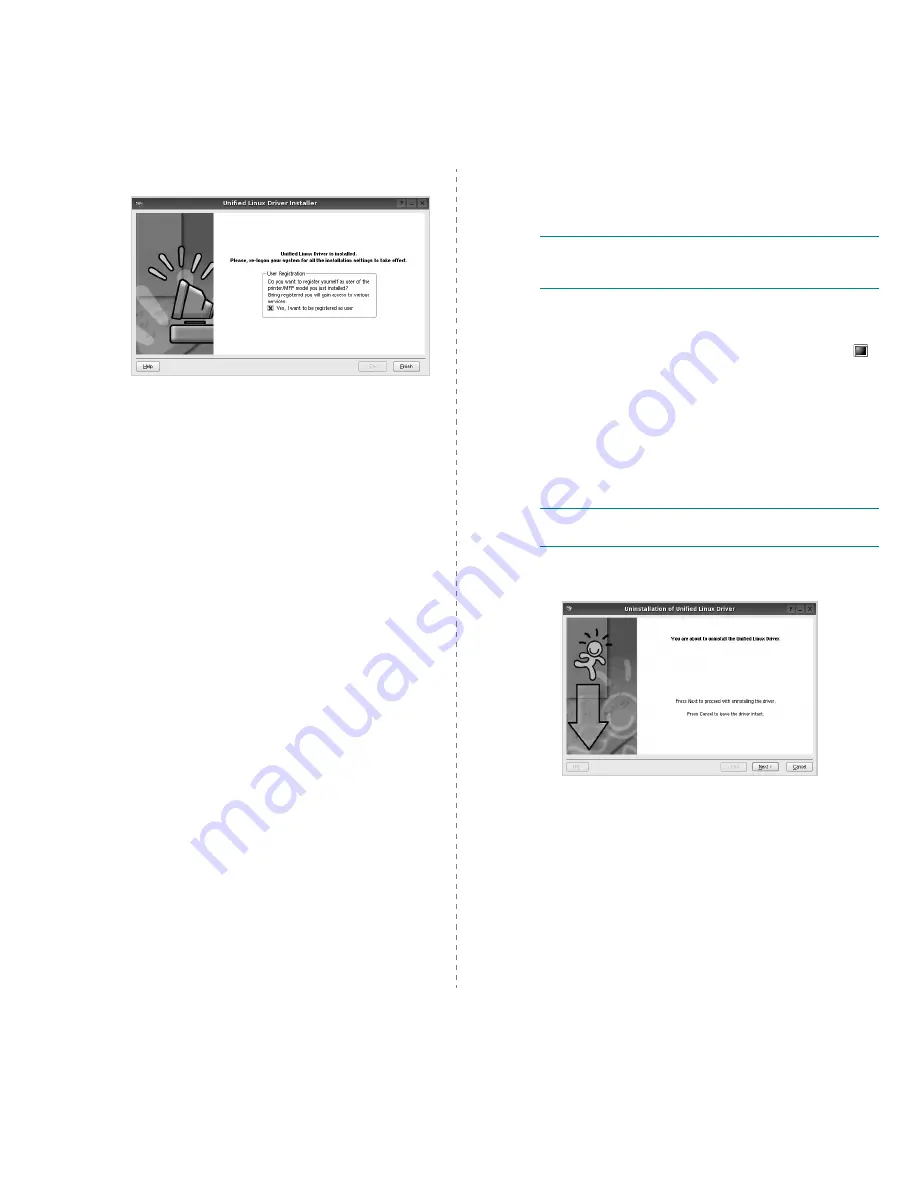
When the installation is complete, click Finish.

The installation program has added the Unified Driver 
Configurator desktop icon and Samsung Unified Driver 

group to the system menu for your convenience. If you 
have any difficulties, consult the onscreen help that is 
available through your system menu or can otherwise be 

called from the driver package windows applications, 
such as Unified Driver Configurator.

Uninstalling the Unified Linux Driver

1

When the Administrator Login window appears, type in 

root

 in the Login field and enter the system password.

N

OTE

: You must log in as a super user (root) to install the 

printer software. If you are not a super user, ask your system 
administrator.

2

Insert the printer software CD-ROM. The CD-ROM will 
automatically run.

If the CD-ROM does not automatically run, click the 


icon at the bottom of the desktop. When the Terminal 
screen appears, type in:
If the CD-ROM is secondary master and the location to 
mount is /mnt/cdrom,
[root@localhost root]#mount -t iso9660 /dev/hdc /mnt/
cdrom
[root@localhost root]#cd /mnt/cdrom/Linux
[root@localhost root]#./uninstall.sh 

N

OTE

: The installation program runs automatically if you 

have an autorun software package installed and configured.

3

Click Uninstall.

4

Click Next

5

Click Finish.

Summary of Contents for Monochrome ML-4050 Series

Page 1: ......

Page 2: ...s is a trademark of Centronics Data Computer Corporation IBM and IBM PC are trademarks of International Business Machines Corporation PCL and PCL 6 are trademarks of Hewlett Packard company Microsoft Windows Windows 98 Windows Me Windows 2000 Windows NT 4 0 Windows XP Windows 2003 and Vista are registered trademarks of Microsoft Corporation PostScript 3 is a trademark of Adobe System Inc UFST and ...

Page 3: ...ung com it JAMAICA 1 800 234 7267 www samsung com latin JAPAN 0120 327 527 www samsung com jp LATVIA 800 7267 www samsung com lv index htm LITHUANIA 8 800 77777 www samsung com lt LUXEMBURG 0035 0 2 261 03 710 www samsung com be MALAYSIA 1800 88 9999 www samsung com my MEXICO 01 800 SAMSUNG 7267864 www samsung com mx NETHERLANDS 0900 20 200 88 0 10 min www samsung com nl NEW ZEALAND 0800SAMSUNG 72...

Page 4: ...ted operating systems 4 2 Configuring TCP IP 4 2 Configuring EtherTalk 4 2 Configuring IPX frame types 4 3 Setting Ethernet speed 4 3 Restoring the network configuration 4 3 Printing a network configuration page 4 3 5 Loading print media Selecting print media 5 1 Loading paper 5 4 Selecting an output location 5 8 6 Basic printing Printing a document 6 1 Canceling a print job 6 1 7 Ordering supplie...

Page 5: ...inting problems 9 9 Solving print quality problems 9 11 Common Windows problems 9 13 Common PostScript problems 9 13 Common Linux problems 9 14 Common Macintosh problems 9 14 10 Installing accessories Precautions when installing accessories 10 1 Installing a memory DIMM 10 1 Installing a wireless network interface card 10 3 Using the hard disk 10 5 11 Specifications Printer specifications 11 1 ...

Page 6: ...equently used 13 Unplug the machine from the PC and AC wall outlet and refer servicing to qualified service personnel under the following conditions When any part of the power cord plug or connecting cable is damaged or frayed If liquid has been spilled into the machine If the machine has been exposed to rain or water If the machine does not operate properly after instructions have been followed I...

Page 7: ...environmentally safe recycling Business users should contact their supplier and check the terms and conditions of the purchase contract This product should not be mixed with other commercial wastes for disposal Radio Frequency Emissions FCC Regulations This device complies with Part 15 of the FCC Rules Operation is subject to the following two conditions This device may not cause harmful interfere...

Page 8: ...n of the laws of the member states related to low voltage equipment January 1 1996 Council Directive 89 336 EEC 92 31 EEC approximation of the laws of the Member States related to electromagnetic compatibility March 9 1999 Council Directive 1999 5 EC on radio equipment and telecommunications terminal equipment and the mutual recognition of their conformity A full declaration defining the relevant ...

Page 9: ... where use of wireless devices may be restricted or eliminated When in environments where you are uncertain of the sanction to use wireless devices ask the applicable authority for authorization prior to use or turning on the wireless device Every country has different restrictions on the use of wireless devices Since your system is equipped with a wireless device when traveling between countries ...

Page 10: ...ive in th e EU Samsung Electronics Co Ltd 259 Gongdan Dong Gumi Si Gyeongsangbuk do 730 030 Korea place and date of issue name and signature of authorized person Samsung Electronics Euro QA Lab Blackbushe Business Park Saxony Way Yateley Hampshire GU46 6GG UK Whan Soon Yim Senior Manager Yong Sang Park Manager place and date of issue name and signature of authorized person of Samsung Electronics C...

Page 11: ...he multi purpose tray supports letterheads envelopes labels transparencies custom sized materials postcards and heavy paper The multi purpose tray holds up to 100 sheets of plain paper The 500 sheet standard tray 1 supports plain paper in various sizes The 500 sheet optional tray support plain paper in various sizes You can install up to 3 additional trays Two output tray select either the output ...

Page 12: ...IPS Emulation compatible with PostScript 3 Emulation PS enables PS printing Zoran IPS Emulation compatible with PostScript 3 Copyright 1995 2005 Zoran Corporation All rights reserved Zoran the Zoran logo IPS PS3 and OneImage are trademarks of Zoran Corporation 136 PS3 fonts Contains UFST and MicroType from Monotype Imaging Inc 1 2 3 4 Use the optional hard disk You can install an optional hard dis...

Page 13: ...ptional tray 2 12 output support 6 optional tray 3 13 multi purpose tray paper width guides 7 optional tray 4 14 multi purpose tray extension The figure above shows an ML 4050N with all available options Rear view 1 power switch 5 parallel port 2 rear cover 6 USB port 3 duplex unit 7 network port 4 power receptacle The figure above shows an ML 4050N with all available options ...

Page 14: ...vides you with step by step instructions for using your printer s full features and contains information for maintaining your printer troubleshooting and installing accessories This user s guide also contains the Software section providing you with information on how to print documents with your printer on various operating systems and how to use the supplied software utilities Network Printer Use...

Page 15: ...edge of your desk or table Clearance space Front 482 6 mm enough space so that trays can be opened or removed Back 320 mm enough space to allow opening of the rear cover or the duplex unit Right 100 mm enough space to allow opening of the control board cover Left 100 mm enough space for ventilation Note When you move the printer do not tilt or turn it upside down otherwise the inside of the printe...

Page 16: ... beginning on page 2 2 Accessing control panel menus You can control your printer from the printer s control panel You can also set the control panel menus while printing 1 Press Menu until the menu you want appears on the bottom line of the display and press OK 2 Press the Scroll buttons until the desired menu item appears and press OK 3 If the menu item has sub menus repeat step 2 4 Press the Sc...

Page 17: ...talled Information menu This menu allows you to print printer information pages that give details about the printer and its configuration Note The default settings and available values of your printer could differ from this guide Item Explanation Active Job This menu shows the print jobs waiting to be printed See page 10 7 Store Job This menu shows the print jobs stored in the installed hard disk ...

Page 18: ...ing You can increase or decrease the value in 0 1 mm increments Top Margin Set the top margin Left Margin Set the left margin Short Binding Set the bottom margin of the back of the page for short binding Long Binding Set the right margin of the back of the page for long binding Item Explanation Copies Set the default number of copies by selecting any number from 1 to 999 Paper Size Depending on th...

Page 19: ...termines whether or not the printer continues printing when it detects the paper unmatched to your paper setting Off If a paper mismatch occurs an error message will remain on the display and the printer will remain off line until you insert the correct paper On If the paper mismatch occurs an error message will display The printer will go offline for 30 seconds then automatically clear the messag...

Page 20: ...sion of Courier font to use Pitch When you select one between PCL1 and PCL7 from the Typeface menu you can determine the font size by setting the number of characters that will print in one horizontal inch of type The default value 10 is the best size Lines This item allows you to set vertical spacing from 5 to 128 lines for the default paper size The default number of lines may differ according t...

Page 21: ...er you restart the printer Network Info This item prints a page showing the network parameters you set Printing a demo page After setting up your printer print a demo page to make sure that the printer is operating correctly Press and hold Demo for about 2 seconds Or 1 Press Menu and then OK when Information appears 2 Press the Scroll buttons until Demo Page appears and press OK 3 Press OK when Ye...

Page 22: ...inting Direct Printing Utility This program allows you to print PDF files easily Postscript Printer Description PPD file Use the PostScript driver to print documents with complex fonts and graphics in the PostScript language User s Guide in PDF Linux Printer driver Use this driver to run your printer from a Linux computer and print documents Smart Panel This program allows you to monitor the print...

Page 23: ...te Overlay is not supported in Windows NT 4 0 System requirements Before you begin ensure that your system meets the following requirements Windows Item Requirements Recommended Operating system Windows 98 Me NT 4 0 2000 XP 2003 Vista CPU Windows 98 Me NT 4 0 2000 Pentium II 400 MHz or higher Pentium III 933 MHz Windows XP 2003 Vista Pentium III 933 MHz or higher Pentium IV 1 GHz RAM Windows 98 Me...

Page 24: ...drake 9 2 10 1 SuSE 8 2 9 2 Processor Pentium IV 1 GHz or higher RAM 256 MB or higher Free disk page 1 GB or higher Software Linux Kernel 2 4 or higher Glibc 2 2 or higher CUPS Item Requirements Operating system 8 6 9 2 and 10 1 10 5 RAM 128 MB Free disk space 200 MB Connection USB interface Network interface ...

Page 25: ...owing programs that came with your printer SyncThru Web Admin Service A web based printer management solution for network administrators SyncThru Web Admin Service provides you with an efficient way of managing network devices and lets you remotely monitor and troubleshoot network printers from any site with corporate intranet access SyncThru Web Service A web server embedded to your network print...

Page 26: ... 2000 XP 2003 Vista Various Linux OS Macintosh OS 8 6 9 2 and 10 1 10 5 Network protocols NetWare IPX SPX TCP IP EtherTalk HTTP 1 1 SNMP Dynamic addressing server DHCP BOOTP Note Before configuring TCP IP you need to set the network protocol to TCP IP 4 Press OK when IP Address appears 5 Set the first byte between 0 and 255 using the Scroll buttons and press OK to move to the next byte Repeat this...

Page 27: ... others will be discarded Off Disables the IPX SPX protocol 4 Press OK to save the selection 5 Press Stop to return to Standby mode Setting Ethernet speed You can select the communication speed for Ethernet connections 1 Press Menu until Network appears on the bottom line of the display and press OK 2 Press the Scroll buttons until Ethernet Speed appears and press OK 3 Press the Scroll buttons unt...

Page 28: ...ce and the output quality When you choose print media consider the following The type size and weight of the print media for your machine are described later in this section Desired outcome The print media you choose should be appropriate for your project Brightness Some print media are whiter than others and produce sharper more vibrant images Surface smoothness The smoothness of the print media ...

Page 29: ... B5 176 x 250 mm 6 93 x 9 84 inches 60 to 90 g m2 16 to 24 lb 10 sheets of 75 g m2 20 lb in the multi purpose tray Envelope Monarch 98 4 x 190 5 mm 3 88 x 7 5 inches Envelope COM 10 105 x 241 mm 4 12 x 9 5 inches Envelope DL 110 x 220 mm 4 33 x 8 66 inches Envelope C5 162 x 229 mm 6 38 x 9 02 inches Envelope C6 114 x 162 mm 4 49 x 6 38 inches Transparency Letter A4 Refer to the Plain paper section...

Page 30: ...sheet at a time through the multi purpose tray to avoid paper jams To prevent print media such as transparencies and label sheets from sticking together remove them as they print out Guidelines for special print media Media type Guidelines Envelopes Successful printing on envelopes depends upon the quality of the envelopes When selecting envelopes consider the following factors Weight The weight o...

Page 31: ...ough the printer more than once The adhesive backing is designed for only a single pass through the printer Do not use labels that are separating from the backing sheet or are wrinkled bubbled or otherwise damaged Card stock or custom sized materials Do not print on media smaller than 76 mm 3 inches wide or 127 mm 5 inches long In the software application set margins at least 6 4 mm 0 25 inches aw...

Page 32: ...completely so that it can extend the length of the tray Notes If you experience problems with paper feed place one sheet at a time in the multi purpose tray You can load previously printed paper The printed side should be facing up with an uncurled edge at the front of the tray If you experience problems with paper feed turn the paper around Note that the print quality is not guaranteed 2 Squeeze ...

Page 33: ...ng loading guidelines Envelopes Flap side down and with the stamp area on the top left side Transparencies Print side up and the top with the adhesive strip entering the printer first Labels Print side up and the top short edge entering the printer first Preprinted paper Design side up and the top edge entering the printer first Card stock Print side up and the short edge entering the printer firs...

Page 34: ...ear cover If not they may tear while exiting the printer Using manual feed mode You can manually load a sheet of print media in the multi purpose tray if you select Manual Feed in the Source option from the Paper tab when you change print settings to print a document See the Software section Manually loading paper can be helpful when you want to check the print quality after each page is printed T...

Page 35: ...1 rear cover 2 output tray 2 Printing to the output tray Face down The output tray collects paper face down in the order in which the sheets were printed The tray should be used for most print jobs Printing to the rear cover Face up Using the rear cover paper comes out of the printer face up Printing from the multi purpose tray to the rear cover provides a straight paper path Using the rear cover ...

Page 36: ...ch as the printer group in Windows delete the job as follows 1 Click the Windows Start button 2 For Windows 98 Me NT 4 0 2000 select Settings and then Printers For Windows XP 2003 select Printers and Faxes For Windows Vista select Control Panel Hardware and Sound Printers 3 Double click the Samsung ML 4050 Series PCL 6 or Samsung ML 4050 Series PS icon 4 From the Document menu select Cancel Printi...

Page 37: ...pprox 20 000 pages ML D4550B Accessory Description Part number Optional Tray If you are experiencing frequent paper supply problems you can attach additional 500 sheet trays up to three You can print documents on various sizes and types of print media ML S4050A Memory DIMM Extends your printer s memory capacity ML MEM110 32 MB ML MEM120 64 MB ML MEM130 128 MB ML MEM140 256 MB IEEE 802 11 b g Wirel...

Page 38: ...hase To order Samsung authorized supplies or accessories contact your local Samsung dealer or the retailer where you purchased your printer or visit www samsungprinter com and select your country region for information on calling for technical support ...

Page 39: ...ng the printing process paper toner and dust particles can accumulate inside the printer This buildup can cause print quality problems such as toner specks or smearing Your printer has a cleaning mode that can correct and prevent these types of problems Cleaning the outside of the printer Clean the cabinet of the printer with a soft lint free cloth You can dampen the cloth slightly with water but ...

Page 40: ...rtridge Use the handle on the cartridge to avoid touching this area Caution While cleaning the inside of the printer be careful not to touch the transfer roller located underneath the toner cartridge Oil from your fingers can cause print quality problems 4 Gently swab the long strip of glass LSU inside the top of the cartridge cavity and check for dirt or dust 5 Locate the PTL lens by flipping up ...

Page 41: ...s on the amount of toner that print jobs require The actual number may also be different depending on the print density of the pages you print on and the number of pages may be affected by operating environment printing interval media type and media size If you print a lot of graphics you may need to change the cartridge more often Your machine sets the toner remains in 3 levels Toner Low Replace ...

Page 42: ...aching too far into the printer The fusing area may be hot To prevent damage to the toner cartridge do not expose it to light for more than a few minutes Cover it with a piece of paper if necessary Do not touch the green surface underside of the toner cartridge Use the handle on the cartridge to avoid touching this area 4 Hold the toner cartridge by the handle and slowly insert the cartridge into ...

Page 43: ...times to distribute the toner evenly inside the cartridge Thoroughly roll the cartridge to assure maximum copies per cartridge Save the box and the plastic bag for shipping Note The sealing tape should be longer than 60 cm when correctly removed Holding the toner cartridge pull the sealing tape straight to remove it form the cartridge Be careful not to cut the tape If this happens you cannot use t...

Page 44: ...ars and press OK 4 Select On and press OK 5 Now the Toner Low Replace Toner message does not appear but the Replace Toner message will remain for reminding you that the new cartridge needs to be installed for quality Caution Once you have selected On this setting will be permanently written to the memory of the toner cartridge and this menu will be disappeared from the Maintenance menu Maintenance...

Page 45: ...n removing paper that is jammed in the printer if possible always pull the paper in the direction that it normally moves so as not to damage internal components Always pull firmly and evenly do not jerk the paper If the paper tears ensure that all fragments of paper are removed otherwise a jam will occur again Message Location of Jam Go To Paper Jam 0 Open Close Door In the paper feed area tray 1 ...

Page 46: ...fuser area around the toner cartridge See page 9 3 3 Insert the tray 1 into the printer until it snaps into place Printing automatically resumes In the optional tray 1 Pull the optional tray open 2 Remove the jammed paper from the printer If the paper does not move when you pull or if you do not see the paper in this area stop and go to step 3 3 Pull the upper tray half way out 4 Pull the jammed p...

Page 47: ...event damage to the toner cartridge do not expose it to light for more than a few minutes Cover it with a piece of paper if necessary Do not touch the green surface underside of the toner cartridge Use the handle on the cartridge to avoid touching this area 2 Carefully lift up the guide feed 3 Remove the jammed paper by gently pulling it straight out If you do not see the jammed paper or if there ...

Page 48: ... 5 Put the fuser levers to their original position and close the rear cover Printing automatically resumes Note If it is difficult to reinstall the toner cartridge make sure that the guide feed has been flipped back down into position In the duplex unit area The improper installation of the duplex unit may cause paper jam Check the error message on the display and follow the appropriate procedure ...

Page 49: ...Status LED is off check the power cord connection Check the power switch Check the power source by plugging the power cord into another outlet If the Status LED lights red check the display message See page 9 6 Print a demo page to verify that the printer is feeding paper correctly See page 2 6 If a demo page does not print check the paper supply in the tray If the paper jams in the printer see pa...

Page 50: ...r See page 8 4 Understanding display messages Messages appear on the Smart Panel program window or the control panel display to indicate the printer s status or errors Refer to the tables below to understand the messages meaning and correct the problem if necessary Messages and their meanings are listed in alphabetical order Note When you call for service it is very convenient to tell the service ...

Page 51: ... is a problem in the fuser unit Unplug the power cord and plug it back in If the problem persists please call for service Paper Exit Jam 1 Open Close Door Paper has jammed before reaching to the exit sensor Clear the jam See page 9 3 Message Meaning Suggested solutions Paper Jam 0 Open Close Door Paper has jammed in the feeding area of the tray Clear the jam See page 9 2 Paper Jam 1 Open Close Doo...

Page 52: ...nge the selection turn the printer off and on to have this message appear again and then re select Stop or Continue NonGenuine Toner Replace Toner1 The toner cartridge installed is not a genuine cartridge This message appears when you selected Stop at the NonGenuine Toner prompt Install the genuine toner cartridge NonGenuine Toner Replace Toner The toner cartridge installed is not a genuine cartri...

Page 53: ...r has more than one port make sure that the printer is attached to the correct one The printer does not print Continued The printer may be configured incorrectly Check the printer properties to ensure that all of the print settings are correct The printer driver may be incorrectly installed Reinstall the printer driver See the Software section Try printing a test page The printer is malfunctioning...

Page 54: ...nted using the output tray face down Use the rear cover face up instead There may be debris inside the printer Open the top cover and remove the debris Condition Possible cause Suggested solutions The printer prints but the text is wrong garbled or incomplete The printer cable is loose or defective Disconnect and reconnect the printer cable Try a print job that you have already printed successfull...

Page 55: ...y be dirty Clean the LSU See page 8 2 Toner spots The paper may not meet specifications for example the paper is too moist or too rough See page 5 3 The transfer roller or paper path may be dirty See page 8 1 Condition Possible cause Suggested solutions Dropouts If generally rounded faded areas occur randomly on the page A single sheet of paper may be defective Try reprinting the job The moisture ...

Page 56: ...roperly formed and producing a wavy effect the scanner unit may need service Verify that it also occurs on a demo page see page 2 6 For service contact a service representative Page skew Ensure that the paper is loaded properly Check the paper type and quality See page 5 2 Ensure that the paper or other media is loaded correctly and the guides are not too tight or too loose against the paper stack...

Page 57: ...estart Windows Reinstall the printer driver Condition Suggested solutions A Common PostScript problems The following situations are PostScript language specific and may occur when several printer languages are being used Error Writing to LPTx message appears Ensure that the cables are connected correctly the printer is on If bi directional communication is not turned on in the driver it will also ...

Page 58: ...roblems I encounter error Unable to open mfp port device file when printing a document Please avoid changing print job parameters via LPR GUI for example while a print job is in progress Known versions of CUPS server break the print job whenever print options are changed and then try to restart the job from the beginning Since Unified Linux Driver locks mfp port while printing the abrupt terminati...

Page 59: ...al or external accessories Discharge static electricity The control board and internal accessories Wireless network interface card DIMM and hard disk are sensitive to static electricity Before installing or removing internal accessories discharge static electricity from your body by touching something metal such as the metal back plate on any device plugged into a grounded power source If you walk...

Page 60: ...Setting the memory in the PostScript printer properties After installing the DIMM you need to select it in the printer properties of the PostScript printer driver to enable its use 1 Make sure that the PostScript printer driver is installed on your computer To install the PostScript printer driver see the Software section 2 Click the Windows Start menu 3 For Windows 98 Me NT 4 0 2000 select Settin...

Page 61: ...out installing the network printer server see the network printer server user s guide The order information is provided for optional wireless network interface card Page 7 1 1 Turn the printer power off and unplug the power cord and printer cable from the printer 1 2 1 DIMM 2 latch 2 Remove the duplex slot cover or the duplex unit from the back of the printer 3 Grasp the control board cover and re...

Page 62: ...ed Custom set each network options Edit SSID Enter the SSID the name that identifies a wireless network SSID is case sensitive so you need to enter it Operation Mode Select the type of wireless connections In Ad Hoc mode wireless cards communicate directly each other In Infrastructure mode network cards communicate with each other through an access point which allows both wireless and cabled cards...

Page 63: ...Standby mode Restoring default values for wireless networking If the problem occurrs when you use or set up the wireless network values take following stops to restore factory default values Generally factory values of wireless networking are optimized for your printer 1 Press Menu until Network appears on the bottom line of the display and press OK 2 Press the Scroll buttons until Wireless appear...

Page 64: ...ter icon 4 Click the right mouse button on the printer icon and select Properties 5 In PCL 6 Properties click the Printer tab and then check Optional Hard Disk Drive HDD In PS Properties click the Device Option or Device Settings tab and set the Optional Hard Disk Drive HDD option to Installed 6 Click OK Printing with the optional hard disk After installing the optional hard disk you can use advan...

Page 65: ... jobs currently stored in the hard disk 1 Press Menu until Job Manage appears on the bottom line of the display and press OK 2 Press the Scroll buttons until Store Job appears and press OK 3 Press the Scroll buttons until the user s name and file name you want appear and press OK 4 If the select file is a confidential print job enter the specified 4 digit password Press the Scroll buttons to enter...

Page 66: ...and press OK 4 If the select file is a confidential print job enter the specified 4 digit password Press the Scroll buttons to enter the first digit and press OK The cursor automatically moves to the next digit position Enter the 2nd 3rd and 4th digit in the same way 5 Press the Scroll buttons until Release appears and press OK This option appears only when you select a Delay print job See page 10...

Page 67: ... MB 32 64 128 or 256 MB optional memory available Use only the Samsung approved DIMM Display 16 characters x 2 lines Fonts 1 bitmap 45 scalable 136 PostScript 3 fonts OCR fonts Interface IEEE 1284 Bidirectional Parallel Standard Modes supported Compatible Nibble Byte ECP USB Interface Standard USB 2 0 compliant 480 Mbps 1 port Network Interface enthernet 10 100 Base TX wired LAN 802 11b g wireless...

Page 68: ...e 5 7 memory 10 1 multi purpose tray 5 6 N network interface card device install 10 3 network setup EtherTalk 4 2 IPX frame types 4 3 operating systems 4 2 TCP IP 4 2 wireless 10 4 O output location select 5 8 output tray 5 8 P paper guidelines 5 3 paper jam clear around the toner cartridge 9 3 duplex area 9 4 multi purpose tray 9 3 optional tray 2 9 2 optional tray 3 9 2 optional tray 4 9 2 paper...

Page 69: ...inter 11 1 status LED meaning 9 6 supplies checking life 8 3 order information 7 1 system requirements Linux 3 3 Macintosh 3 3 Windows 3 2 T toner cartridge checkig remaining toner 8 3 cleaning 8 3 maintaining 8 3 redistributing 8 4 replacing 8 5 8 6 toner save mode use 2 6 troubleshooting 9 1 W Windows problems 9 13 wireless network setup 10 4 ...

Page 70: ...Samsung Printer Software section ...

Page 71: ...Printing a Document 12 Printer Settings 13 Layout Tab 13 Paper Tab 14 Graphics Tab 15 Extras Tab 16 About Tab 17 Printer Tab 17 Using a Favorite Setting 17 Using Help 17 Chapter 3 ADVANCED PRINTING Printing Multiple Pages on One Sheet of Paper N Up Printing 18 Printing Posters 19 Printing Booklets 19 Printing on Both Sides of Paper 20 Printing a Reduced or Enlarged Document 20 Fitting Your Documen...

Page 72: ...DIRECT PRINT UTILITY Overview Direct Print Utility 24 Printing 24 From the Direct Print Utility window 24 Using the shortcut icon 24 Using the right click menu 24 Chapter 6 SHARING THE PRINTER LOCALLY Setting Up a Host Computer 25 Setting Up a Client Computer 25 Chapter 7 USING SMART PANEL Understanding Smart Panel 26 Opening the Troubleshooting Guide 27 Using Printer Settings Utility 27 Using Ons...

Page 73: ...ion 30 Ports Configuration 31 Configuring Printer Properties 31 Printing a Document 32 Printing from Applications 32 Printing Files 32 Chapter 9 USING YOUR PRINTER WITH A MACINTOSH Installing Software for Macintosh 33 Setting Up the Printer 34 For a Network connected Macintosh 34 For a USB connected Macintosh 34 Printing 35 Printing a Document 35 Changing Printer Settings 35 Printing Multiple Page...

Page 74: ...work Printing on page 7 You can install the printer software using the typical or custom method NOTE If the New Hardware Wizard window appears during the installation procedure click in the upper right corner of the box to close the window or click Cancel Typical Installation This is recommended for most users All components necessary for printer operations will be installed 1 Make sure that the p...

Page 75: ...tly click Yes If not click No to reprint it 7 To register yourself as a user of Samsung Printers in order to receive information from Samsung select the checkbox and click Finish You are now sent to the Samsung web site Otherwise just click Finish NOTE After setup is complete if your printer driver doesn t work properly reinstall the printer driver See Reinstalling Printer Software on page 10 Cust...

Page 76: ... don t want to connect the printer at this time click Next and No on the following screen Then the installation will start and a test page will not be printed at the end of the installation The installation window that appears in this User s Guide may differ depending on the printer and interface in use 6 Select the components to be installed and click Next NOTE You can change the desired installa...

Page 77: ...ake sure that the printer is connected to your network and powered on For details about connecting to the network see the supplied printer s User s Guide 2 Insert the supplied CD ROM into your CD ROM drive If you use Windows Vista when you are asked to allow the installation click continue The CD ROM should automatically run and an installation window appears If the installation window does not ap...

Page 78: ...f your printer driver doesn t work properly reinstall the printer driver See Reinstalling Printer Software on page 10 Custom Installation You can choose individual components to install and set a specific IP address 1 Make sure that the printer is connected to your network and powered on For details about connecting to the network see the supplied printer s User s Guide 2 Insert the supplied CD RO...

Page 79: ...t a specific IP address on a specific network printer click the Set IP Address button The Set IP Address window appears Do as follows a Select a printer to be set with a specific IP address from the list To verify your printer s IP address or MAC address print a Network Configuration page b Configure an IP address subnet mask and gateway for the printer manually and click Configure to set the spec...

Page 80: ...tallation fails 1 Start Windows 2 From the Start menu select Programs or All Programs your printer driver name Maintenance 3 Select Repair and click Next 4 The list of printers available on the network appears Select the printer you want to install from the list and then click Next If you do not see your printer on the list click Update to refresh the list or select Add TCP IP Port to add your pri...

Page 81: ...l printing and you select your printer driver name the window asking you to print a test page appears Do as follows a To print a test page select the check box and click Next b If the test page prints out correctly click Yes If it doesn t click No to reprint it 6 When the reinstallation is done click Finish Removing Printer Software 1 Start Windows 2 From the Start menu select Programs or All Prog...

Page 82: ...om various Windows applications The exact steps for printing a document may vary depending on the application program you are using Refer to the User s Guide of your software application for the exact printing procedure 1 Open the document you want to print 2 Select Print from the File menu The Print window is displayed It may look slightly different depending on your application The basic print s...

Page 83: ...indows OS refer to the corresponding Windows User s Guide or online help 1 Click the Windows Start button 2 Select Printers and Faxes 3 Select your printer driver icon 4 Right click on the printer driver icon and select Printing Preferences 5 Change the settings on each tab click OK Layout Tab The Layout tab provides options to adjust how the document appears on the printed page The Layout Options...

Page 84: ...ose Tray Tray n Type Set Type to correspond to the paper loaded in the tray from which you want to print This will let you get the best quality printout If not print quality may not be acheived as you want Cotton 20 lb to 24 lb 75 90 g m2 cotton paper such as Gilbert 25 and Gilbert 100 Plain Paper Normal plain paper Select this type if your printer is monochrome and printing on the 16 lb 60 g m2 c...

Page 85: ... to save toner when printing a document select this option Advanced Options You can set advanced settings by clicking the Advanced Options button TrueType Options This option determines what the driver tells the printer about how to image the text in your document Select the appropriate setting according to the status of your document This option may be available only in Windows 9x Me depending on...

Page 86: ...Use Printer Fonts When Use Printer Fonts is checked the printer uses the fonts that are stored in its memory resident fonts to print your document rather than downloading the fonts used in your document Because downloading fonts takes time selecting this option can speed up your printing time When using Printer fonts the printer will try to match the fonts used in your document to those stored in ...

Page 87: ...orite Setting The Favorites option which is visible on each properties tab allows you to save the current properties settings for future use To save a Favorites item 1 Change the settings as needed on each tab 2 Enter a name for the item in the Favorites input box 3 Click Save When you save Favorites all current driver settings are saved To use a saved setting select the item from the Favorites dr...

Page 88: ... Printing Multiple Pages on One Sheet of Paper N Up Printing You can select the number of pages to print on a single sheet of paper To print more than one page per sheet the pages will be reduced in size and arranged in the order you specify You can print up to 16 pages on one sheet 1 To change the print settings from your software application access printer properties See Printing a Document on p...

Page 89: ...g the sheets together 4 Click the Paper tab select the paper source size and type 5 Click OK and print the document You can complete the poster by pasting the sheets together 0 15 inches 0 15 inches Printing Booklets This printer feature allows you to print your document on both sides of the paper and arranges the pages so that the paper can be folded in half after printing to produce a booklet 1 ...

Page 90: ...t the document NOTE If your printer does not have a duplex unit you should complete the printing job manually The printer prints every other page of the document first After printing the first side of your job the Printing Tip window appears Follow the on screen instructions to complete the printing job Long Edge Short Edge 2 5 3 2 5 3 2 5 3 2 5 3 Printing a Reduced or Enlarged Document You can ch...

Page 91: ... message displays in the preview window When the First Page Only box is checked the watermark prints on the first page only 4 Select watermark options You can select the font name style size or grayscale level from the Font Attributes section and set the angle of the watermark from the Message Angle section 5 Click Add to add a new watermark to the list 6 When you have finished editing click OK an...

Page 92: ...ST Dear ABC Regards WORLD BEST Using a Page Overlay After an overlay has been created it is ready to be printed with your document To print an overlay with a document 1 Create or open the document you want to print 2 To change the print settings from your software application access printer properties See Printing a Document on page 12 3 Click the Extras tab 4 Select the desired overlay from the O...

Page 93: ...ws applications will override settings you specify in the printer driver Change all print settings available in the software application first and change any remaining settings using the printer driver The settings you change remain in effect only while you are using the current program To make your changes permanent make them in the Printers folder The following procedure is for Windows XP For ot...

Page 94: ...using Direct Print Utility From the Direct Print Utility window 1 From the Start menu select Programs or All Programs Direct Print Utility Direct Print Utility Or double click the Direct Print Utility shortcut icon on your desk top The Direct Print Utility window opens 2 Select the printer you will use in the Select Printer section and click Browse 3 Select the PDF file you will print and click Op...

Page 95: ...ied CD ROM Setting Up a Host Computer 1 Start Windows 2 From the Start menu select Printers and Faxes 3 Double click your printer driver icon 4 From the Printer menu select Sharing 5 Check the Share this printer box 6 Fill in the Shared Name field and then click OK Setting Up a Client Computer 1 Right click the Windows Start button and select Explorer 2 Open your network folder in the left column ...

Page 96: ...If you are a Windows user from the Start menu select Programs or All Programs your printer driver name Smart Panel NOTES If you have already installed more than one Samsung printer first select the printer model you want in order to use the corresponding Smart Panel Right click in Windows or Linux or click in Mac OS X the Smart Panel icon and select your printer name The Smart Panel window and its...

Page 97: ...click 5 Changing the Smart Panel Program Settings Right click in Windows or Linux or click in Mac OS X the Smart Panel icon and select Options The following window opens Display when job is finished for network printer The computer shows the Smart Panel popup window or balloon when your job is complete in Windows Only for Windows network supported printers Display when error occurs during printing...

Page 98: ...talled automatically this is possible on a wide set of the most popular Linux clones Installing the Unified Linux Driver Installing the Unified Linux Driver 1 Make sure that you connect your machine to your computer Turn both the computer and the machine on 2 When the Administrator Login window appears type in root in the Login field and enter the system password NOTE You must log in as a super us...

Page 99: ... in the Login field and enter the system password NOTE You must log in as a super user root to install the printer software If you are not a super user ask your system administrator 2 Insert the printer software CD ROM The CD ROM will automatically run If the CD ROM does not automatically run click the icon at the bottom of the desktop When the Terminal screen appears type in If the CD ROM is seco...

Page 100: ... Printers Configuration button Scanners Configuration button for MFP device only Ports Configuration button Printers Configuration Printers configuration has the two tabs Printers and Classes Printers Tab You can see the current system s printer configuration by clicking on the printer icon button on the left side of the Unified Driver Configurator window You can use the following printer control ...

Page 101: ...pen the Unified Driver Configurator If necessary switch to Printers configuration 2 Select your machine on the available printers list and click Properties 3 The Printer Properties window opens The following five tabs display at the top of the window General allows you to change the printer location and name The name entered in this tab displays on the printer list in Printers configuration Connec...

Page 102: ...es files such as color options image size or image position Device allows you to set the print resolution paper source and destination 5 Click Apply to apply the changes and close the Properties window 6 Click OK in the LPR GUI window to start printing 7 The Printing window appears allowing you to monitor the status of your print job To abort the current job click Cancel Printing Files You can pri...

Page 103: ...r computer and the machine 3 Insert the PostScript driver CD ROM which came with your machine into the CD ROM drive 4 Double click the CD ROM icon on your Macintosh desktop 5 Double click the MAC_Installer folder 6 Double click the MAC_Printer folder 7 For Mac OS 8 6 9 2 double click the Samsung LBP Installer Classic icon For Mac OS 10 1 or higher double click the Samsung LBP Installer OSX icon 8 ...

Page 104: ...ax 3 Click Add on the Printer List For MAC OS 10 5 press the icon then a display window will pop up 4 Select the AppleTalk tab For MAC OS 10 3 select the Rendezvous tab For MAC OS 10 4 click Default Browser and find the Bonjour For MAC OS 10 5 click Default and find the Bonjour The name of your machine appears on the list Select SEC000xxxxxxxxx from the printer box where the xxxxxxxxx varies depen...

Page 105: ...e menu and click Print 5 Choose the number of copies you want and indicate which pages you want to print 6 Click Print when you finish setting the options Mac OS 10 3 Make sure that your printer is selected Changing Printer Settings You can use advanced printing features when using your printer From your Macintosh application select Print from the File menu The printer name which appears in the pr...

Page 106: ...type of print material select the corresponding paper type Resolution Quality The Resolution options you can select may vary depending on your printer model You can select the printing resolution The higher the setting the sharper the clarity of printed characters and graphics The higher setting also may increase the time it takes to print a document Mac OS 10 3 Printing Multiple Pages on One Shee...

Page 107: ...ion 4 Click Print and the printer prints on both sides of the paper CAUTION If you have selected duplex printing and then try to print multiple copies of a document the printer may not print the document in the way you want In case of Collated copy if your document has odd pages the last page of the first copy and the first page of the next copy will be printed on the front and back of one sheet I...

Page 108: ...osh 36 Windows 18 O orientation print 32 Windows 13 overlay create 22 delete 22 print 22 P Paper properties set 14 paper size set 14 print 32 paper source set 32 Windows 14 paper type set Macintosh 36 print 32 poster print 19 PostScript driver installing 23 print document 12 fit to page 20 from Macintosh 35 from Windows 12 N up Macintosh 36 Windows 18 overlay 22 scaling 20 watermark 21 print resol...

Page 109: ...ware install Macintosh 33 Windows 4 reinstall Windows 10 system requirements Macintosh 33 uninstall Macintosh 33 Windows 11 status monitor use 26 T toner save set 15 U uninstall software Macintosh 33 Windows 11 uninstalling MFP driver Linux 29 W watermark create 21 delete 21 edit 21 print 21 ...

Page 110: ...GGGGGGGGGGGGGRev 3 00 ...

Reviews: