background image

23

ENGLISH

Accessories

Accessories

f

You must keep following accessories until the installation is finished.

f

Hand over the installation manual to the customer after finishing the installation.

Installation manual (1)

Optional accessories

f

Following optional accessories are needed for connecting pipes between the indoor and outdoor units.

Classification

Model Name

Specification

Y-Joint

MXJ-YA1509M

15.0 kW and below

MXJ-YA2512M

15.1 kW ~ 40.0 kW

MXJ-YA2812M

40.1 kW ~ 45.0 kW

MXJ-YA2815M

45.1 kW ~ 70.3 kW

MXJ-YA3419M

70.4 kW ~ 98.4 kW

MXJ-YA4119M

98.5 kW ~ 135.2 kW

MXJ-YA4422M

Over 135.2 kW

Y-Joint (Only H/R)

MXJ-YA1500M

22.4 kW and below

MXJ-YA2500M

22.5 kW ~ 70.3 kW

MXJ-YA3100M

70.4 kW ~ 135.2 kW

MXJ-YA3800M

Over 135.2 kW

Distribution header

MXJ-HA2512M

45.0 kW and below (for 4 rooms)

MXJ-HA3115M

70.3 kW and below (for 8 rooms)

MXJ-HA3819M

70.4 kW ~ 135.2 kW (for 8 rooms)

Y-Joint

- Outdoor unit

MXJ-TA3419M

135.2 kW and below

MXJ-TA4122M

Over 135.2 kW

Y-Joint (Only H/R)

- Outdoor unit

MXJ-TA3100M

135.2 kW and below

MXJ-TA3800M

Over 135.2 kW


If you use an indoor unit with no internal EEV(Electric Expansion Valve), you will need an EEV kit.


Only use the genuine accessories listed in above table and do not use imitated accessories.

Summary of Contents for DVM S AM080FXVAGH

Page 1: ...DVM S AM FXVAGR Series AM FXVAGH Series AM HXVAGH Series AM MXV NR Series Air Conditioner installation manual imagine the possibilities Thank you for purchasing this Samsung product DB68 03850A 14 ...

Page 2: ...uct 28 Refrigerant pipe installation 31 Electrical wiring work 63 Air tightness test and vacuum drying 80 Pipe insulation 82 Charging refrigerant for the turkish market only 85 Basic segment display 88 Setting outdoor unit option switch and key function 88 Setting the MCU and Pipe Addresses for HR Only 98 Things to check after completing the installation 102 Inspection and test operation 104 Autom...

Page 3: ...er installation But when it has to be relocated for inevitable reasons please contact Samsung s qualified dealers for system air conditioners WARNING Hazards or unsafe practices that mayresult in severe personal injury or death CAUTION Hazards or unsafe practices that mayresult in minor personal injury to installer user or property damage SEVEREWARNING SIGNS Consult qualified installer or dealer f...

Page 4: ...nerate on the electrical terminal and cause electric shock or fire Exclusive circuit breaker MCCB ELB must be installed to the power supply X When overcurrent or current leakage occurs with no circuit breaker installed power will not be cut off and it may cause electric shock or fire X Do not use damaged parts It may cause fire or electric shock You must cut off the power before you work on or adj...

Page 5: ...decrease product s performance Lighting rod Protective angle 25 55 Height of the building Protection control 20m or less 55 40m or less 35 60m or less 25 Install the indoor unit away from lighting apparatus that uses ballast stabilizer X If you use the wireless remote control it may not operate normally due to ballast stabilizer Do not install the product in following places X Place where outdoor ...

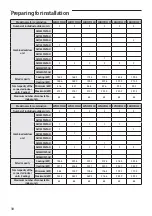
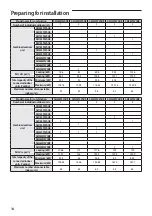
Page 6: ...tity of connectable indoor units the installation at the outdoor joints and the outdoor unit combinations are different from the conventional models X If the pipe length is over 2 m between outdoor units make traps to prevent oil stagnation Oil stagnation may occur when outdoor unit at the end of module stops while other outdoor units are still in operation Preparing for installation Outdoor unit ...

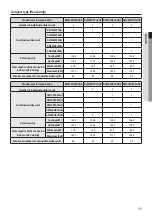
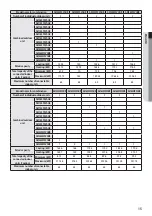
Page 7: ...munication address Indoor unit address can be assigned from 0 63 If the indoor unit address was assigned from 64 79 E201 error will occur Maximum 32Wall mount type indoor units with EEV AM FNQDEH AM JNVDKH can be connected Use the following table to determine the size and number of outdoor units needed to achieve the capacity requirements CAUTION Standard type Heat pump Model name for combination ...

Page 8: ...6 36 4 Maximum kW 65 5 72 8 80 1 87 4 94 6 Maximum number of connectable indoor units 32 36 40 43 47 Model name for combination AM280HXVAGH1 AM300HXVAGH1 AM320HXVAGH1 AM340HXVAGH1 AM360HXVAGH1 Number of individual outdoor units 2 2 2 2 2 Combined outdoor unit AM080FXVAGH AM100FXVAGH AM120FXVAGH 1 1 1 1 AM140FXVAGH 1 AM160FXVAGH 1 AM180FXVAGH 1 AM200FXVAGH 1 AM220FXVAGH 1 1 AM240HXVAGH AM260HXVAGH ...

Page 9: ...4 Maximum kW 138 6 146 6 152 9 160 2 167 4 Maximum number of connectable indoor units 64 64 64 64 64 Model name for combination AM480HXVAGH1 AM500HXVAGH1 AM520HXVAGH1 AM540HXVAGH1 AM560HXVAGH1 Number of individual outdoor units 3 3 3 3 3 Combined outdoor unit AM080FXVAGH AM100FXVAGH AM120FXVAGH 1 1 1 1 1 AM140FXVAGH 1 AM160FXVAGH 1 AM180FXVAGH 1 AM200FXVAGH 1 AM220FXVAGH 1 1 1 1 2 AM240HXVAGH AM26...

Page 10: ... Maximum kW 212 3 218 7 212 3 233 0 240 2 247 5 Maximum number of connectable indoor units 64 64 64 64 64 64 Model name for combination AM700HXVAGH1 AM720HXVAGH1 AM740HXVAGH1 AM760HXVAGH1 AM780HXVAGH1 AM800HXVAGH1 Number of individual outdoor units 4 4 4 4 4 4 Combined outdoor unit AM080FXVAGH AM100FXVAGH AM120FXVAGH 1 1 1 1 1 AM140FXVAGH 1 1 AM160FXVAGH 1 AM180FXVAGH 1 AM200FXVAGH 1 AM220FXVAGH 2...

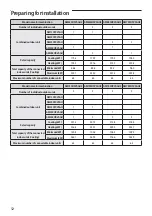
Page 11: ...mum kW 50 4 53 2 64 4 67 2 Maximum kW 131 0 138 3 167 4 174 7 Maximum number of connectable indoor units 64 64 64 64 Model name for combination AM500HXVAGH2 AM520HXVAGH2 AM580HXVAGH2 AM600HXVAGH2 Number of individual outdoor units 2 2 3 3 Combined outdoor unit AM120FXVAGH 1 1 AM200FXVAGH 1 AM220FXVAGH 1 AM240HXVAGH 1 AM260HXVAGH 1 2 1 1 Rated capacity Cooling kW 140 0 145 6 162 4 168 0 Heating kW ...

Page 12: ...m kW 86 8 89 6 95 2 98 0 Maximum kW 225 7 233 0 247 5 254 8 Maximum number of connectable indoor units 64 64 64 64 Model name for combination AM720HXVAGH2 AM740HXVAGH2 AM760HXVAGH2 AM780HXVAGH2 Number of individual outdoor units 3 3 3 3 Combined outdoor unit AM120FXVAGH AM200FXVAGH AM220FXVAGH 1 1 AM240HXVAGH 1 1 AM260HXVAGH 1 2 2 3 Rated capacity Cooling kW 201 6 207 2 212 8 218 4 Heating kW 226 ...

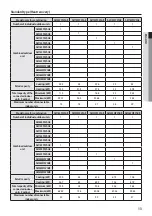
Page 13: ... 11 2 14 16 8 20 22 5 Maximum kW 29 12 36 4 43 68 52 58 5 Maximum number of connectable indoor units 14 18 21 26 29 Model name for combination AM180FXVAGR AM200FXVAGR AM220FXVAGR AM240MXVGNR AM260MXVGNR Number of individual outdoor units 1 1 1 1 1 Combined outdoor unit AM080FXVAGR AM100FXVAGR AM120FXVAGR AM140FXVAGR AM160FXVAGR AM180FXVAGR 1 AM200FXVAGR 1 AM220FXVAGR 1 AM240MXVGNR 1 AM260MXVGNR 1 ...

Page 14: ... 8 47 6 50 8 Maximum kW 102 18 109 2 116 48 123 76 132 08 Maximum number of connectable indoor units 51 54 58 61 64 Model name for combination AM380FXVGNR AM400FXVGNR AM420FXVGNR AM440FXVGNR AM460FXVGNR Number of individual outdoor units 2 2 2 2 2 Combined outdoor unit AM080FXVAGR AM100FXVAGR AM120FXVAGR AM140FXVAGR 1 AM160FXVAGR 1 1 AM180FXVAGR 1 AM200FXVAGR 1 AM220FXVAGR 1 1 1 AM240MXVGNR AM260M...

Page 15: ...2 189 28 196 56 203 84 Maximum number of connectable indoor units 64 64 64 64 64 Model name for combination AM580FXVGNR AM600FXVGNR AM620FXVGNR AM640FXVGNR AM660FXVGNR AM680FXVGNR Number of individual outdoor units 2 2 3 3 3 3 Combined outdoor unit AM080FXVAGR AM100FXVAGR AM120FXVAGR 1 1 AM140FXVAGR 1 AM160FXVAGR 1 AM180FXVAGR AM200FXVAGR 1 AM220FXVAGR 1 1 1 AM240MXVGNR AM260MXVGNR AM280MXVGNR 1 A...

Page 16: ... 100 8 103 6 106 4 109 2 112 1 Maximum kW 254 8 262 08 269 36 276 64 283 92 291 46 Maximum number of connectable indoor units 64 64 64 64 64 64 Model name for combination AM820FXVGNR AM840FXVGNR AM860FXVGNR AM880FXVGNR AM900FXVGNR Number of individual outdoor units 3 3 3 3 3 Combined outdoor unit AM080FXVAGR AM100FXVAGR AM120FXVAGR AM140FXVAGR AM160FXVAGR AM180FXVAGR AM200FXVAGR AM220FXVAGR 1 AM24...

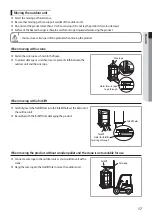
Page 17: ... shown in the figure f To protect damage or scratches insert a piece of cloth between the outdoor unit and the wire rope Wire rope Holes for wire rope to go through When moving with a forklift f Carefully insert the forklift forks into the forklift holes at the bottom of the outdoor unit f Be careful with the forklift from damaging the product Forklift Forklift holes Holes for forklift forks to go...

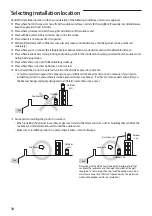
Page 18: ...irect influence of snow or rain f Do not install the product in a place where it will be directly exposed to sea breeze Consult an installation expert or company since you will need to take extra anti corrosion measures if you need to install the product in a place where it can be exposed to direct sea breeze You have to remove dusts and salinity on the heat exchanger and apply designated rust inh...

Page 19: ...ay R Pro With initial coating 4 years extended ৄ Cleaning Spray R Pro without initial coating 2 years extended Seashorewithin500m 2km ৄ With Anti corrosion coating 4 years from installation ৄ Without Anti corrosion coating 2 years from installation Check1yearlaterfrominstallation After Corrosion Protection period ৄ Cleaning Spray R Pro With initial coating 4 years extended ৄ Cleaning Spray R Pro W...

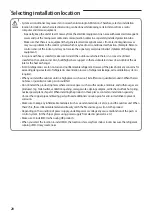
Page 20: ...olds any concerns for exceeding dangerous level of refrigerant concentration in case of refrigerant leakage extra ventilation system is required When you install the outdoor unit in a high places such as roof install fence or guardrail around it When there is no fence or guardrail service person could fall Do not install the product in places where corrosive gases such as sulfur oxides ammonia and...

Page 21: ... If the installation space is narrow installer or other worker may get injured during work and may also cause problem to the product f If you install multiple number of outdoor units in one space make sure to secure enough ventilation space if there s any walls around the product that may disturb the air flow If enough ventilation space is not secured product may malfunction f You may install the ...

Page 22: ...400 Height of the wall is unlimited Front side Frontside For Case 1 or Case 3 Height of the wall on the front side should not be higher than 1500mm Height of the wall on the air inlet side should not be higher than 500mm Height of the wall on the side is not limited If the height of the wall exceeds by certain value h1 h2 additional clearance h1 2 h2 2 Half of the exceeded distance should be added...

Page 23: ...YA3419M 70 4 kW 98 4 kW MXJ YA4119M 98 5 kW 135 2 kW MXJ YA4422M Over 135 2 kW Y Joint Only H R MXJ YA1500M 22 4 kW and below MXJ YA2500M 22 5 kW 70 3 kW MXJ YA3100M 70 4 kW 135 2 kW MXJ YA3800M Over 135 2 kW Distribution header MXJ HA2512M 45 0 kW and below for 4 rooms MXJ HA3115M 70 3 kW and below for 8 rooms MXJ HA3819M 70 4 kW 135 2 kW for 8 rooms Y Joint Outdoor unit MXJ TA3419M 135 2 kW and ...

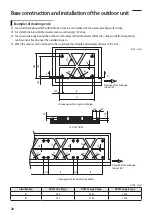
Page 24: ...peed of 30m s If you cannot fix the outdoor unit on the base ground fix it by side or use extra structure 5 In heating operation defrost water may form so you must really care about the drainage and waterproofing the floor To prevent defrost water from stagnating or freezing construct a drainage with over 1 50 slope Ice may form on the floor in winter time 6 It is necessary to add wire mesh or ste...

Page 25: ...ount and anchor bolt position A B 54 761 803 54 Outdoor unit Anti vibration frame 4 Ø 12 Anti vibration Base ground 4 Ø 18 Unit mm Classification DVM S SmallType DVM S Large AType DVM S Large B type A 880 1 295 1 295 B 740 1 150 1 150 Refer to the blueprints in technical data book to make a holes for connecting the anti vibration pad ...

Page 26: ... from stagnating overflowing or freezing near the installation space f When the outdoor unit is installed on the roof check the strength and waterproof status of the roof Unit mm 960 760 100 80 80 80 6 0 100 X X Direction of the drainage Slope 1 50 Drainage work for single installation B A 50 100 150 100 X X SECTION 80 80 80 80 80 80 80 80 6 0 6 0 200 B B 200 Direction of the drainage Slope 1 50 D...

Page 27: ...ftop f Construct draining pit around the base construction and pay attention to the drainage around the outdoor unit Condensation or defrost water may form during outdoor unit operation f If there s any possibility of small animals from entering the pipe outlet block the outlet as shown in the illustration Liquid side pipe Gas side pipe Block the part When withdrawing the pipe from the front side ...

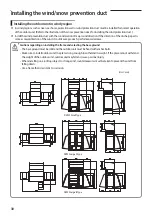
Page 28: ...get injured by the sharp parts f When installing the outdoor unit under the tree or near forest leafs may get into the product and cause problems on the product Therefore install a discharge duct to prevent foreign substance infiltration Protecting discharge duct Preventing foreign substance infiltration CAUTION Installing the wind snow prevention duct Installing the outdoor unit around the obstac...

Page 29: ...e directed to the enclosed space Cautions regarding on installing the frame and selecting the base ground Height h of the frame and the base ground should be higher than the heaviest expected snowfall Area of the frame and the base ground should not be larger than the are of the outdoor unit Snow may accumulate if the area of the frame or the base ground is larger CAUTION Should adopt bar type lou...

Page 30: ...ld cause product s performance decrease Cautions regarding on installing the frame and selecting the base ground The base ground must be solid and the outdoor unit must be fixed with anchor bolts Make sure to install outdoor unit in a place strong enough to withstand its weight If the place cannot withstand the weight of the outdoor unit outdoor unit may fall and cause personal injury When install...

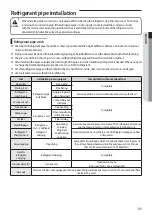
Page 31: ...e tools and accessories that fit on R 410A only Tool Installation process purpose Compatibility with conventional tool Pipe cutter Refrigerant pipe installation Pipe cutting Compatible Flaring tool Pipe flaring Refrigerant machine oil Apply refrigerant oil on flared part Exclusive ether oil ester oil alkali benzene oil or synthetic oil Torque wrench Connect flare nut with pipe Compatible Pipe bend...

Page 32: ...utdoor unit and the farthest indoor unit exceeds 90m you must increase the size of the pipe main pipe by one grade which connects between the outdoor unit to the first branch joint f For H R model When the pipe length including elbow between an outdoor unit and the farthest indoor unit exceeds 90m you must increase the size of the liquid pipe by one grade among the pipes main pipe which connects b...

Page 33: ...5 88 Ø 28 58 33 7 kW 40 0 kW 40 1 kW 45 0 kW Ø 31 75 note2 45 1 kW 50 4 kW Ø 15 88 Ø 19 05 50 5 kW 56 0 kW 56 1 kW 63 3 kW 63 4 kW 70 3 kW Ø 34 92 Ø 38 10 note3 70 4 kW 98 4 kW Ø 19 05 Ø 22 22 98 5 kW 135 2 kW Ø 41 28 Ø 41 28 135 3 kW 169 0 kW Ø 53 98 169 1 kW 252 0 kW Ø 22 22 Ø 53 98 Ø 25 40 note1 Maximum pipe length The pipe length between an outdoor unit and the farthest indoor unit Note1 If Ø ...

Page 34: ...40 note1 28 2 kW 40 0 kW Ø 12 70 Ø 28 58 Ø 15 88 Ø 28 58 40 1 kW 45 0 kW Ø 31 75 note2 45 1 kW 63 3 kW Ø 15 88 Ø 19 05 63 4 kW 70 3 kW Ø 34 92 Ø 38 10 note3 70 4 kW 98 4 kW Ø 19 05 Ø 22 22 98 5 kW 135 2 kW Ø 41 28 Ø 41 28 135 3 kW 169 0 kW Ø 53 98 Over 169 0 kW Ø 22 22 Ø 53 98 Ø 25 40 note1 Note1 If Ø 25 40 pipe is not available on site use Ø 28 58 pipe Note2 If Ø 31 75 pipe is not available on si...

Page 35: ... MXJ YA4422M f Branch joint E Select a branch joint according to the sum of indoor unit capacity which will be connected after the branch However if the size of the pipe between branch joints E is bigger than the size of the pipe connected to the outdoor unit D apply the pipe size D 1 Y joint Classification Model name Specification kW Y joint E MXJ YA1509M 15 0 kW and below MXJ YA2512M 15 1 kW 40 ...

Page 36: ...88 22 5 kW 28 1 kW Ø 22 22 Ø 19 05 Ø 22 22 Ø 19 05 28 2 kW 33 6 kW Ø 12 70 Ø 28 58 Ø 15 88 Ø 28 58 33 7 kW 40 0 kW Ø 22 22 Ø 22 22 40 1 kW 45 0 kW 45 1 kW 50 4 kW Ø 15 88 Ø 19 05 50 5 kW 56 0 kW Ø 28 58 Ø 28 58 56 1 kW 63 3 kW 63 4 kW 70 3 kW Ø 34 92 Ø 34 92 70 4 kW 98 4 kW Ø 19 05 Ø 22 22 98 5 kW 135 2 kW Ø 41 28 Ø 34 92 Ø 41 28 Ø 34 92 135 3 kW 169 0 kW 169 1 kW 252 0 kW Ø 22 22 Ø 53 98 Ø 53 98 ...

Page 37: ...12 70 Ø 28 58 Ø 15 88 Ø 28 58 33 7 kW 40 0 kW Ø 22 22 Ø 22 22 40 1 kW 45 0 kW Ø 31 75 note2 45 1 kW 50 4 kW Ø 15 88 Ø 19 05 50 5 kW 63 3 kW Ø 28 58 Ø 28 58 63 4 kW 70 3 kW Ø 34 92 Ø 38 10 note3 70 4 kW 98 4 kW Ø 19 05 Ø 22 22 98 5 kW 135 2 kW Ø 41 28 Ø 34 92 Ø 41 28 Ø 34 92 135 3 kW 169 0 kW Ø 53 98 Over 169 0 kW Ø 22 22 Ø 53 98 Ø 41 28 Ø 25 40 note1 Ø 41 28 Note1 If Ø 25 40 pipe is not available ...

Page 38: ...5 2 kW MXJ YA4119M Over 135 2 kW MXJ YA4422M High pressure Y joint D 22 4 kW MXJ YA1500M 22 5 kW 67 2 kW MXJ YA2500M 67 3 kW 135 2 kW MXJ YA3100M Over 135 2 kW MXJ YA3800M f Branch joint E Select a branch joint according to the sum of indoor unit capacity which will be connected after the branch However if the size of the pipe between branch joints E is bigger than the size of the pipe connected t...

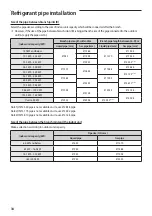
Page 39: ... has to be calculated based on the sum of all liquid pipe length Classification AM080FXVAG AM100FXVAG AM120FXVAG AM140FXVAG AM160FXVAG Basic type 5 5 5 2 5 5 7 7 7 4 Classification AM180FXVAG AM200FXVAG AM220FXVAG AM240HXVAG AM260HXVAG Basic type 8 7 8 4 8 4 14 3 14 3 Classification AM240MXVGNR AM260MXVGNR AM280MXVGNR AM300MXVANR Basic type 14 0 14 0 14 0 14 0 f Amount of additional refrigerant de...

Page 40: ...37 0 37 0 37 DuctS AM HNMPK 0 22 0 22 0 22 0 22 0 31 0 38 0 38 0 38 DuctS AM HNMPK 0 31 0 31 0 38 0 38 0 38 DuctS AM HNHPK 0 38 0 38 0 38 Slimduct AM FNLDE 0 17 0 17 0 17 0 26 0 35 0 35 0 45 0 42 0 42 0 62 0 62 Slimduct withdrainpump AM KNLDE 0 35 0 35 0 45 0 42 0 42 0 62 0 62 MSPduct AM NMDE 0 24 0 24 0 24 0 28 0 28 0 28 0 32 0 54 0 68 0 68 0 91 MSPduct withdrainpump AM KNMDE 0 24 0 24 0 24 0 28 ...

Page 41: ...In case the capacity conjunction of the Hydro Unit HT exceeds 50 among the total indoor unit please don t put the additional refrigerant f Method to calculate total amount of additional refrigerant Amount of additional refrigerant depending on the pipe length ⓐ Amount of additional refrigerant for each indoor unit ⓑ Amount of additional refrigerant for each connected indoor unit Refer to the table...

Page 42: ...onal refrigerant kg Total amount of additional refrigerant kg Indoor unit ⓑ 4way cassette AM071FN4DEH 4 0 45 1 80 ⓑ 3 10 Slim duct AM056FNLDEH 2 0 35 0 70 Slim duct AM045FNLDEH 1 0 35 0 35 1way cassette AM036FN1DEH 1 0 25 0 25 Total amount of refrigerant ⓐ ⓑ 5 575 3 10 8 675 kg f Example of refrigerant calculation for HR models Classification Size of liquid pipe Length m Unit amount of refrigerant...

Page 43: ... 4 66 16 625 kg Temper grade and minimum thickness of the refrigerant pipe Outer diameter mm Minimum thickness mm Temper grade Ø 6 35 0 70 Annealed Ø 9 52 0 70 Ø 12 70 0 80 Ø 15 88 1 00 Ø 19 05 0 90 Drawn Ø 22 22 0 90 Ø 25 40 1 00 Ø 28 58 1 10 Ø 31 75 1 10 Ø 34 92 1 20 Ø 38 10 1 35 Ø 41 28 1 43 Ø 44 45 1 60 Ø 50 80 2 00 Ø 53 98 2 10 For pipes larger than Ø 19 05 drawn type C1220T 1 2H or C1220T H ...

Page 44: ... Nitrogen flushing welding f When welding the refrigerant pipes flush them with nitrogen gas as shown in the picture f If you do not perform nitrogen flushing when welding the pipes oxide may form inside the pipe It can cause the damage of the important parts such as compressor and valves etc f Adjust the flow rate of the nitrogen flushing with a pressure regulator to maintain 0 05m2 h or less Wel...

Page 45: ...nut Clutch type Wing nut type Flaring tools Pipe diameter D mm Depth of flaring part A mm Using flaring tool for R 410A Using conventional flaring tool Clutch type Wing nut type Ø 6 35 0 0 5 1 0 1 5 1 5 2 0 Ø 9 52 0 0 5 1 0 1 5 1 5 2 0 Ø 12 70 0 0 5 1 0 1 5 1 5 2 0 Ø 15 88 0 0 5 1 0 1 5 1 5 2 0 5 Check that you flared the pipe correctly f Refer to below illustrations for correct and incorrect exam...

Page 46: ...ter diameter D mm Connection torque N m Flare dimension L mm Flare shape mm Ø 6 35 14 18 8 7 9 1 D L 90 2 45 2 R 0 4 0 8 Ø 9 52 34 42 12 8 13 2 Ø 12 70 49 61 16 2 16 6 Ø 15 88 68 82 19 3 19 7 Ø 19 05 100 120 23 6 24 0 Blowing Nitrogen gas should be done when welding the pipe Make sure to use the provided flare nut Make sure that there are no cracks or twisted part when you need to bend the pipe Do...

Page 47: ...e Front side connection Right side connection Left side connection Caution for using knock out hole Knock out hole Make sure to prevent any damages on the exterior of the outdoor unit Remove all burrs around the knock out hole and apply varnish on the cross section and edges of the knock out hole to prevent rust Use a cable protection tube and bushing to prevent a cable from being damaged when pas...

Page 48: ...the pipe to an outdoor unit When welding the pipe the unit may get damaged by the heat and flame from welding Use a flame proofing cloth to protect the unit from a welding fire or flame Sensor for detecting outside temperature is located on the left side of the welding part so be extra careful not to damage the sensor when welding The O ring andTeflon packing inside service valve may get damaged b...

Page 49: ...ht of the connection pipe should be same or lower than the ones connected to the outdoor units f Check the changes in comparison with the DVM II III and IV Caution Correct installation Incorrect installation Refrigerant pipes should be connected at the same or lower level than the ones connected to the outdoor unit Refrigerant pipes must be connected by the side of the product Straight section sho...

Page 50: ... MCU MCU MCU MCU MCU MCU Note1 Note 1 Direct connected indoor unit without MCU for HR only This indoor unit can only be used for cooling operation Heating operation is not possible Connect indoor unit to liquid and low pressure gas pipe Changetheinstallationoptionfordirect connectedindoorunitwithoutMCU refertotheindoorunitinstallationmanual ...

Page 51: ...0m and below 220m and below Installing only with Y joint a b c d e f g p 200m 220 m Equivalent length Y joint 0 5 m Distribution header 1 m Installing withY joint and distribution header a b h 200m 220 m a i k 200m 220 m Installing only with distribution header a i 200m 220 m Total length of pipe m 1 000 m or less Installing only with Y joint a b c d e f g h i j k l m n p 1000 m Installing withY j...

Page 52: ...ize must be increased by 1 grade Total length of extended pipe If the size of pipe main pipe between the first branch joint and the outdoor unit is not increased by 1 grade a b c d e f g 2 h i j k l m n p 1000 m If the size of pipe main pipe between the first branch joint and the outdoor unit is increased by 1 grade a b c d e f g 2 h i j k l m n p 1000 m EachY joint Each indoor unit h i j p 45 m D...

Page 53: ... a g j 200 m 220 m Equivalent length Y joint 0 5m Distributionheader 1m MCU 1m Installing with MCU and Y joint a b h k 200m 220m Total length of pipe 1000 m or less Installing only with MCU a b c d e f g h i j 1000m Installing with MCU and Y joint a b c r 1000m Outdoor unit Outdoor unit Module installation Pipe length 10 m or less x 10 m y 10 m z 10 m Equivalent length 13 m or less x 13 m y 13 m z...

Page 54: ...ranch joint First branch joint Farthest Indoor unit Pipe length 45 m or less Installing only with MCU g j 45 m Installing with MCU and Y joint b h k 45 m l m q 45 m l r 45 m 45 90 m Note 2 Required conditions must be satisfied EEV kit Model name Remarks EEV kit Indoor unit Actual pipe length 2 m MEV E24SA 1 indoor Apply to products without EEV Wall mount ceiling MEV E32SA 20 m or less MXD E24K132A...

Page 55: ...1 grade a b l m x 2 c d e f g h i j k n o p q r 1000 m If the size of pipe main pipe between the first branch joint and the outdoor unit is increased by 1 grade a b l m x 2 c d e f g h i j k n o p q r 1000 m MCU Each indoor unit c d c e c f g h i h j h k n o p q r 45 m Difference between the distance of the outdoor unit to the farthest indoor unit and nearest indoor unit 45 a b h k a b c d 45 Note...

Page 56: ...of the connection pipe before connecting them Over 10 15mm NOTE Install the branch joint within 15 of the horizon or vertical line Make sure that the pipe is not bent at where it is connected to the branch joint Keep a minimum straight line distance of 500mm or more before connecting branch joint Install within 15 of the horizon or vertical line Minimum straight line over 500mm Pipe Main pipe Conn...

Page 57: ...on header ports Connect in order Welding part Provided item Gas side Case of blocking the unused distribution header ports Connect in order For A J type distribution header Connect the distribution header to the connection pipe with the provided reducer For K Z type distribution headers Cut the provided socket according to the diameter of the connection pipe before connecting it Over 10 15mm NOTE ...

Page 58: ...Socket Distribution header Pipe Separately purchased item Below 15 Horizon line Horizon line Liquid side Below 15 Horizon line Below 10 Horizon line Gas side Installing the branch joint between outdoor units Installation of outdoor joints Do not install the outdoor joint in this direction Liquid pipe High pressure gas pipe Gas pipe High pressure gas pipe only applies to the H R product ...

Page 59: ...e Pipe Reducer Reducer Pipe To other outdoor unit To other outdoor joint orY joint of the main pipe To other outdoor joint or outdoor unit Use the attached reducer according to the selected pipe size Pipe Reducer Reducer Pipe To other outdoor unit To other outdoor joint orY joint of the main pipe High pressure gas side To other outdoor joint or outdoor unit Connect the Outdoor joint to the pipe by...

Page 60: ...p to 8 units Up to 8 units Up to 8 units The maximum capacity of the connectable indoor units at one port 16 kW 16 kW 16 kW 16 kW The maximum capacity of the connectable indoor units 61 6 kW 61 6 kW 32 0 kW 16 kW Internal EEV Not included Indoor units without internal EEV AM NTDE AM NADE can not be connected directly to the MCU Please connect these indoor units using EEV kit MEV E SA MXD E K A CAU...

Page 61: ...ctoron 5 0 16kWindoorunit IncaseofusingY connector itisonlyconnectableforportcombinationatbelow ConnectableportcombinationforY connector A Bport C Dport E Fport Non connectableportcombinationforY connector B Cport D Eport non continuousport Set Dip Switch option for usingY connector 1 ON 2 3 4 1 ON 2 3 4 1 ON 2 3 4 1 ON 2 3 4 S W Option S W Option S W Option S W Option Default CombinationofA Bport...

Page 62: ...nection welding Highpressuregaspipeconnection welding Liquidpipeconnection welding 70mm When installing MCU use the pattern sheet for installation that is provided with the product When welding the gas pipes protect the product with the flame proof sheet When connecting the MCU with outdoor units default direction is set in the MCU If installing opposite direction weld the enclosed copper cap in e...

Page 63: ...dard module Heat pump Model MCA MFA AM280HXVAGH1 57 0 63 AM300HXVAGH1 64 1 75 AM320HXVAGH1 67 5 75 AM340HXVAGH1 69 5 80 AM360HXVAGH1 69 5 80 AM380HXVAGH1 76 5 90 AM400HXVAGH1 83 0 100 AM420HXVAGH1 87 0 100 AM440HXVAGH1 89 0 100 AM460HXVAGH1 94 5 125 AM480HXVAGH1 94 5 125 AM500HXVAGH1 101 5 125 AM520HXVAGH1 108 6 125 AM540HXVAGH1 112 0 125 AM560HXVAGH1 114 0 125 AM580HXVAGH1 114 0 125 AM600HXVAGH1 ...

Page 64: ...H2 125 5 150 AM600HXVAGH2 127 5 150 AM620HXVAGH2 138 0 175 AM640HXVAGH2 141 0 175 AM680HXVAGH2 144 0 175 AM700HXVAGH2 147 0 175 AM720HXVAGH2 157 5 175 AM740HXVAGH2 160 5 200 AM760HXVAGH2 171 0 200 AM780HXVAGH2 174 0 200 Single Heat recovery Model MCA MFA AM080FXVAGR 18 0 25 AM100FXVAGR 21 1 32 AM120FXVAGR 25 0 32 AM140FXVAGR 25 0 32 AM160FXVAGR 32 0 40 AM180FXVAGR 39 1 50 AM200FXVAGR 42 5 63 AM220...

Page 65: ...FXVGNR 156 6 175 AM720FXVGNR 160 0 200 AM740FXVGNR 162 0 200 AM760FXVGNR 172 5 200 AM780FXVGNR 177 5 200 AM800FXVGNR 184 5 225 AM820FXVGNR 190 5 225 AM840FXVGNR 201 0 225 AM860FXVGNR 206 0 250 AM880FXVGNR 213 0 250 AM900FXVGNR 219 0 250 When installing outdoor units in module select the power supply cable according to the sum of outdoor unit capacity Refer to the table for each model Power Supply ...

Page 66: ...AM120FXVAG 5 3 AM240MXVGN 12 5 AM140FXVAG 5 3 AM260MXVGN 12 2 AM160FXVAG 6 8 AM280MXVGN 13 6 AM180FXVAG 7 6 AM300MXVAN 14 8 NOTE Caution for electrical work You must install ELCB or MCCB ELB ELCB Earth leakage breaker MCCB Molded case circuit breaker ELB Earth leakage breaker Do not operate the outdoor unit before completing the refrigerant pipe work Do not disconnect or change the cable inside th...

Page 67: ...ing Main unit Sub unit Sub unit Groundcable Groundcable Groundcable Communication cable Power ground cable Power cable Power cable Powercable Communication cable between outdoor units Communication cable between outdoor units Protection tube ELCB MCCB ELB or ELCB MCCB ELB or ELCB MCCB ELB or When the module combination is in the tables of Outdoor unit combination Main unit Sub unit Sub unit ELCB M...

Page 68: ...door and exposed to outside so there are risk of damage to the protection tube and extra waterproof is needed Caution for perforating the knock out hole Perforate a knock out hole by punching it with a hammer After perforating the knock out hole apply rust resisting paint around the hole When you need to pass the cables through the knock out hole remove burrs on the hole and protection the cable w...

Page 69: ...ELCB Main unit Main unit Sub unit Sub unit Main unit Sub unit 1 Sub unit 2 Single phase 2 wires 220 240V Grounding Grounding Grounding Wired remote controller Wired remote controller Communication cable Outdoorunit Outdoorunit Communicationcable Outdoorunit Indoor unit Wired remote controller or or Communication cable Outdoor unit Indoor unit Communication cable Outdoor unit Outdoor unit ...

Page 70: ...utdoorunit Indoor unit Wired remote controller or or or or Communication cable Outdoor unit Indoor unit Communication cable Outdoor unit Outdoor unit f Connect a power cable of the outdoor unit after checking that R S T N 3 phase 4 wire is properly connected If the 380 415V power is supplied to the N phase PCB and other electrical part will be damaged f Communication cable between indoor and outdo...

Page 71: ...dimension mm 9 5 15 15 16 12 16 5 16 22 22 24 Allowance mm 0 2 0 2 0 2 0 3 0 3 0 3 0 4 D Standard dimension mm 5 6 7 1 9 11 5 13 3 13 5 17 5 Allowance mm 0 3 0 2 0 3 0 2 0 3 0 2 0 5 0 2 0 5 0 2 0 5 0 2 0 5 0 4 d1 Standard dimension mm 3 4 4 5 5 8 7 7 9 4 11 4 13 3 Allowance mm 0 2 0 2 0 2 0 2 0 2 0 3 0 4 E Min mm 6 7 9 9 5 11 12 5 17 5 18 5 F Min mm 5 9 9 13 15 13 13 13 14 20 L Max mm 20 28 5 30 3...

Page 72: ... place where the sheath of the power supply cable is removed Connector Solderless ring terminal Thin cable Thick cable Cable tie When connecting two cables to one terminal separate the solderless terminal up and down to prevent it from getting loose Place the thin cable upward and the thick cable downward Fix the power cable with a cable tie Screw Tightening torque for terminal N m M4 1 2 1 8 Sing...

Page 73: ...kness of the power cable 2 Fix the power cable and tool by using the hook at the top side of the tool 3 Cut out the outer sheath of the power cable by revolving the tool in the direction of the arrow two or three times 4 At this situation cut out the outer sheath of the power cable by moving the tool toward the direction of the arrow 5 Slightly bend the wire and pull out the cut part of the outer ...

Page 74: ... fire or explosion Make sure that the place where the sheath of power supply cable is removed is inside the power supply box If it is impossible you should connect the protection tube for power cable to the power supply box After arranging the power cable into the power supply box tighten the cover CAUTION Connect the ring terminal of 3 phase cable 1 Cut the power cable to an appropriate length an...

Page 75: ...nding hole inside the power supply box Grounding Withdrawing the power cable f Withdrawing from the front side Connect the power cable protection tube into the power supply box as shown picture Be sure that the power supply cable is not damaged by burr on the knock out hole ...

Page 76: ...lution device f When the number of indoor units installed with the outdoor unit is 16 or less F1 F2 OF1 OF2 R1 R2 F1 Terminal block with indoor unit F2 OF1 Terminal block with outdoor unit sub module OF2 R1 Terminal block with solution device R2 ...

Page 77: ...CU separately from the outdoor unit f Connect the communication cable of the outdoor unit F1 F2 to the communication cable of the MCU F1 F2 Power cable connection should be done with the solderless ring terminal Indoor unit Indoor unit Indoor unit Indoor unit Indoor unit Indoor unit MCU MCU Indoor unit Indoor unit Indoor unit Indoor unit Indoor unit Indoor unit MCU MCU When installing the MCU comm...

Page 78: ...plied to the MCU separately from the outdoor unit f Connect the communication cable of the outdoor unit F1 F2 to the communication cable of the MCU F1 F2 Power cable connection should be done with the solderless ring terminal Indoorunit Indoorunit Indoorunit Indoorunit Indoorunit Indoorunit MCU MCU When installing the MCU communication cable can be connected as shown above CAUTION ...

Page 79: ...ow humidity Perform grounding work 3 if possible for your safety Note 2 Note 1 About grounding work 3 Grounding work must be done by an expert with qualification Check if the grounding resistance is lower than 100Ω When installing an earth leakage breaker that can cut the electric circuit within 0 5 second in case of a short circuit allowable grounding resistance should be 30 500Ω Note 2 Grounding...

Page 80: ...sure regulator and pay attention to the pressure of the nitrogen Keep it for minimum 24 hours to check if pressure drops After applying Nitrogen gas check there s any change of pressure using a pressure regulator If the pressure drops check for gas leakage If the pressure is changed apply soap water to check for leakage and check the pressure of the nitrogen gas again Maintain 1 0MPa of the pressu...

Page 81: ...nstalling outdoor units in module When installing outdoor units in module connect the manifold gauge to liquid side pipe and the gas side pipe Perform vacuum drying of the liquid side pipe and gas side pipe when installing outdoor units in module using a vacuum pump Make sure that check valve is installed to prevent pump oil from flowing into the pipe While the vacuum gauge pressure is less than 1...

Page 82: ...umidity is higher you must increase the size by one grade as stated in below table Pipe Diameter of refrigerant pipe Insulator Cooling Heating Remarks General 30 C 85 High humidity 30 C over 85 EPDM NBR Liquid pipe Ø 6 35 Ø 9 52 9 mm Heat resisting temperatureover120 C Ø 12 7 Ø 50 80 13 mm Gas pipe Ø 6 35 13 mm 19 mm Ø 9 52 Ø 25 40 19 mm 25 mm Ø 28 58 Ø 44 45 32 mm Ø 50 80 25 mm 38 mm When install...

Page 83: ...he thickness of the insulation by one grade When installing the gas side and liquid side pipes leave at least 10mm of space When the gas side and liquid side pipes are contacting each other increase the thickness of the insulation by one grade Gas pipe Liquid pipe Insulator Insulator Gas pipe 10 mm 10 mm 10 mm Liquid pipe Insulator for refrigerant pipe a x 3 Hanger Additional Insulator a Install t...

Page 84: ...tor provided with the branch joint to the separately purchased insulator Wrap the connected part with an insulator separately purchased item that has thickness of at least 10mm f Use an insulator that resist heat up to 120 C Wrap the branch joint with an insulation that has thickness of at least 10mm Fix securely without any gap Provided Insulator Fix securely without any gap Pipe insulator Separa...

Page 85: ... R410A refrigerant is blended refrigerant Add only liquid refrigerant f Measure the quantity of the refrigerant according to the length of the liquid side pipe Add quantity of the refrigerant using a scale Important information regulation regarding the refrigerant used This product contains fluorinated greenhouse gases Do not vent gases into the atmosphere Inform user if system contains 5 tCO2e or...

Page 86: ...e field Refer to the above information for the quantity of refrigerant replenishment c Total refrigerant charge d Refrigerant cylinder and manifold for charging NOTE The filled out label must be adhered in the proximity of the product charging port ex onto the inside of the stop valve cover CAUTION Single installation f Open the manifold gauge valve connected to the liquid side service valve and a...

Page 87: ...lve closed the important parts may be damaged Put on safety equipment when charging refrigerant Do not charge the refrigerant when you adjust or control other product such as indoor units or EEV kits If you charge the refrigerant with the front cabinet open be very careful with the fan on the top of the product to prevent personal injury When the ambient temperature is low in winter time do not he...

Page 88: ... the MCU and the indoor unit Switch Setting Function Remarks SW51 SW52 Setting total number of installed indoor unit SW51 Tens digit SW52 Units digit Setting can be done from the main outdoor unit only sub unit setting is unnecessary Ex When 12 indoor units are installed SW51 1 SW52 2 SW53 K6 On Enable maximum capacity restriction for cooling operation Restrict excessive capacity increase when ope...

Page 89: ... K2 button for 2 seconds to save exit system will be reset Quantity of indoor units Step4 Press K1 Ready to set Step5 K2 x n times X Tens digit 0 6 Ex 03 3 units 64 64 units K4 x n times X Ones digit 0 9 K4 Press for 2 seconds automatic detection of indoor units quantity Step6 If it is heat recovery model go to step 7 Otherwise press K2 button for 2 seconds to save exit system will be reset Quanti...

Page 90: ...selected desired option you can shortly press the K2 switch to adjust the value of the Seg 3 Seg 4 and change the function for the selected option Refer to pages 81 83 for the Seg number of the function for each option Example Z 4 After selecting the function for options press and hold the K2 switch for 2 seconds Edited value of the option will be saved when entire segments blinks and tracking mod...

Page 91: ...n for heating Main 0 2 0 0 3 0 Factory default Targeted high pressure MPa When low pressure value is set discharged air temperature of the indoor unit will decrease 0 1 2 5 0 2 2 6 0 3 2 7 0 4 2 8 0 5 2 9 0 6 3 1 0 7 3 2 0 8 3 3 Current restriction rate Individual 0 3 0 0 100 Factory default When restriction option is set cooling and heating performance may decrease 0 1 95 0 2 90 0 3 85 0 4 80 0 5...

Page 92: ...Height difference type 2 Outdoor unit is lower than indoor unit When indoor unit is over 30 m above the outdoor unit Long piping condition setting Setting is unnecessary if high head condition is set Main 0 9 0 0 Disabled Factory default 0 1 LEVEL 1 When equivalent length of farthest indoor unit from the outdoor unit is between 100 170m 0 2 LEVEL 2 When equivalent length of farthest indoor unit fr...

Page 93: ...d the air conditioner to cool heat faster at initial start up However this function will not workwhenHigh headcondition settingorLong pipingcondition setting is enabled 0 1 Enabled Max capacity restriction B type PBA Main 1 8 0 0 Enabled Factory default Restrict excessive capacity increase when operating indoor units with small capacity 0 1 Disabled Gas leak pump down B type PBA Main 1 9 0 0 Disab...

Page 94: ... Heating mode K 2 BLANK BLANK 3 times Pump out in Heating mode Outdoor unit address 1 K 3 BLANK 1 4 times Pump out in Heating mode Outdoor unit address 2 K 3 BLANK 2 5 times Pump out in Heating mode Outdoor unit address 3 K 3 BLANK 3 6 times Pump out in Heating mode Outdoor unit address 4 K 3 BLANK 4 7 times Vaccuming Outdoor unit address 1 K 4 BLANK 1 8 times Vaccuming Outdoor unit address 2 K 4 ...

Page 95: ...NV1 and INV2 will be displayed alternately Even when the outdoor unit power is off it is dangerous when you come in contact with inverter PCB and fan PCB since they are charged with high DC voltage When pressing K2 key 9 to 12 times without inverter checker error code can be displayed on segment even though the outdoor unit is normal When replacing repairing the PCB cut off the power and wait unti...

Page 96: ...mpressor 1 8 87 C 0 8 7 9 times IPM temperature Compressor 2 9 87 C 0 8 7 10 times CT sensor value Compressor 1 A 2 A 0 2 0 11 times CT sensor value Compressor 2 B 2 A 0 2 0 12 times Suction temperature C 42 C 4 2 13 times COND OUT temperature D 42 C 4 2 14 times Temperature of liquid pipe E 42 C 4 2 15 times TOP temperature Compressor 1 F 42 C 4 2 16 times TOP temperature Compressor 2 G 42 C 4 2 ...

Page 97: ...o enter the setting Displayed content Display on segment page1 page2 1 time Main version MAIN Version ex 1412 2 times Hub version HUB Version ex 1412 3 times Inverter 1 version INV1 Version ex 1412 4 times Inverter 2 version INV2 Version ex 1412 5 times Fan 1 version FAN1 Version ex 1412 6 times Fan 2 version FAN2 Version ex 1412 7 times EEP version EEP Version ex 1412 8 times Automatically assign...

Page 98: ...on the indoor unit piping connection 3 If two MCU ports are connected to an indoor unit through aY joint set the relevant S W option DIP switch to the settings given in the following table S W option DIP switch No ON Individual connection OFF Shared connection 1 Each of ports A and B Both ports A and B 2 Each of ports C and D Both ports C and D 3 Each of ports E and F Both ports E and F You cannot...

Page 99: ...eds digitoftheindoor unitaddress 0to9 Tensdigit oftheindoorunit address 0to9 Unitsdigit oftheindoorunit address Option SEG7 SEG8 SEG9 SEG10 SEG11 SEG12 Value 1 0 0 TheRMCaddress willnotbeset 1 TheRMCaddress willbeset 0 0toF RMCgroup channel 0toF RMCgroup address Option SEG13 SEG14 SEG15 SEG16 SEG17 SEG18 Value 2 0 0 TheMCUaddress willnotbeset 1 TheMCUaddress willbeset 0to1 Tensdigitof theMCUaddres...

Page 100: ... 380 415V is read between lines R S S T T R and 200 240V R N S N T N between phases 5 After the power is turn on set the devices indoor unit MCU and others that are connected to the outdoor unit and set the options Note that before the MCU port addresses are set MCU port setting errors E216 217 218 may occur You can run the Automatic pipe address setting operation regardless of MCU port setting er...

Page 101: ...e pairing operation Display Outdoortemperature C 24ºC Outdoortemperature 30 C 30 C Outdoortemperature Indoor temperature 24 C Main heating operation Main heating operation Main cooling operation Indoor temperature 24 C Main heating operation Main cooling operation Main cooling operation Each step is indicated on the outdoor unit display The whole operation takes about 25 to 55minutes normally depe...

Page 102: ...ect Ensure that the MCU ports to use are set correctly Depending on the indoor and outdoor temperatures the Auto pipe pairing operation may stop due to protection control If an error occurs while the Auto pipe pairing operation is running check the error code and take actions If you cannot finish the Auto pipe pairing operation because of the previous reasons set the pipe addresses manually by ref...

Page 103: ...ranch joints properly installed Did you check the connection of liquid and gas pipes Have you selected correct insulator for pipes and insulated them correctly Did you insulate the pipes and connection part correctly Is the quantity of the additional refrigerant correctly weighed in You must record the amount of additional refrigerant on the service record paper placed inside of the outdoor unit D...

Page 104: ...ower supply for the outdoor unit and run auto address setting Run auto address setting even after changing the indoor unit PCB CAUTION Checklist before auto trial operation 1 Check the power cable and communication cable of the indoor and outdoor unit 2 Supply power to the outdoor unit 6 hours before trial operation to pre heat the crank case heater 3 Before supplying the power use a voltmeter and...

Page 105: ... due to vavle inspection Check the product if abnormal noise occurs continously 2 When error occurs during auto trial operation check the error code and take appropriate measures Refer to next couple of pages when E503 E505 or E506 error occurs 3 When auto trial operation ends use S NET pro or S CHECKER to issue a result report Refer to service manual if you have any items with NG on the result re...

Page 106: ...Operation again Yes Yes Yes Yes Yes Take corrective measures No Is the ball valve on the outdoor unit opened Take corrective measures No Hasthecorrectamountofadditionalrefrigerant beeninjectedintotheindoorunitandliquidline Take corrective measures No Are the 4 way valve Main EEV and pressure sensors operating properly Take corrective measures No Is the operation cycle normal ...

Page 107: ...erminated Checkservicevalve ballvalve ofgas pipeandliquidpipeatthesametimewhencheckingservicevalve ballvalve When4wayvalve MainEEVdetectionisneeded runheatingtrialoperationformorethan1hourandanalyzethedatato checkforaproblem Ifthere sfrostformedinoutdoorunitortheoutdoorunitisoperatingindeforstoperation itmaybehardtodetectproblem normally Inthiscase performTrialoperationorForceddefrostoperationtoel...

Page 108: ... measures No Arethepressuresensorconnectorsproperly connectedtothePBA Isthedeviationbetweenpressuresensorson outdoorunitsgreaterthan0 2MPa Replace the Hub PBA No Is the pin to pin voltage between pins 3 and 4 of the pressure sensor terminal on the Hub PBA 5V Replace the pressure sensor No Is the actual pressure different from the value on the pressure sensor Yes Yes No The actual pressure can be c...

Page 109: ...sure sensor check is required error will be displayed on all installed outdoor units If pressure sensor check is required outdoor units will terminate auto trial operation mode automatically To check for the pressure sensor with the problem run trial operation for more than 1 hour and analyze the data to check for a problem To replace a component or inspect the PBA be sure to cut off the power sup...

Page 110: ... Judgment not available Judgment not available Connect S Net Pro Judge the amount of refrigerant Judgment on the amount of refrigerant Normal Excessive Insufficient Satisfythetemperaturecondition Satisfythetemperaturecondition Check the amount of refrigerant Input S CHECKER signal Check stability Check stability End Yes No No Yes After refrigerant amount detection is finished if you see K9 Ed on t...

Page 111: ...art the refrigerant amount check Judgment not available Check if the function of refrigerant amount check is executed within the guaranteed temperature range Run trial operation to check if there are other problems on the system CAUTION Model Net weight kg Net size W x H x D mm AM080FXVAGH TK 181 0 880 0 x 1695 0 x 765 0 AM100FXVAGH TK 181 0 880 0 x 1695 0 x 765 0 AM120FXVAGH TK 181 0 880 0 x 1695...

Page 112: ......
Reviews: