219
2. Using a Network-Connected Machine
Google Cloud Print™
Google Cloud Print™ is a service that allows you to print to a printer using your
smart phone, tablet
,
or any other web-connected devices. Just register your
Google account with the printer, and you are ready to use the Google Cloud
Print™ service. You can print your document or email with Chrome OS, Chrome
browser, or a Gmail™/ Google Docs™ application on your mobile device, so you
don’t need to install the printer driver on the mobile device.
Refer to the Google
website (http://www.google.com/cloudprint/learn/ or http://
support.google.com/cloudprint) for more information about Google Cloud
Print™.
28
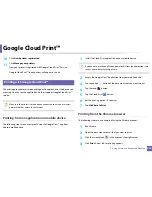
Registering your Google account to the printer
•
Make sure the printer machine is turned on and connected to a wired or
wireless network that has access to the Internet.
•
You should create your
account in the advance.
1
Open the Chrome browser.
2
Visit www.google.com.
3
Sign in to the Google website with your Gmail™ address.
4
Enter your printer’s IP address in the address field and press the Enter key
or click
Go
.
5
Click
Login
in the upper right corner of the SyncThru™ Web Service
website.
6
If it’s your first time logging into
SyncThru™ Web Service
you need to
log-in as an administrator. Type in the below default
ID
and
Password
.
We recommend you to change the default password for security
reasons.
•
ID: admin
•
Password: sec00000
If the network environment is using a proxy server, you need to configure
the proxy’s IP and port number from
Settings
>
Network Settings
>
Google Cloud Print
>
Proxy Setting
. Contact your network service
provider or network administrator for more information.
7
When the
SyncThru™ Web Service
window opens, click
Settings
>
Network Settings
>
Google Cloud Print
.
8
Enter your printer’s name and description.
9
Click
Register
.
The confirmation pop-up window appears.
If you set the browser to block pop-ups, the confirmation window will not
appear. Allow the site to show pop-ups.
Summary of Contents for CLX-6260ND
Page 96: ...Redistributing toner 96 3 Maintenance...
Page 98: ...Replacing the toner cartridge 98 3 Maintenance CLX 419xN CLX 419xFN CLX 419xFW Series 5 6...
Page 101: ...Replacing the waste toner container 101 3 Maintenance 1 2 1 2 1 2...
Page 105: ...Installing accessories 105 3 Maintenance 1 2 1 2...
Page 110: ...Cleaning the machine 110 3 Maintenance...
Page 126: ...Clearing paper jams 126 4 Troubleshooting CLX 626xND CLX 626xFD CLX 626xFR CLX 626xFW Series...
Page 155: ...Specifications 155 5 Appendix Free HDD space Up to 100 MB Items Requirements...
Page 168: ...Regulatory information 168 5 Appendix 26 China only...

