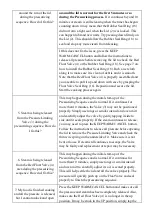
3. Remove the Condensation Cup (12) and rinse it thoroughly and let dry. Clean the Inner
Main Body (13) and Upper Ring (9) with a damp sponge or wash cloth.
4. Remove the pressure limiting valve (3) by gripping and firmly pulling upwards. Rinse
with warm water and dry.
5. Clean the Lid (2) with warm soapy water, including the Rubber Seal Ring (18), Filter
(17), Vent, Float Valve (4) and let dry thoroughly.
6. On the underside of the lid below the pressure limiting valve (3), is a small metal filter
(17) which can be easily removed to clean (Figure 18).
7. Let parts dry completely before reassembling.
8. Wash the Inner Pot (6), Wire Rack (20), and Tempered Glass Lid (21) with a non-
abrasive sponge and allow to air dry or use a towel. It is not recommended to use any
type of scouring pad that can scratch the non-stick surface of the Inner Pot (6).
9. Store the inner pot inside of the Pressure Cooker. Store Pressure Cooker in a cool, dry
location.
10. Do not store pressure cooker with lid on tightly. This saves on gasket wear and tear.
11. NOTE: Any other servicing should be performed by an
authorized service representative or from the original
manufacturer or distributer.
How to Clean the Filter:
To clean the filter (17), remove it by pulling vertically. To re-
attach, simply line up the filter (17) and press down to secure the
filter (Figure 18).
Figure 18
Pull up
Press down


