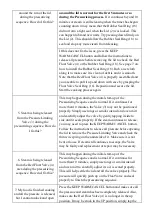
WARNING: To avoid a serious burn injury when cooking foods other than rice, never
exceed the Figure 13 2/3 MAX PRESSURE COOK mark of the combined volume of
liquids and solids (Figure 12 - 13).
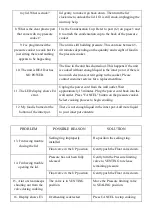
Be certain the inner receptacle, where the heating plate
(14) is located, is clean and dry before inserting the Inner
Pot (6) into the pressure cooker and adjust the pot left and
right to ensure optimal contact between the Inner Pot and
the heating plate (14) (Figure 14)
Figure 14
3. Close and "LOCK" the lid.
4. Adjust the Pressure Limiting Valve (3) to the “Sealing” position, and ensure that the
Float Valve (4) sinks.
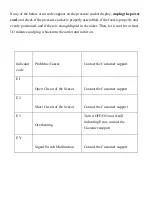
5. When adjusting the Pressure Limiting Valve (3) to either the
" Sealing " or the " Venting " positions, line up the marking on
the Pressure Limiting Valve (3) with the arrow on the Handle
(1) as shown in Figure 15.
6. Plug the power cord into the pressure cooker and then into
the wall outlet. The LCD display will show 00:00 - OFF.
Figure 15
OPERATING INSTRUCTIONS
With the lid securely locked in place, unit on and the LCD displayed, select the button for
the desired cooking function by reading the following instructions.
There are 18 Menu functions programmed for your pressure cooker. They are Oatmeal,
Soup/Broth, Poultry, Yogurt, Egg, Bean/Chili, Rice, Pressure Cook, Meat/Stew, Dessert,
Slow Cook, Steam, Saute, Multigrain, Beef, Porridge, Pork & ribs, Risotto, Vegetables.
The default times are programmed for quick and easy cooking for small portions of food
less than 3lbs. When cooking food that is more than 3lbs. Use the Custom Manual
function. Each of the default times is programmed to detect the weight of food being
cooked and how much liquid is inside the pot during the cooking cycle. The unit will


